Showing posts with label stamping. Show all posts

Saturday, 11 July 2015

Snakeskin Nail Art

Hello everyone!

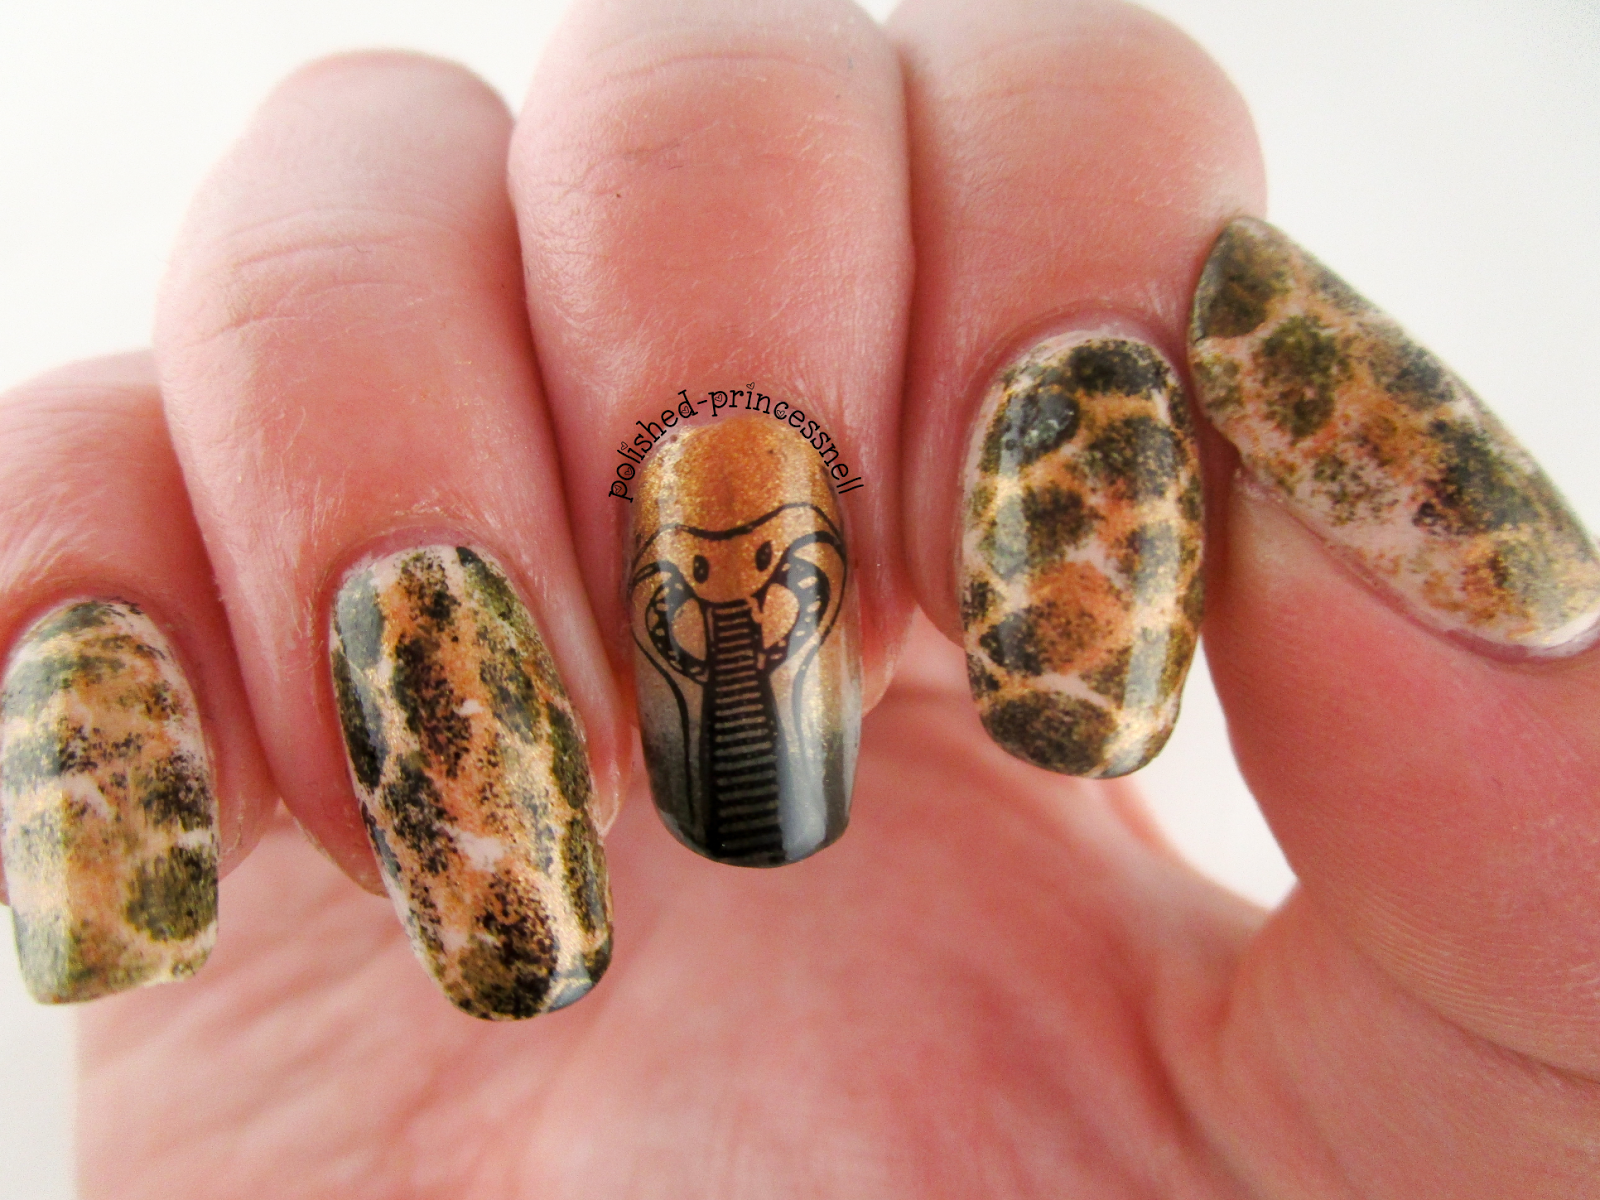
The prompt for this week's Weekly Nail Art Challenge on Instagram is 'aminal print + gradient'. As I've worn leopard print on a few occasions recently, I wanted to do something a bit different. So I chose snakeskin!


I followed this tutorial on YouTube as I had no idea where to begin! The basic idea is to use one light, one medium, and one dark toned polish and do the following:

  1. Paint your nails a light base colour and allow to dry
  2. Wrap a mesh material around the nail and sponge on your medium polish
  3. Carefully remove the mesh material, and repeat on all nails
  4. Use a smaller mesh material to sponge on your dark polish (again, remove carefully)
  5. Add topcoat, and you're done!

For this design I used another two of my 'untrieds' - my list is getting shorter! (I have had to purchase a whole new storage system for my untrieds as I have so many... but I'm working my way through them!)

Anyway, back to the polishes I used: OPI 'My Vampire Is Buff' (light), Ciate 'Gold Digga' (medium) and Revlon 'Jungle' (dark). I also used a tiny amount of black around the edges to add more definition to the 'scales'.


BM-612
For the little snake design I used Bundle Monster plate BM-612 and stamped with MoYou Black Special Nail Polish and my Creative Shop Stamper (bought from Rainbow Connection).


Although my index finger is by far the best, scale-wise, I'm happy with how these look! It's definitely not my favourite colour palette, it was nice to wear something different for a change.

Thanks for reading!

Helen x

As always, head over to Instagram to see all of the entries into the Weekly Nail Art Challenge - just search #wnac2015 :)

Friday, 10 July 2015

Lace Stamped Nails

Hi guys!

Wow, two blog posts in one day! I'm on a roll :)

Today's manicure is one that I've been waiting to try out for a long time - lace nails! I finally ordered myself a lace design stamping plate from BornPrettyStore.com, and couldn't wait to use it in some nail art!


lace-stamped-nail-art

For this manicure I used a new Barry M Speedy Quick-Dry polish from their summer release - 'Lap Of Honour'. I painted my thumb, index and middle finger with this then stamped over it using Color Club 'French Tip' polish. On my ring finger I added a base of OPI 'My Boyfriend Scales Walls', then stamped with Claire's 'Liquid Metal Rose Gold'. Finally, I covered my pinkie with a gorgeous glitter polish from Maybelline called 'Gilded Rose'.


lace-stamped-nail-art

I couldn't resist sticking a few gems onto the nail as a finishing touch!


lace-stamped-nail-art

This manicure is way more delicate than I would normally wear, but I got a lot of compliments on it and love the detail in the stamp. I hadn't tried out any of the Born Pretty Store stamping plates before, but I must say I am impressed with the quality. The lines are well defined and create a clear image on the stamp and on the nail. For only £2.50 you really can't complain. Free shipping too! Enter my code CESH10 for 10% off your order at BornPrettyStore.com :)

Thanks for reading!

Helen x

Tuesday, 30 June 2015

NEON WEEK: Radial Gradient and Stamping

Hi!

I've been *loving* the weather here over the last few days and today we saw the temperature reach 30 degrees Celsius which is lovely! I'm so glad I have a neon theme going on at the moment because it's complimenting the sunshine wonderfully :)


neon-radial-gradient-stamping
 Stamped Neon Radial Gradient

Today's nails include a technique that I have only tried a couple of times - a radial gradient (where the gradient works outwards from the centre of the nail, rather than horizontally or vertically across the nail). I found it really difficult to get consistent gradients across all ten fingers, but I'm pretty happy with the results anyway. I added a pretty circular-style stamped image, and of course I had to stick some sparkly gems on there too!

The polishes used for this were all Models Own - 'Bikini' (yellow), 'Sun Hat' (pink) and 'Pukka Purple'. I used Pukka Purple and Bundle Monster stamping plate #BM-618 for the design. Oh, and a sprinkling of China Glaze 'Fairy Dust' was added to the gradient.

neon-radial-gradient-stamping
My left hand came out better than my right hand (even though I'm left handed...)

neon-radial-gradient-stamping
FYI my stamping is *meant* to be off-centre...

neon-radial-gradient-stamping
A bit blurry but look at the pretty Fairy Dust! <3

Hope you like them :)

Thanks for reading!

Helen x

Monday, 22 June 2015

Gold and Turquoise Nails

Hi guys!

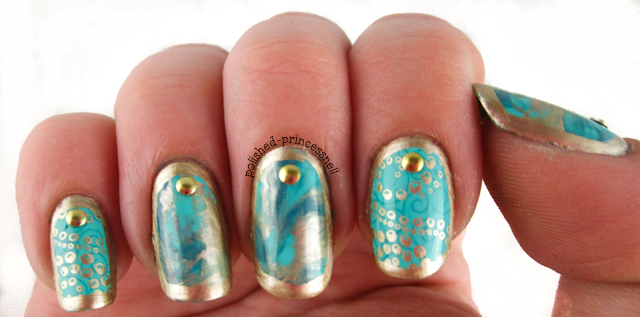
Today I have a pretty gold and turquoise manicure to show you. I created these as June week 3 prompt for the Weekly Nail Art Challenge I'm taking part in over on Instagram.

weekly-nail-art-challenge-wnac-turqoise-gold-stamped-nails
Weekly Nail Art Challenge - Turquoise and Gold

To achieve this look, I first painted my nails in a base colour of Barry M 'Green Berry', which is a vibrant turquoise polish from their Gelly Hi-Shine collection. It's probably my favourite green and is perfect for summer.

After my base colour had dried, I blobbed random dots of Barry M 'Green Berry', Collection 'After Dinner Mint' and Models Own 'Gold Chrome' onto my nails, then pressed down on them with a piece of plastic (I just used a plastic food bag for this). I love the 'saran wrap' technique as it creates such a gorgeous smoky/marbled effect on the nail. Finally, on my index and pinkie, I used my Bundle Monster stamping plate #607 to stamp two patterns using 'After Dinner Mint' and then 'Gold Chrome'. Finally, I outlined my nails using a thin striping brush and voila!


weekly-nail-art-challenge-wnac-turqoise-gold-stamped-nails
Saran wrap technique and stamping


weekly-nail-art-challenge-wnac-turqoise-gold-stamped-nails
Oooooohhhhh macro!
I also decided to try this manicure with one of my new matte topcoats - 'Satin Matt' from Essence. I picked this up from Wilko for £2 and I'm actually quite impressed with it. I'm not sure that it is that different to a regular matte topcoat, but at £2 I'm not complaining!

weekly-nail-art-challenge-wnac-turqoise-gold-stamped-nails
Essence Satin Matt 

weekly-nail-art-challenge-wnac-turqoise-gold-stamped-nails
Matte gold and turquoise nails
I definitely prefer these nails glossy as I think the marbled effect has more depth than when they are mattified. What is your preference? Glossy or matte?

Thanks for reading!

Helen

Sunday, 14 June 2015

Pretty Purple Pattern Over Holo

Hi everyone!

I'm currently taking part in a Weekly Nail Art Challenge on Instagram and this weeks theme is holo + patterns

My original idea for this mani included a neon water marble, however after a devastating incident involving liquid latex and my carpet I have given up on watermarbling once again. I *will* succeed one day, but today is not that day (nor is tomorrow, probably!)

After my disaster, I decided to paint two layers of GOSH 'Holographic Hero' and stamped the tips using MoYou London Pro Plate #4 and my Hello Kitty polish 'Respect'. Respect is actually a dark blue shade, but it came out a deep purple when I stamped over the silver holo. It's a lovely and unexpected combination!

holographic-stamped-nails-wnac
Holographic Hero stamped with Respect using MoYou London Pro Plate #4

Unfortunately my camera just didn't want to demonstrate the holo-goodness of this polish no matter how hard I tried to capture it! You'll just have to believe me :)

holographic-stamped-nails-wnac
Obligatory (but blurry) macro shot

holographic-stamped-nails-wnac


Search the hashtag #wnac15 on Instagram to see all of the wonderful manicures other people have come up with as part of the challenge.

Thanks for reading!

Helen x

Friday, 12 June 2015

Neon Jelly Pond Mani


Hi everyone!

I've got a picture-heavy post for you all today!

Whilst browsing Instagram (my favourite pastime), I stumbled upon an indie brand called Kandy Colors, and was instantly drawn in by their neon jelly collection. I love jelly polishes/tints but unfortunately found that my OPI Sheer Tints are really difficult to use due to their formula, so I've been on the lookout for an upgrade. I headed over to the Kandy Colors site and was super pleased to find that you can buy the whole collection for under £20! You get six amazingly bright neon shades which are available in both jelly and creme formulas (choices, choices!)

Let's take a look at the polishes:

kandycolors-neon-jelly-pond-manicure-nails


 Obviously, I couldn't wait to try these beauties out, and instead of having to choose which colours to use I decided to use them all!

Here is my finished manicure (apologies in advance for the atrocity that is my Cinderella hand!):

kandycolors-neon-jelly-pond-manicure-nails

kandycolors-neon-jelly-pond-manicure-nails


kandycolors-neon-jelly-pond-manicure-nails

kandycolors-neon-jelly-pond-manicure-nails

kandycolors-neon-jelly-pond-manicure-nails

I went for a picnic with my boyfriend last night and my nails were GLOWING in the sunlight, it is truly magical! My favourites from this collection are Carnival (green) and Hey Girl (pink). They are definitely some of the brightest neon shades I have seen around.

kandycolors-neon-jelly-pond-manicure-nails

Hope you like it :) thanks for reading!

Helen x

Friday, 3 April 2015

Stamping Over Ombré Nails - MoYou London Princess Collection

Hello lovelies!

After a busy few days of visiting family 300 miles away I am now back to the lovely city of Bristol and have been working on a pretty little ombré manicure for you all, stamped over with MoYou Princess collection plate #10. I've been wanting to do something like this for a while and my nails are now long enough for it to be worthwhile!

I wanted this to be very feminine and pretty, so I chose some cute pinks to make my ombré with - Rimmel 'Rose Libertine', Essie 'Flawless', and Rimmel 'Lose Your Lingerie'. I prepped my nails before sponging with Barry M 'Matt White' to ensure that my pinks were bright enough on the nail. 

L-R: Rose Libertine / Flawless / Lose Your Lingerie / Matt White


I think this is actually my first ombré (different tones of the same colour hue), as I usually do gradients (different colours blended together). I absolutely love how the ombré turned out, and couldn't resist snapping a few pics before I stamped all over it! 

My first attempt at ombré nails

I recently picked up my MoYou London Princess set from Boots (available to buy online here), and hadn't tried it out. I love the branding that MoYou London have - it reminds me slightly of Soap and Glory (also available from Boots)! The Princess Collection is really sweet, and includes lots of cutesy designs from hearts and flowers to raindrops and bunnies! It's adorable!

I used plate number 10 and I have circled the particular image below. I chose two designs from the plate - interlocking love hearts and butterflies, alternating on each nail. Stamping in white allowed the patterns to 'fade' into the lighter part of the ombré.

MoYou London Princess Collection

Stamped using MoYou London Princess plate #10

My cuticles are in awful shape at the moment, so I apologise for the raggedy dryness. I'm using extra amounts of my favourite cuticle rescue treatment Lemony Flutter Cuticle Butter which is available from Lush here. It smells amazing and you can feel the goodness seeping into your nails and cuticles when you apply it. If you haven't tried it I highly recommend you do!

I love this mani and hope that I continue to improve my stamping so I can really start incorporating the technique into other nail designs.

Thanks for reading!

Helen x

Friday, 27 March 2015

Pond Manicure using OPI Sheer Tints

Hello my lovelies!

Today I have a pond mani for you all! A pond mani is essentially a jelly sandwich (a layer of glitter between two layers of sheer polish), only instead of using glitter you create a simple design using polish - for example dots, flowers, hearts, etc.  Adventures In Acetone has a great description and tutorial that you can find here if you're looking to create your own pond manicure. I have seen some lovely pond mani designs using various sheer polishes, however since my collection is somewhat lacking in the sheer jelly department, I chose to use my OPI Sheer Tints.


OPI Sheer Tints
L-R: I'm Never I’m Never Amberrassed / Be Magentale With Me /
I Can Teal You Like Me / Don't Violet Me Down

I haven't properly explored the possibilities of OPI Sheer Tints, which is a shame because they are so versatile. The tints come in four different colours, but the beauty of these is that they can be layered to create many more colours and effects. When I first got my hands on the collection I layered them over a plain white base and blended the colours on my accent finger to create the effect below. The tints can be layered as many times as you wish in order to reach the opacity/colour that you're after. The downside to this, however, is that more layers = more bulge on the nailbed, and it can be difficult with regards to drying time. The consistency is also very gloopy (almost syrup-like), so I find that applying a few thinner layers works much better than one or two thick layers.


OPI Sheer Tints (please ignore all bad things about this photo!)

For this manicure I built up the colour of the tints without any base, which gives them more of a jelly appearance. Between each layer I stamped flowers randomly using the image from the circled area on the below stamping plate made by Essence, a brand that can be found in most Wilkinson stores in the UK (and online). These stamping plates retail for around £1.50, which is pretty good value! Obviously the quality isn't as good as other brands such as Konad or MoYou, but you get what you pay for!

Essence Stampy Designs - found here.
Can also be bought at Wilko in the UK!

Here is the finished look:

Stamped Pond Manicure


I started by stamping onto bare nails, then applied a layer of tint. After it had completely dried, I stamped again, then another layer of tint (etc., etc.) After four layers of tints I added one final stamp on each nail to make the pattern pop. Finally, I finished it off with a coat of Barry M's Plumpy Topcoat, which makes it super shiny and, well, plumpy!

Step One - one stamped image plus one layer of tint per nail
Step two - repeat as many times as you like!

Here are the bottles of tints as a comparison:


Index finger - "Don't Violet Me Down" / Middle finger - "I'm So Ambarresed" /
Ring finger - "I Can Teal You Like Me" / Pinkie finger - "Be Magentale With Me"


Macro shot of ring finger

It almost looks 3D - so much depth!


Pond manis have a subtleness about them that I love


What do you think of this look? 

Thanks for reading!

Helen x