Showing posts with label born pretty store. Show all posts

Sunday, 12 July 2015

Hello Kitty - 'Respect' **Swatch**

Hi!

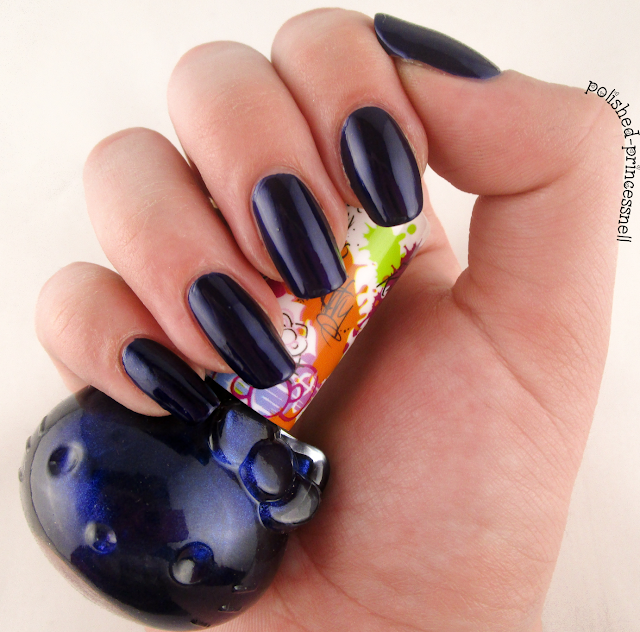
I've got a swatch of 'Respect' by Hello Kitty to show you today. I'm a huge fan of blue polishes and have quite a few in my collection, but 'Respect' is probably my favourite blue that I own. It is just absolutely beautiful in colour, application, and finish. Let's take a look:

hello-kitty-respect-nail-polish-swatch-review

I picked up this beauty from Poundland here in the UK and because of this I didn't have high hopes for the polish. How wrong I was! The application is perfect and it self-levels very well. Not only that but it is opaque in one generous coat. Shown here is two coats plus Poshe topcoat.

hello-kitty-respect-nail-polish-swatch-review

hello-kitty-respect-nail-polish-swatch-review

The depth of this colour is beautiful, it is such a rich navy blue that has an extremely glossy finish. Even without topcoat this polish is stunning!

hello-kitty-respect-nail-polish-swatch-review
BornPrettyStore Cute Cat Ear Ring

hello-kitty-respect-nail-polish-swatch-review
Hello Kitty bottle! <3

If you are near a Poundland store, definitely have a hunt for this little gem!

Thanks for reading,

Helen x

** Get 10% off your BornPrettyStore.com order with my code CESH10! Stuck for inspiration? Have a look at these owl decals, this thermal polish, or my cute cat ears ring that I am wearing in the picture above!


Friday, 10 July 2015

Lace Stamped Nails

Hi guys!

Wow, two blog posts in one day! I'm on a roll :)

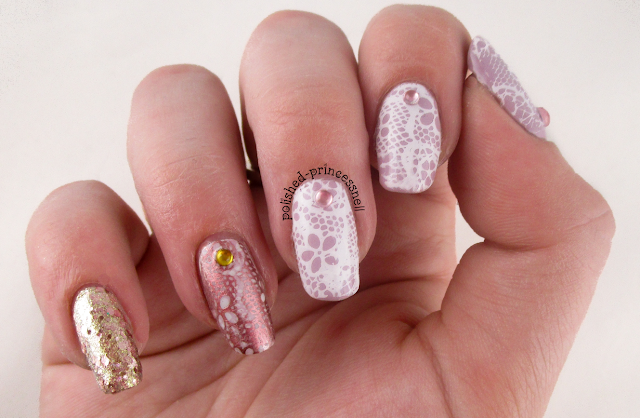
Today's manicure is one that I've been waiting to try out for a long time - lace nails! I finally ordered myself a lace design stamping plate from BornPrettyStore.com, and couldn't wait to use it in some nail art!


lace-stamped-nail-art

For this manicure I used a new Barry M Speedy Quick-Dry polish from their summer release - 'Lap Of Honour'. I painted my thumb, index and middle finger with this then stamped over it using Color Club 'French Tip' polish. On my ring finger I added a base of OPI 'My Boyfriend Scales Walls', then stamped with Claire's 'Liquid Metal Rose Gold'. Finally, I covered my pinkie with a gorgeous glitter polish from Maybelline called 'Gilded Rose'.


lace-stamped-nail-art

I couldn't resist sticking a few gems onto the nail as a finishing touch!


lace-stamped-nail-art

This manicure is way more delicate than I would normally wear, but I got a lot of compliments on it and love the detail in the stamp. I hadn't tried out any of the Born Pretty Store stamping plates before, but I must say I am impressed with the quality. The lines are well defined and create a clear image on the stamp and on the nail. For only £2.50 you really can't complain. Free shipping too! Enter my code CESH10 for 10% off your order at BornPrettyStore.com :)

Thanks for reading!

Helen x

Sunday, 21 June 2015

**Review** Colourful Loose Glitter - BornPrettyStore

Hi guys!

Today I have a super sparkly review for you that makes me happy inside! BornPrettyStore very kindly sent me some of this mixed loose glitter* to play around with, so of course I covered my nails with it! I don't do subtle.

bornprettystore-review-loose-glitter-placement-manicure
ALL OF THIS FOR ONLY $0.99!

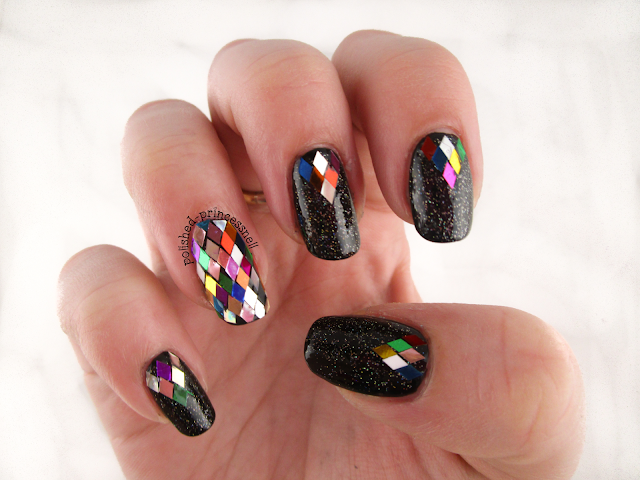
This is a rainbow filled pot of glittery goodness! The diamond shaped glitter comes in a pot full of green, blue, silver, gold, pink/purple, white, black, clear and bronze pieces. Phew!

I wanted to create a similar effect to my glitter framed nails from a little while ago, so I started with a base of Rimmel 'Black Out'. Then by applying a coat of Rimmel 'Clear' polish, I began placing the loose glitter onto my nail using a small dotting tool to position the pieces. The glitter lay flat on the nail and was easy to trim with cuticle clippers in order to get a close fit. Another thing I liked about this particular glitter is that there weren't any clumps of uncut diamonds, which is an issue I've had with other glitters. Plus, after two heavy coats of topcoat the glitter was just as shiny as when I started and almost smooth! It's a big bonus for me that the glitter pieces didn't dull after a topcoat was applied, again as this is a problem I have had in the past with other glitters.
 
bornprettystore-review-loose-glitter-placement-manicure

Because there is simply no such thing as too much glitter, I decided to add a coat of China Glaze 'Fairy Dust'.

I'll just leave a few pics here to show you the mini disco ball from a few angles :)

bornprettystore-review-loose-glitter-placement-manicure
I couldn't stop admiring my nails when I wore this

bornprettystore-review-loose-glitter-placement-manicure
I even managed to do my left (dominant) hand!

bornprettystore-review-loose-glitter-placement-manicure
A bit blurry but still pretty :)

bornprettystore-review-loose-glitter-placement-manicure
The finished look


bornprettystore-review-loose-glitter-placement-manicure
Get lost in the sparkles...


bornprettystore-review-loose-glitter-placement-manicure
Born Pretty Loose Glitter and China Glaze = ALL OF THE SPARKLE!

I hope you like this as much as I do. And *PLEASE* go to BornPrettyStore.com, pop a few (amazingly priced) items into your cart, enter my exclusive code CESH10 to receive 10% discount, enjoy the totally free international shipping, and enjoy playing with your goodies when they arrive. I promise you'll be back for more!

Thanks for reading!

Helen x

born-pretty-store-discount-code


*Items provided by BornPrettyStore for my impartial review

Tuesday, 9 June 2015

**Review** Knitted Nail Stickers - BornPrettyStore

Hello!

Today I have another review for you from my items sent to me by Born Pretty Store. If you haven't already seen it, check out my other post here where I reviewed some gorgeous water nail decals.


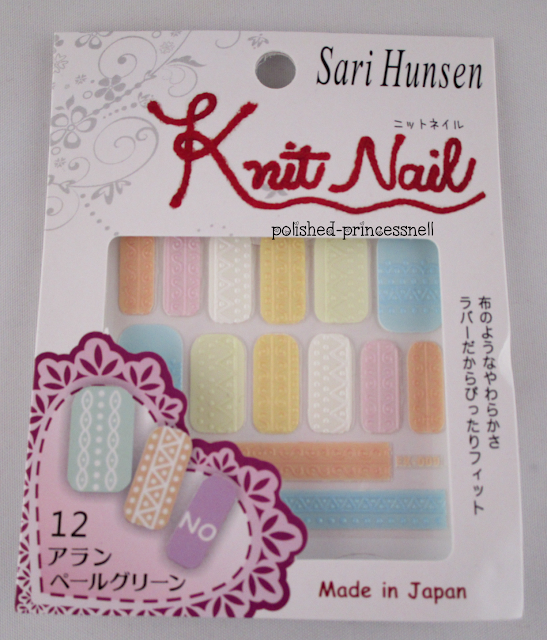
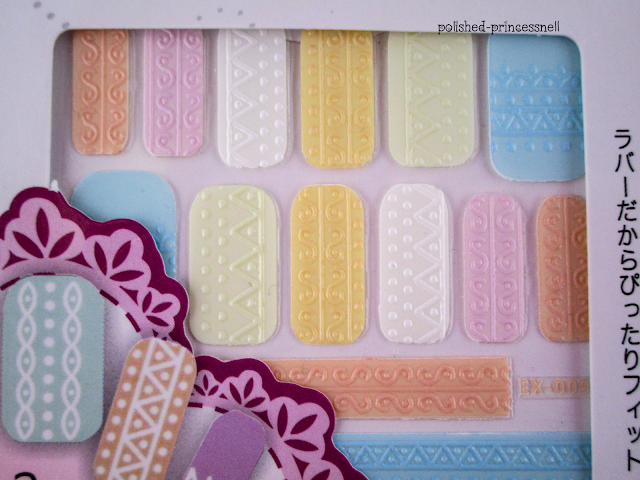
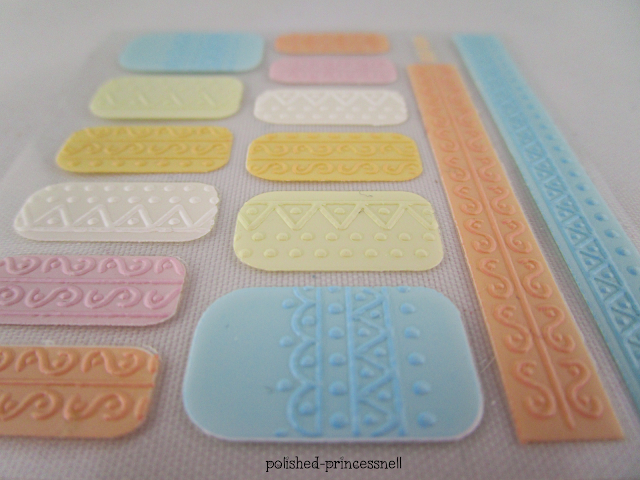
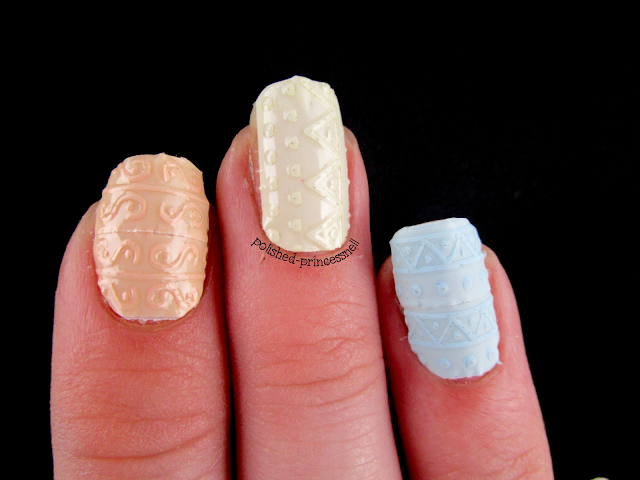
Anyway, on to today's review! I chose these cute *'knit' effect nail stickers that you can purchase from this page for $1.99. Even though you only get one sheet of stickers, there are more than enough to span all ten fingers and maybe even a couple of toes, too!


review-bornprettystore-knitted-nails-stickers


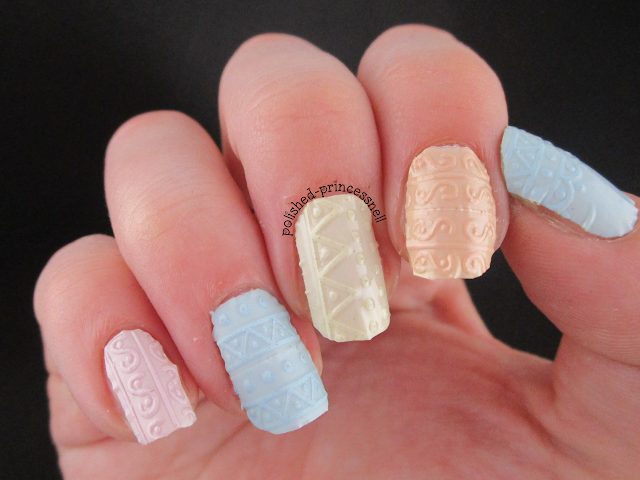
Taking a closer look, you can see that the stickers have 3D patterns on them in a knitted style - very kawaii! The colours are soft and pastel, and I can imagine these looking lovely around autumn time with a chunky knit over your shoulders.


review-bornprettystore-knitted-nails-stickers


review-bornprettystore-knitted-nails-stickers


review-bornprettystore-knitted-nails-stickers


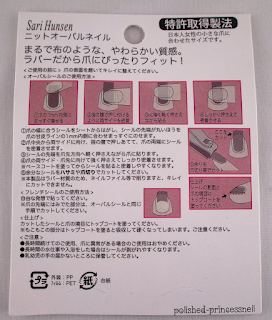
Now, although I have studied Japanese before, I am in no way proficient enough to be able to read the instructions on the packet (see below). Luckily, Born Pretty have realised this and have instructions on the product page of their site:


review-bornprettystore-knitted-nails-stickers


How to Use:
1. Clean the surface where the design is to be placed. 
2. Select a design and peel off by your nail. (Don't touch the glue) 
3. Place the design in nail/tip and rub it gently several times. 
4. Apply top coat for best result.


I began by removing all of my old polish and wiping my nails with acetone to remove any oils and fluff, I lined up each nail with a sticker that I thought would best fit. This was my first problem - they were a little too small! I don't have particularly wide fingernails, however I really struggled to find a good fit with these. 

review-bornprettystore-knitted-nails-stickers


review-bornprettystore-knitted-nails-stickersAfter placing a full sticker onto my thumb, middle and pinkie finger, I decided to experiment with my index and ring fingers by cutting the long stickers into two pieces and placing them horizontally onto my nail. Although this did solve the wideness issue, it created a new problem of overlapping. This created quite an obvious divide which I have highlighted the divide in the picture to the right -->


Also, I found it incredibly difficult to make the edges look smooth and natural. Even after spending a lot of time trimming them with cuticle cutters and small scissors, I still couldn't get it to look right. However, I do believe that this is at least in part an issue with me, and not just the product!


review-bornprettystore-knitted-nails-stickers

The tips of the stickers weren't quite as difficult to trim, but they started to unfold while I was taking photos. At this point I added topcoat (and a matte topcoat to my ring finger - blue), but it didn't help much.


 I really wanted to love this item but I just couldn't get it to work for me. I got really frustrated with how imperfect they looked on my nails, although the idea behind this sort of nail sticker is very appealing. However, I think this would be perfect an older child/young teen as the application is quick and easy, and the glue on the stickers is strong enough to adhere to the nail plate but not too strong so that they can't be repositioned. I think that I would have loved these when I was younger. Plus, youngsters have smaller nails too! 

Don't forget to grab yourself a 10% discount at Born Pretty Store with my exclusive discount code CESH10.


Thanks for reading!


Helen x


review-bornprettystore-knitted-nails-stickers


*Items provided by BornPrettyStore for my impartial review


Monday, 1 June 2015

**Review** Nail Water Decals - BornPrettyStore

Hello!

I was recently contacted by Born Pretty Store to ask if I would like to review some of their products - of course I jumped at the chance to try out some of their stuff! Is there a better place to buy all of your nail art items? I think not! If you haven't yet stumbled across BPS, you are missing a treat!

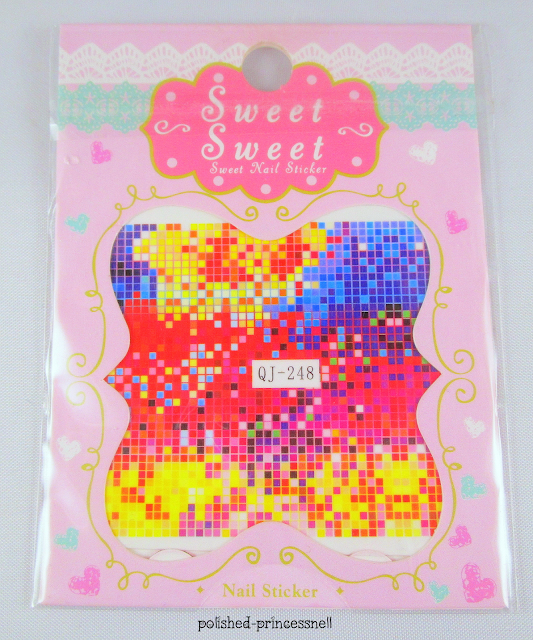
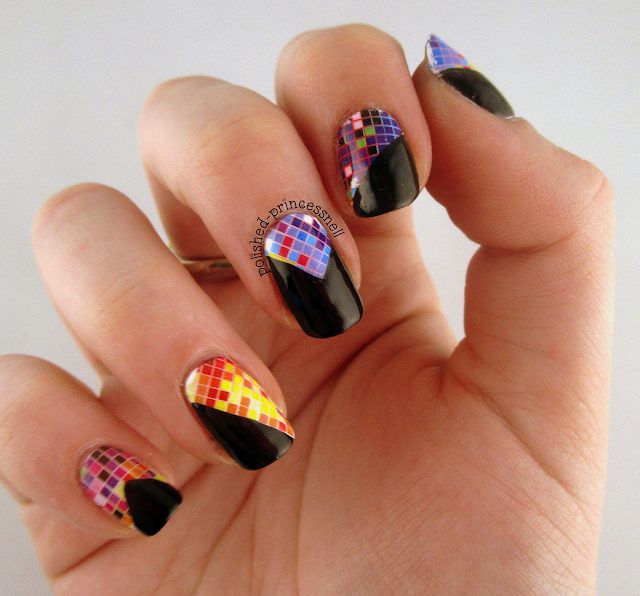
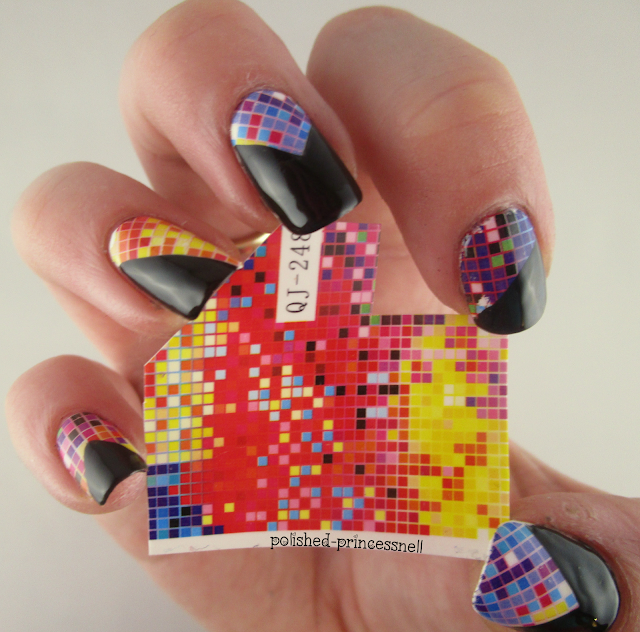
My items arrived this week and I have three review posts to feature my new stuff. The first in line are these super bright geometric water decals. I chose product QJ-248*, which reminded me of colourful pixels! I loved the fact that the colours and pattern is random and how bright it appeared on the store page. When they arrived I was pleased to see that the colours are just as vivid in real life.

review-bornprettystore-water-decals
Available to buy here

review-bornprettystore-water-decals-pixel
Pixel water decals

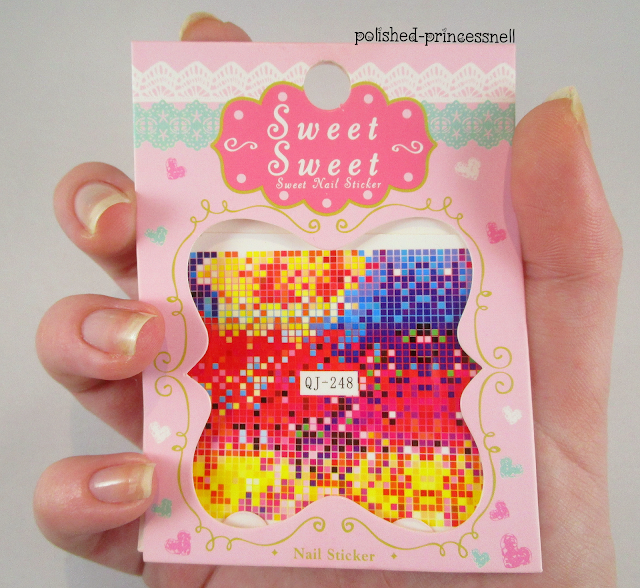
I was a little disappointed when I first opened the decal, as it looks like such a tiny square ("how will I fit this on ten nails?!" was my panicky cry to my boyfriend), but it goes a surprisingly long way and I even had leftovers! As these decals aren't of individual items (such as these adorable owl designs), if you have particularly long nails it may be worth purchasing two sets to fit them on all nails.

review-bornprettystore-water-decals-size
One sheet of water decals

Having never tried water decals, I was a little nervous that it would be a total failure (as we all know practice makes perfect), but I'm pleased to say that the decals were super easy to use, and that all errors appeared to be with my own technique/application rather than a fault of the actual product. 

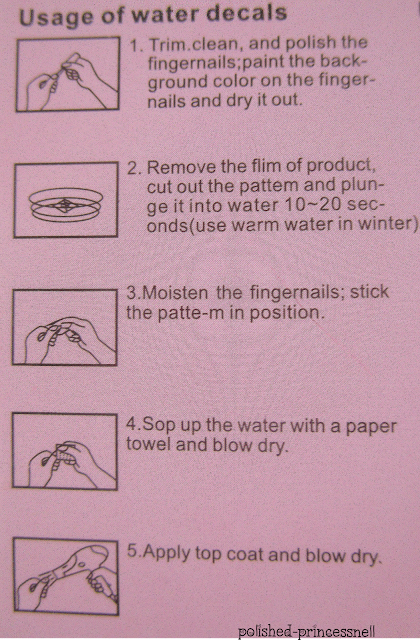
The instructions on the back of the packet are quite straightforward (see below). The basic idea is to paint your nails in a base colour of your choice, remove the plastic film from the decal, cut to size and then dunk into water for 10-20 seconds. After this time the transfer should then easily slide from the cardboard backing (think of kids temporary tattoos!) and you can place it on your nail and finish with topcoat.

I chose my new favourite white from MoYou London as a base - 'White Knight'. This polish is opaque in one generous coat, and white allowed the colours of the decal to pop!

review-bornprettystore-water-decals-moyou-london
MoYou London 'White Knight'


review-bornprettystore-water-decals-instructions
Water decal instructions
The instructions say to 'blow dry'. I must admit I did not do this step as I didn't think it was needed. Actually, on one or two nails I had the issue of the decal being too dry, so I lightly wet my fingernail to help the decal to adhere. This seemed to work perfectly and in general the decals transferred to my nails easily.

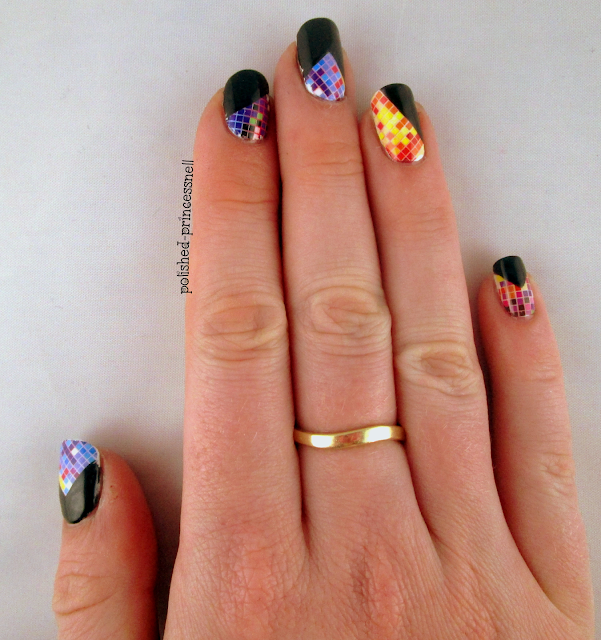
Here is the finished design:

review-bornprettystore-water-decals-nails
Water decal manicure


I used Rimmel 'Black Out' to contrast the colours in the transfers. 


review-bornprettystore-water-decals-nails
I love how vibrant the colours are over a white base
As you can see from the photos, I had a bit of trouble keeping the design intact once it was on the nail. I discovered through trial and error that this was due to adding topcoat too quickly (so the transfer 'dragged' and tore), and also from hasty clean-up. Here is a close-up of the topcoat issue:

And so, for once, wrapping my tip was not a good idea!

Overall I am very pleased to have finally tried water decals, especially as they are so quick and easy to use. These geometric style decals add a fun pattern and lots of colour to your nails in no time at all! Plus, I even have some left over to practice more, although I am definitely going to be ordering these, these and these from BornPrettyStore.com soon!

review-bornprettystore-water-decals-nails
Leftovers!


The water decals shown here can be purchased from this page for $2.18 (less than £1.50!) Use my code CESH10 to get 10% off your order. Did I also mention that BornPretty do free worldwide shipping?! No excuses not to give them a go ;)

review-bornprettystore-water-decals-nails
The finished look


Thanks for reading!

Helen x

*Items provided by BornPrettyStore for my impartial review