Showing posts with label nail porn. Show all posts

Tuesday, 21 July 2015

Classic Monochrome Nails

Hi!

Every now and then I get a hankering for a classic monochrome mani, so that is what I'm wearing on my nails today!


For this design I used Rimmel 'White Hot Love', Rimmel 'Black Out' and Binky London 'Gold Rush'. I stamped my design using my brand new super duper Fab UR Nails Fun17 plate, which I am in LOVE with! This design is so pretty and I just love that plate in general! <3


Hope you like it :)

Thanks for reading!

Helen x

Saturday, 18 July 2015

Denim Nails

Hey guys!

I have been trying out a lot of my new (unused) polishes recently, and stumbled upon an Essence polish that I bought on a whim a few months ago - 'Blue Jeaned'. This polish is titled 'denim sugar', which I think describes it well! Blue Jeaned dries to a very fine texture somewhere between matte and glossy, and I don't have anything like it in my collection.


Obviously I wanted to create a denim-style manicure, so I teamed this with Barry M 'Mustard' and Color Club 'French Tip' and added a few stitches :)


On my middle finger I used a polish from Poundland's Make Up Gallery collection - 'Pink Sherbet', and added a little amber gem.


I really like the finish on this polish but I didn't want to risk going to work without topcoat on my nails so I added a matte topcoat after I took these photos. Obviously it smoothed out the nails texture-wise and I think I actually prefer it matte, although the denim effect is much more subtle. Naturally I didn't get any photos of it with a matte topcoat. Typical!

Thanks for reading!

Helen x


Geometric Gradient Nails

Hi!

Originally I wasn't going to write a full post for this design, but I ended up using so many polishes that I thought it would be best to write them all here! 

This is my geometric gradient design that I created for the Weekly Nail Art Challenge on Instagram.

geometric-gradient-nails-wnac
WNAC - Geometric Gradient Nails
I started off with a base of OPI 'My Boyfriend Scales Walls' and let dry, then I applied striping tape in a criss-cross pattern with a piece of tape running up the centre of my nail. I created a gradient on each nail by sponging two different polishes of each colour (plus 'My Boyfriend Scales Walls') on each nail:

Blue = Barry M 'Damson' / Rimmel 'Mind The Gap, Victoria'
Yellow = Sally Hansen 'Butter-Fly Stroke' / Essence 'Love Is In The Air'
Green = Rimmel 'Sea Green' / Barry M 'Green Berry'
Pink = China Glaze 'Sexy Lady' / Barry M 'Strawberry Ice Cream'
Purple = Models Own 'Pukka Purple' / Barry M 'Prickly Pear'

geometric-gradient-nails-wnac

geometric-gradient-nails-wnac

Thanks for reading!

Helen x

As always, head over to Instagram to see all of the entries into the Weekly Nail Art Challenge - just search #wnac2015 :)

Thursday, 16 July 2015

Polish Me Silly - Lilac Lover Thermal **Swatch**

Hi everyone!

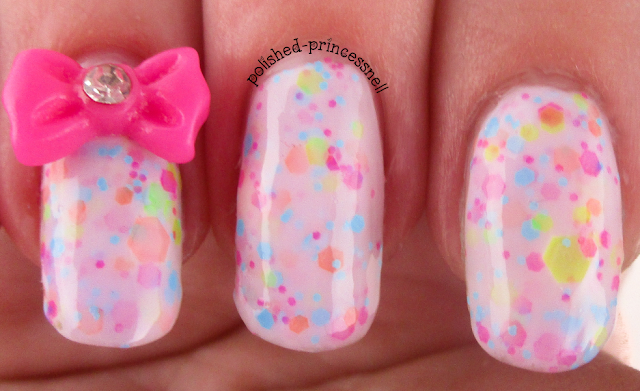
Today I am wearing one of my favourite polishes. 'Lilac Lover' is a thermal crelly polish by indie brand Polish Me Silly and it is just gorgeous. The colour shifts from a creamy white when warm to a deep lilac when cold, and on longer nails the transition is beautiful :)

lilac-lover-thermal-polish-swatch
Polish Me Silly - Lilac Lover

You can buy this polish in the UK from Rainbow Connection for £9.80, and there are other colours available too! I'm totally going to be purchasing the whole collection at some point.

As you can see, this lacquer is jam-packed full of bright matte glitter in all shapes and sizes. In these swatches I am wearing three coats on each nail as I wanted it quite opaque, but it is also gorgeous with only one or two coats too.

lilac-lover-thermal-polish-swatch
Oooooohhhhhh <3

The application is great and you don't have to 'fish around' for pieces of glitter. I also didn't have to spread the glitter at all - this is how it applied first time! Love it!

lilac-lover-thermal-polish-swatch
Lilac Lover when cold (please ignore water droplets - I had to chill my hands somehow!

lilac-lover-thermal-polish-swatch
Lilac Lover when warm

lilac-lover-thermal-polish-swatch

On my pinkie I added a coat of Kandy Colors 'Hey Girl' which is a neon pink jelly polish. The cute bow is from a set I bought on Amazon.

lilac-lover-thermal-polish-swatch

I am so in love with this polish and this brand that I just can't contain my excitement! I've promised myself that I won't buy any new nail related items in July as I have about 40 polishes that I have bought and not yet used (oops!), but as soon as August comes around I am sure to be buying more Polish Me Silly goodies :)

Thanks for reading!

Helen x
Sunday, 12 July 2015

Rainbow Tips!

Hi guys!

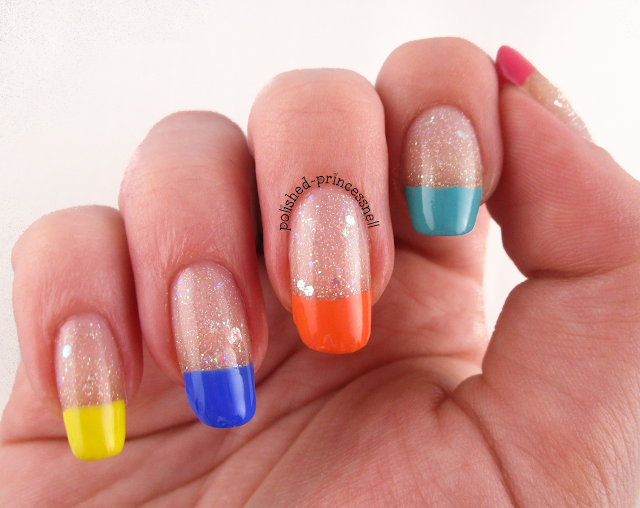
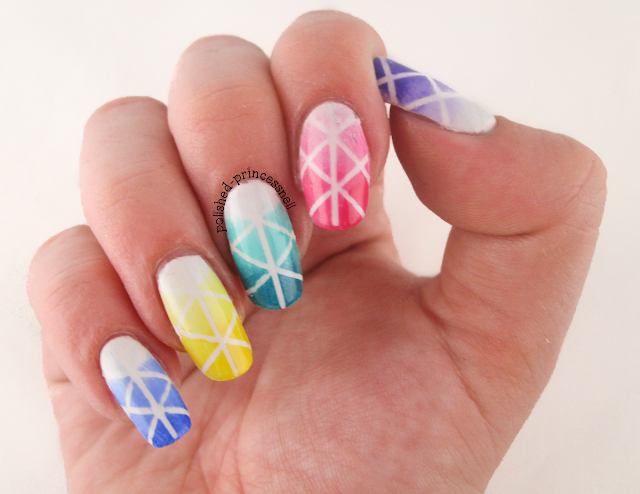
Today I have a fun French manicure with a twist to show you!


rainbow-french-tip-nails
Rainbow French Manicure

This mani is super easy to create and didn't take very long at all. I started out with a coat of China Glaze 'Fairy Dust' then added a coat of Jess 'Fresh' iridescent glitter to give the finished look some flakie goodness. I then simply painted the French tips using a range of coloured polishes (see below for details) and finished with a quick-dry topcoat. Et voila!


rainbow-french-tip-nails


Colours used are (left - right): China Glaze 'Sexy Lady'/ Nicole By OPI 'Teal Me Something New' / NYC 'Summer In NYC' / Barry M 'Damson' / NYC 'Lexington Yellow'

rainbow-french-tip-nails

rainbow-french-tip-nails

I added a 'splat' design to this manicure using MoYou London Princess plate #09 but I definitely prefer it without. What do you think?

rainbow-french-tip-nails

Thanks for reading!

Helen x

Hello Kitty - 'Respect' **Swatch**

Hi!

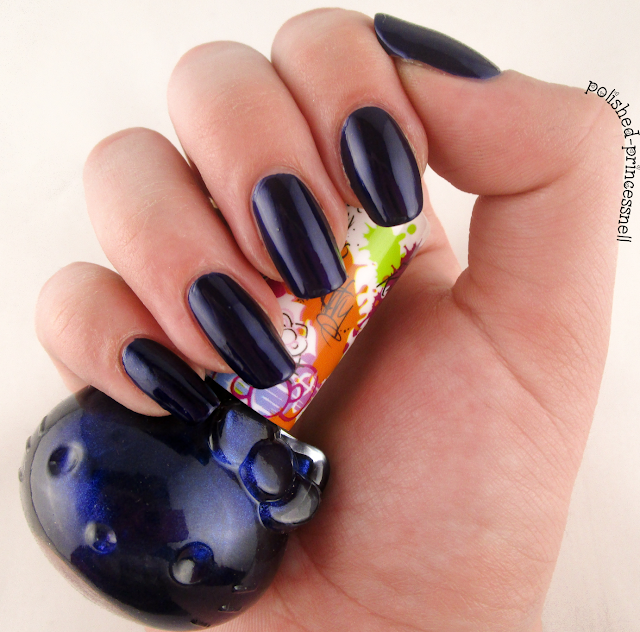
I've got a swatch of 'Respect' by Hello Kitty to show you today. I'm a huge fan of blue polishes and have quite a few in my collection, but 'Respect' is probably my favourite blue that I own. It is just absolutely beautiful in colour, application, and finish. Let's take a look:

hello-kitty-respect-nail-polish-swatch-review

I picked up this beauty from Poundland here in the UK and because of this I didn't have high hopes for the polish. How wrong I was! The application is perfect and it self-levels very well. Not only that but it is opaque in one generous coat. Shown here is two coats plus Poshe topcoat.

hello-kitty-respect-nail-polish-swatch-review

hello-kitty-respect-nail-polish-swatch-review

The depth of this colour is beautiful, it is such a rich navy blue that has an extremely glossy finish. Even without topcoat this polish is stunning!

hello-kitty-respect-nail-polish-swatch-review
BornPrettyStore Cute Cat Ear Ring

hello-kitty-respect-nail-polish-swatch-review
Hello Kitty bottle! <3

If you are near a Poundland store, definitely have a hunt for this little gem!

Thanks for reading,

Helen x

** Get 10% off your BornPrettyStore.com order with my code CESH10! Stuck for inspiration? Have a look at these owl decals, this thermal polish, or my cute cat ears ring that I am wearing in the picture above!


Friday, 10 July 2015

NEON WEEK: Aztec Nails

Hi everyone!

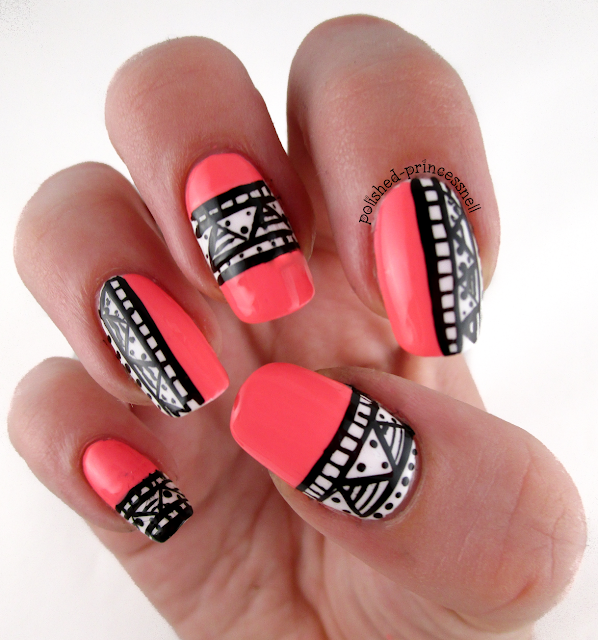
As part of my neon week, I wanted to incorporate an Aztec/tribal pattern into one of my designs. I recently picked up a Color Club Nail Striper in black, and thought this might be a good way to test it out.

neon-aztec-tribal-nail-art
Neon Tribal Nail Art

For this manicure I used a base of MoYou London 'White Knight', then divided the nails with Models Own 'Shades' from their Polish For Tans collection (I LOVE those polishes!). Finally, I added the detail using a teeny-tiny dotting tool and my Color Club striper.

neon-aztec-tribal-nail-art

neon-aztec-tribal-nail-art

neon-aztec-tribal-nail-art

Overall I'm pleased with how these turned out. I definitely need to practice my freehand linework with my striper, though!

neon-aztec-tribal-nail-art
I love the contrast between the pop of colour and the black and white design. 

Thanks for reading!

Helen x

Sunday, 5 July 2015

NEON WEEK: Dry Brush Technique

Hello!

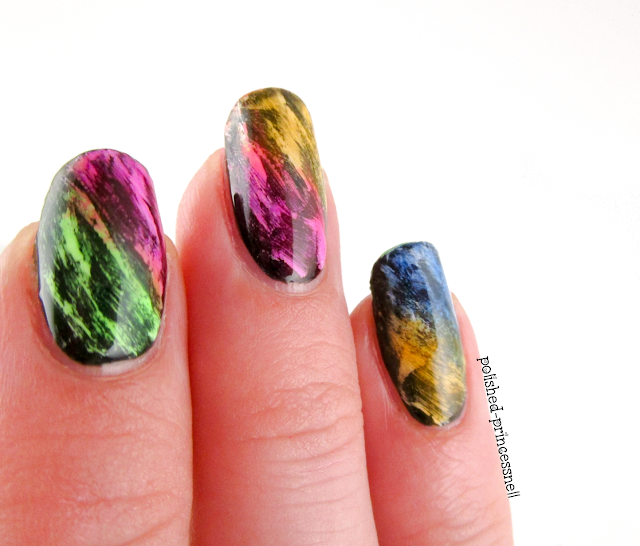
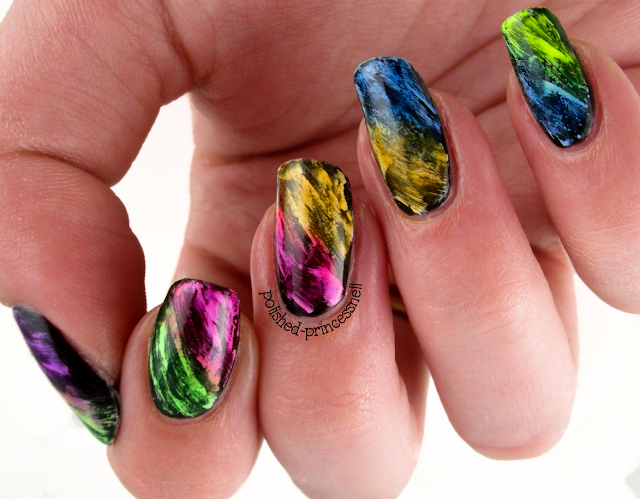
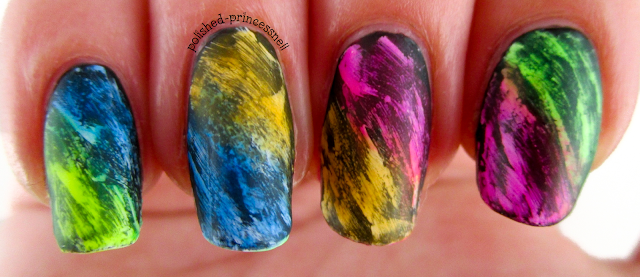
Today I have this week's entry into the Weekly Nail Art Challenge to show you, and of course I'm sticking with the neon theme for it. The prompt for the challenge this week is 'dry brush + gradient'. I have only tried dry bushing once before and it made my nails look like I'd dragged them through mud so I wasn't hopeful for this challenge, but I'm pleased with the results of this one!

neon-dry-brush-technique-nails-wnac
Dry brush using neon jellies
I started by painting my nails black using Rimmel 'Black Out', then once dry I dragged Color Club 'French Tip' white polish randomly over the black. The trick to this technique is to get rid of as much polish as you can from the brush before applying it to the nail. I found brushing it onto a piece of paper to remove the excess worked well. Finally, I took my favourite neon jelly polishes - the 'Northern Lights' collection from Kandy Colors and created a gradient over the nail by blending two colours together per nail. 

neon-dry-brush-technique-nails-wnac

neon-dry-brush-technique-nails-wnac
How beautiful are these jellies?!
neon-dry-brush-technique-nails-wnac
The finished look
I tried this out using Barry M Matte Topcoat too, but don't like the effect as much. Glossy is nearly always better in my opinion!

neon-dry-brush-technique-nails-wnac
Dry brush using neon jellies - matte
neon-dry-brush-technique-nails-wnac
The colours appear slightly brighter on the nail with a matte topcoat added
What do you guys think? Let me know in the comments!

Thanks for reading!

Helen x

As always, head over to Instagram to see all of the entries into the Weekly Nail Art Challenge - just search #wnac2015 :)

Tuesday, 30 June 2015

NEON WEEK: Radial Gradient and Stamping

Hi!

I've been *loving* the weather here over the last few days and today we saw the temperature reach 30 degrees Celsius which is lovely! I'm so glad I have a neon theme going on at the moment because it's complimenting the sunshine wonderfully :)


neon-radial-gradient-stamping
 Stamped Neon Radial Gradient

Today's nails include a technique that I have only tried a couple of times - a radial gradient (where the gradient works outwards from the centre of the nail, rather than horizontally or vertically across the nail). I found it really difficult to get consistent gradients across all ten fingers, but I'm pretty happy with the results anyway. I added a pretty circular-style stamped image, and of course I had to stick some sparkly gems on there too!

The polishes used for this were all Models Own - 'Bikini' (yellow), 'Sun Hat' (pink) and 'Pukka Purple'. I used Pukka Purple and Bundle Monster stamping plate #BM-618 for the design. Oh, and a sprinkling of China Glaze 'Fairy Dust' was added to the gradient.

neon-radial-gradient-stamping
My left hand came out better than my right hand (even though I'm left handed...)

neon-radial-gradient-stamping
FYI my stamping is *meant* to be off-centre...

neon-radial-gradient-stamping
A bit blurry but look at the pretty Fairy Dust! <3

Hope you like them :)

Thanks for reading!

Helen x

Tuesday, 23 June 2015

Rockstar Gel Nails!

Hey everyone!

Today I want to share with you the sparkliest nails that my hands have ever adorned! 


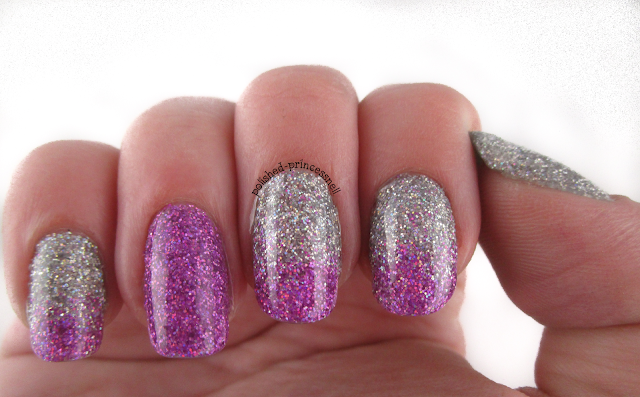
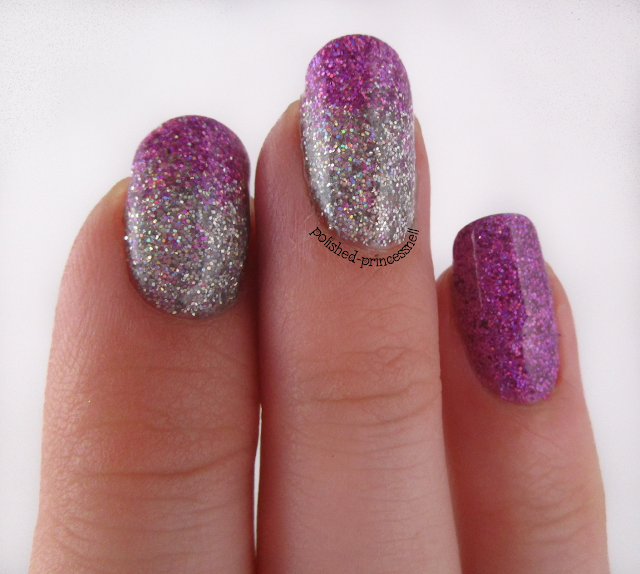
gel-nails-rockstar-glitter-gradient
Rockstar Nails

This is a style nicknamed 'rockstar nails' and it is applied to a gel manicure.

The basic idea is:

  1. Clean and prep your nails for a gel manicure
  2. Apply a base coat and cure in an LED/UV lamp
  3. Apply a thin coat of gel polish and before curing sprinkle fine glitter onto the nail.
  4. Press lightly onto the nail to ensure the glitter adheres, then cure in your lamp.
  5. Apply topcoat and cure.

If you want to recreate this look, I recommend heading over to Chalkboard Nails for a great tutorial (the one that I followed), which has each step explained in much more detail than I gave above!


gel-nails-rockstar-glitter-gradient
Super glittery! 

gel-nails-rockstar-glitter-gradient
LOOK AT THE PRETTY!

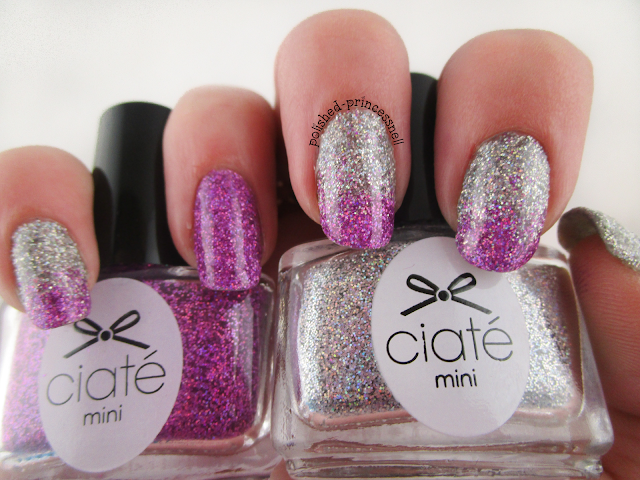
This is so easy to create and the effect is absolutely stunning. As this is a gel manicure my nails are super glossy and the glitter really shines through, almost magnified by the topcoat.


gel-nails-rockstar-glitter-gradient
Obligatory macro shot :)

I used two Ciate glitters that I got in my Ciate Mini Manor Advent Calendar last year - a fantastic holographic silver ('Let It Snow') and holographic pink ('Prima Ballerina'). I have been waiting for the perfect opportunity to use these and I think I found it!


gel-nails-rockstar-glitter-gradient
My camera could only just pick up the holo goodness in these bottles


gel-nails-rockstar-glitter-gradient
Ciate Fine Holographic Glitter - Prima Ballerina and Let It Snow

gel-nails-rockstar-glitter-gradient
Can you see the holo shift?! 

I am starting to fall in love with gel manicures - there are so many possibilities using cured polish, and the prettiness lasts for ages too!

Thanks for reading!

Helen x