Showing posts with label glitter. Show all posts

Sunday, 13 September 2015

31 Day Challenge - Day 11 - Polka Dots

Bonjour!

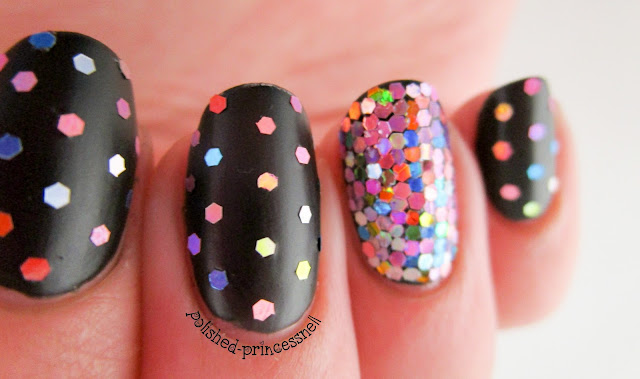
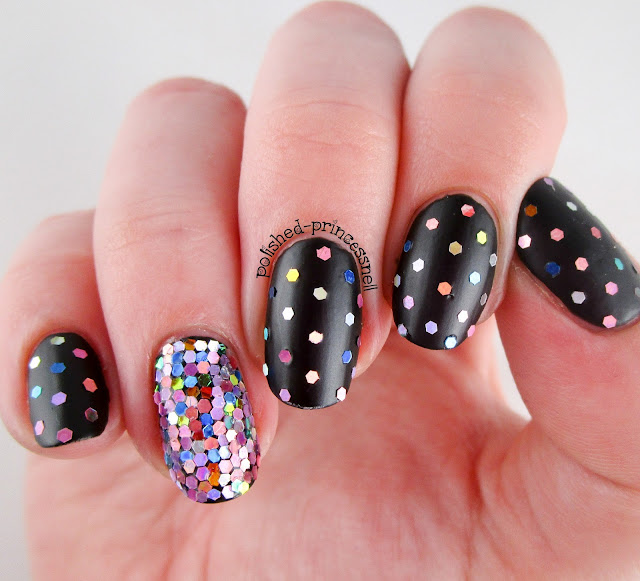
The eleventh prompt on the 31 Day Challenge is polka dots, so I did a glitter placement! *Proud face*


#31DC2015-day-eleven-polka-dot-nails-glitter-placement

If you've seen any of my regular polka dot manis, you will be aware that I am not the neatest 'dotter'. I am still learning how to get my dots equally spaces, the same size and un-smudged, so after a failed attempt at a simple dotticure, I took inspiration from @simplynailogical who's mantra is that glitter fixes everything. 


#31DC2015-day-eleven-polka-dot-nails-glitter-placement

For this mani I started with a base of Essence 'Black Cat' which is a latex effect polish that dries semi-matte and is just lovely! As it was drying, I quickly added my loose glitter (also from Essence) in a polka dot pattern. As you can see on my middle finger, some of the pieces of glitter did not stick flat to the nail. I didn't add topcoat to this as I wanted the latex finish to be apparent, but if I was wearing this out of the house then a topcoat is a must to seal in the glitter. For my ring finger I added Rimmel 'Clear' nail polish in strips up my nail and placed the glitter pieces on by one to cover the full nail. This takes a lot of time but the effect is so cool. I found it difficult to line up the hexes so that they lay flush with each other, but that all comes with practice I guess!


#31DC2015-day-eleven-polka-dot-nails-glitter-placement

#31DC2015-day-eleven-polka-dot-nails-glitter-placement

#31DC2015-day-eleven-polka-dot-nails-glitter-placement

All of this glitter has made me want to make everything look like a disco ball, so be expecting more glitter placement manis soon!

Thanks for reading!

Helen x

PS Check out all of the other submissions for the 31 Day Challenge on Instagram by searching the hashtag #31DC2015
Monday, 31 August 2015

Glitter Jelly Sandwich Nail Art!

Hi everyone!

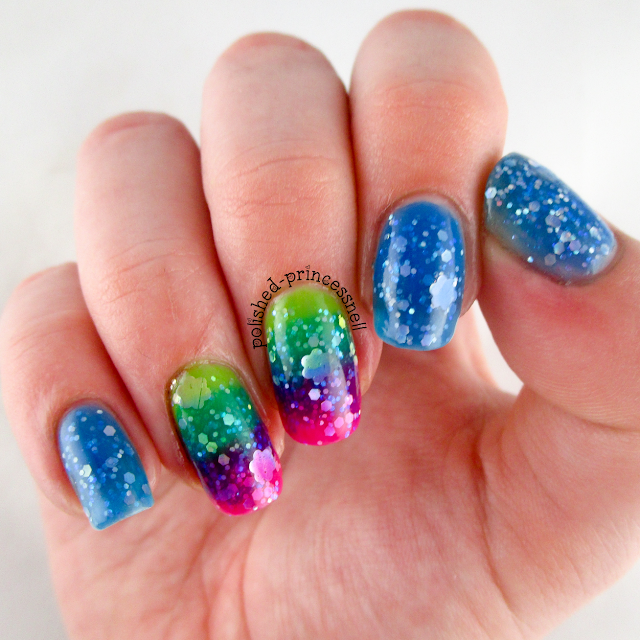
Today's mani is a super bright, super squishy neon jelly glitter sandwich! Woah!


glitter-jelly-sandwich-nail-art

I created this look by layering glitter polish between thin coats of jelly polish, which does take forever as you have to wait for each layer to dry before adding the next, but LOOK AT THE PRETTY!!! For this design I used Kandy Colors 'Retro' (blue), 'Hey Girl' (pink) and 'Carnival' (green) along with Nicole by OPI 'Party Bus' glitter. I picked up 'Party Bus' at TK Maxx for £3.99 and I'm so glad I didn't pay full price for it. Even though I absolutely love the polish, I unfortunately ended up spending a lot of time fishing out the bigger pieces of glitter which is so frustrating! Less clear base and more glitter please, Nicole by OPI!


glitter-jelly-sandwich-nail-art

No glitter jelly sandwich is complete without snapping a few close-ups, so here they are!:


glitter-jelly-sandwich-nail-art

glitter-jelly-sandwich-nail-art

glitter-jelly-sandwich-nail-art

glitter-jelly-sandwich-nail-art

I love jelly polishes and these ones from Kandy Colors really do have the 'wow factor'. But I'm always looking for more to add to my collection! What's your favourite jelly polish?

Thanks for reading!

Helen x

Sunday, 2 August 2015
ILNP - Electric Carnival **Swatch**

Hi!

I am not going to say anything about this polish, I'll just let the pictures do the talking. This is 'Electric Carnival' multichrome flakie by ILNP <3:


ilnp-electric-carnival-multichrome-flakie-swatch

ilnp-electric-carnival-multichrome-flakie-swatch

ilnp-electric-carnival-multichrome-flakie-swatch

ilnp-electric-carnival-multichrome-flakie-swatch

ilnp-electric-carnival-multichrome-flakie-swatch

ilnp-electric-carnival-multichrome-flakie-swatch

ilnp-electric-carnival-multichrome-flakie-swatch

ilnp-electric-carnival-multichrome-flakie-swatch

Isn't it just beautiful?

Helen x

Saturday, 1 August 2015

Travel In Colour Gradient Nails

Hi everyone!

This post was meant to have some nail art in it, but I liked the base to the art so much that I have dedicated a whole post to it! Let's take a look:

gradient-nail-art-travel-in-color-china-glaze

I used three colours to create a mix of gradients: OPI 'Ski Teal We Drop', Barry M 'Sugarplum' and Maybelline 'Grey Beats'. I added one coat of China Glaze 'Travel In Color' to each nail and topped with Ciate Speed Pro Topcoat.

gradient-nail-art-travel-in-color-china-glaze

gradient-nail-art-travel-in-color-china-glaze

gradient-nail-art-travel-in-color-china-glaze

'Ski Teal We Drop' by OPI is, as the name suggest, a dark teal colour, however this was hidden by the glitter topper goodness of China Glaze. The topper made the colours below it shift to beautiful purples, pinks, golds, blues and greens - so pretty! The photo below kind of demonstrates this over the teal and grey polish gradient.

gradient-nail-art-travel-in-color-china-glaze

I actually added some nail art to this after taking these pics, but I'm unsure as to whether I will post them as they were a bit rubbish. This is definitely a set of nails that look best left simple!

gradient-nail-art-travel-in-color-china-glaze

Thanks for reading!

Helen x

Monday, 27 July 2015

Chameleon Thermal Gel Polish

Hi everyone!

Last week whilst I was away visiting family I tested out one of my newer purchases - a thermal gel polish from a brand called Aimeili. I know that the quality of gel polishes can be awful if you don't buy the right ones, but I find a price tag of £15+ a little too expensive for most regular gel shades. So I turned to Amazon for inspiration, and along came this polish for £4.49 and free delivery! I chose the shade named 'Hot Pink to Glitter White' which is product number TC04, however there are loads to choose from and I'll definitely be ordering more.

aimeili-thermal-chameleon-gel-polish-swatch

I applied this gel alongside Red Carpet 'Structure' basecoat, Red Carpet 'Brilliance' topcoat and Le Mini Macaron LED lamp. I have read conflicting reviews about mixing brands of gel polishes, but so far I have had no issue with this combination. This is by far the best gel manicure I have had in terms of durability and staying power! 

aimeili-thermal-chameleon-gel-polish-swatch

aimeili-thermal-chameleon-gel-polish-swatch

This gel is a gorgeous creamy-translucent white when it is warm, turning into a deep hot pink when cold. As my nails are at quite a long length at the moment, I found that I had a cute French manicure type effect going on most of the time. On shorter nails I imagine this wouldn't be quite so obvious, and the 'resting' colour would be more in line with the picture below.The white shade is not opaque (even with three layers), however it is still beautiful!

aimeili-thermal-chameleon-gel-polish-swatch

I am incredibly pleased with my purchase here and can't wait to try out more. I wore this manicure for one whole week (which is unheard of for me!) and I had absolutely no issues with chipping, dulling or general wear-and-tear. All of these photos were taken just before I removed the polish, so you can see just how great this one lasted.

aimeili-thermal-chameleon-gel-polish-swatch

What do you guys think? Have you tried out any of Aimeli's polishes before? Let me know in the comments!

Thanks for reading!

Helen x

Thursday, 16 July 2015

Polish Me Silly - Lilac Lover Thermal **Swatch**

Hi everyone!

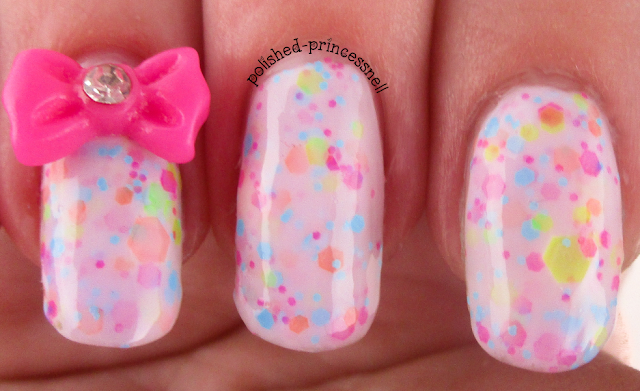
Today I am wearing one of my favourite polishes. 'Lilac Lover' is a thermal crelly polish by indie brand Polish Me Silly and it is just gorgeous. The colour shifts from a creamy white when warm to a deep lilac when cold, and on longer nails the transition is beautiful :)

lilac-lover-thermal-polish-swatch
Polish Me Silly - Lilac Lover

You can buy this polish in the UK from Rainbow Connection for £9.80, and there are other colours available too! I'm totally going to be purchasing the whole collection at some point.

As you can see, this lacquer is jam-packed full of bright matte glitter in all shapes and sizes. In these swatches I am wearing three coats on each nail as I wanted it quite opaque, but it is also gorgeous with only one or two coats too.

lilac-lover-thermal-polish-swatch
Oooooohhhhhh <3

The application is great and you don't have to 'fish around' for pieces of glitter. I also didn't have to spread the glitter at all - this is how it applied first time! Love it!

lilac-lover-thermal-polish-swatch
Lilac Lover when cold (please ignore water droplets - I had to chill my hands somehow!

lilac-lover-thermal-polish-swatch
Lilac Lover when warm

lilac-lover-thermal-polish-swatch

On my pinkie I added a coat of Kandy Colors 'Hey Girl' which is a neon pink jelly polish. The cute bow is from a set I bought on Amazon.

lilac-lover-thermal-polish-swatch

I am so in love with this polish and this brand that I just can't contain my excitement! I've promised myself that I won't buy any new nail related items in July as I have about 40 polishes that I have bought and not yet used (oops!), but as soon as August comes around I am sure to be buying more Polish Me Silly goodies :)

Thanks for reading!

Helen x

Sunday, 12 July 2015

Rainbow Tips!

Hi guys!

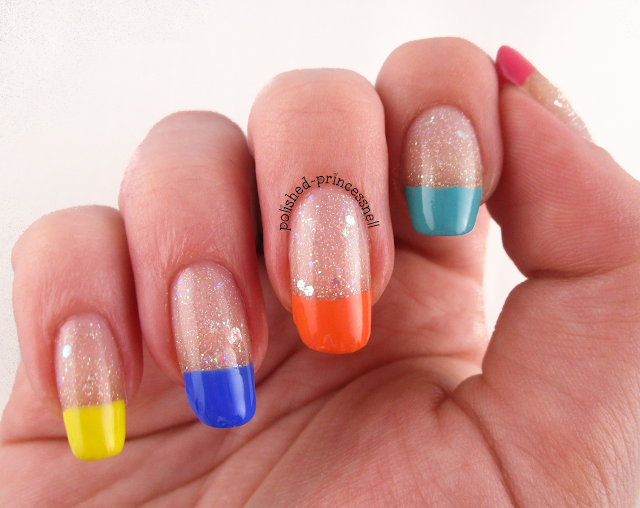
Today I have a fun French manicure with a twist to show you!


rainbow-french-tip-nails
Rainbow French Manicure

This mani is super easy to create and didn't take very long at all. I started out with a coat of China Glaze 'Fairy Dust' then added a coat of Jess 'Fresh' iridescent glitter to give the finished look some flakie goodness. I then simply painted the French tips using a range of coloured polishes (see below for details) and finished with a quick-dry topcoat. Et voila!


rainbow-french-tip-nails


Colours used are (left - right): China Glaze 'Sexy Lady'/ Nicole By OPI 'Teal Me Something New' / NYC 'Summer In NYC' / Barry M 'Damson' / NYC 'Lexington Yellow'

rainbow-french-tip-nails

rainbow-french-tip-nails

I added a 'splat' design to this manicure using MoYou London Princess plate #09 but I definitely prefer it without. What do you think?

rainbow-french-tip-nails

Thanks for reading!

Helen x

Tuesday, 23 June 2015

Rockstar Gel Nails!

Hey everyone!

Today I want to share with you the sparkliest nails that my hands have ever adorned! 


gel-nails-rockstar-glitter-gradient
Rockstar Nails

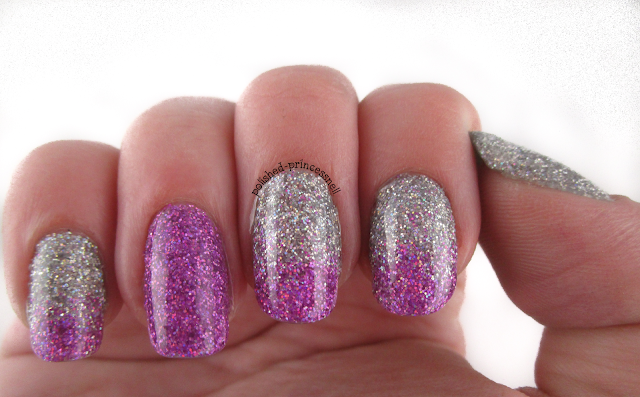
This is a style nicknamed 'rockstar nails' and it is applied to a gel manicure.

The basic idea is:

  1. Clean and prep your nails for a gel manicure
  2. Apply a base coat and cure in an LED/UV lamp
  3. Apply a thin coat of gel polish and before curing sprinkle fine glitter onto the nail.
  4. Press lightly onto the nail to ensure the glitter adheres, then cure in your lamp.
  5. Apply topcoat and cure.

If you want to recreate this look, I recommend heading over to Chalkboard Nails for a great tutorial (the one that I followed), which has each step explained in much more detail than I gave above!


gel-nails-rockstar-glitter-gradient
Super glittery! 

gel-nails-rockstar-glitter-gradient
LOOK AT THE PRETTY!

This is so easy to create and the effect is absolutely stunning. As this is a gel manicure my nails are super glossy and the glitter really shines through, almost magnified by the topcoat.


gel-nails-rockstar-glitter-gradient
Obligatory macro shot :)

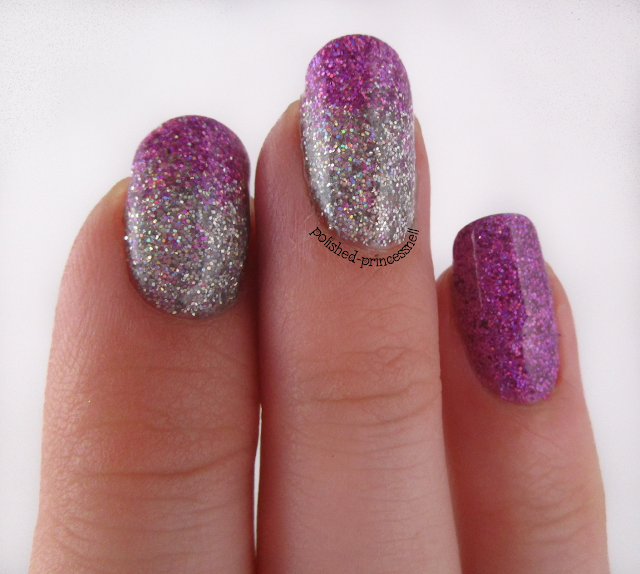
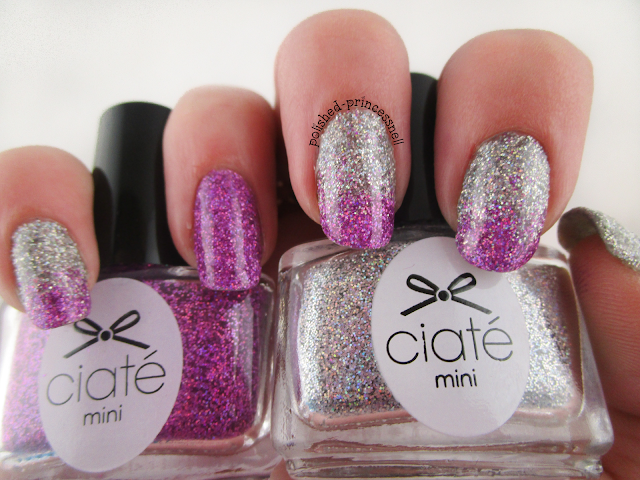
I used two Ciate glitters that I got in my Ciate Mini Manor Advent Calendar last year - a fantastic holographic silver ('Let It Snow') and holographic pink ('Prima Ballerina'). I have been waiting for the perfect opportunity to use these and I think I found it!


gel-nails-rockstar-glitter-gradient
My camera could only just pick up the holo goodness in these bottles


gel-nails-rockstar-glitter-gradient
Ciate Fine Holographic Glitter - Prima Ballerina and Let It Snow

gel-nails-rockstar-glitter-gradient
Can you see the holo shift?! 

I am starting to fall in love with gel manicures - there are so many possibilities using cured polish, and the prettiness lasts for ages too!

Thanks for reading!

Helen x

Sunday, 21 June 2015

**Review** Colourful Loose Glitter - BornPrettyStore

Hi guys!

Today I have a super sparkly review for you that makes me happy inside! BornPrettyStore very kindly sent me some of this mixed loose glitter* to play around with, so of course I covered my nails with it! I don't do subtle.

bornprettystore-review-loose-glitter-placement-manicure
ALL OF THIS FOR ONLY $0.99!

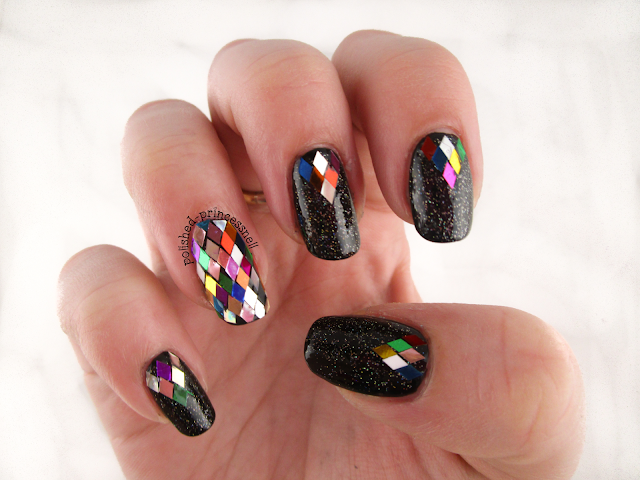
This is a rainbow filled pot of glittery goodness! The diamond shaped glitter comes in a pot full of green, blue, silver, gold, pink/purple, white, black, clear and bronze pieces. Phew!

I wanted to create a similar effect to my glitter framed nails from a little while ago, so I started with a base of Rimmel 'Black Out'. Then by applying a coat of Rimmel 'Clear' polish, I began placing the loose glitter onto my nail using a small dotting tool to position the pieces. The glitter lay flat on the nail and was easy to trim with cuticle clippers in order to get a close fit. Another thing I liked about this particular glitter is that there weren't any clumps of uncut diamonds, which is an issue I've had with other glitters. Plus, after two heavy coats of topcoat the glitter was just as shiny as when I started and almost smooth! It's a big bonus for me that the glitter pieces didn't dull after a topcoat was applied, again as this is a problem I have had in the past with other glitters.
 
bornprettystore-review-loose-glitter-placement-manicure

Because there is simply no such thing as too much glitter, I decided to add a coat of China Glaze 'Fairy Dust'.

I'll just leave a few pics here to show you the mini disco ball from a few angles :)

bornprettystore-review-loose-glitter-placement-manicure
I couldn't stop admiring my nails when I wore this

bornprettystore-review-loose-glitter-placement-manicure
I even managed to do my left (dominant) hand!

bornprettystore-review-loose-glitter-placement-manicure
A bit blurry but still pretty :)

bornprettystore-review-loose-glitter-placement-manicure
The finished look


bornprettystore-review-loose-glitter-placement-manicure
Get lost in the sparkles...


bornprettystore-review-loose-glitter-placement-manicure
Born Pretty Loose Glitter and China Glaze = ALL OF THE SPARKLE!

I hope you like this as much as I do. And *PLEASE* go to BornPrettyStore.com, pop a few (amazingly priced) items into your cart, enter my exclusive code CESH10 to receive 10% discount, enjoy the totally free international shipping, and enjoy playing with your goodies when they arrive. I promise you'll be back for more!

Thanks for reading!

Helen x

born-pretty-store-discount-code


*Items provided by BornPrettyStore for my impartial review