Showing posts with label MoYou London. Show all posts

Friday, 4 September 2015

31 Day Challenge - Day 2 - Orange

Hi guys!

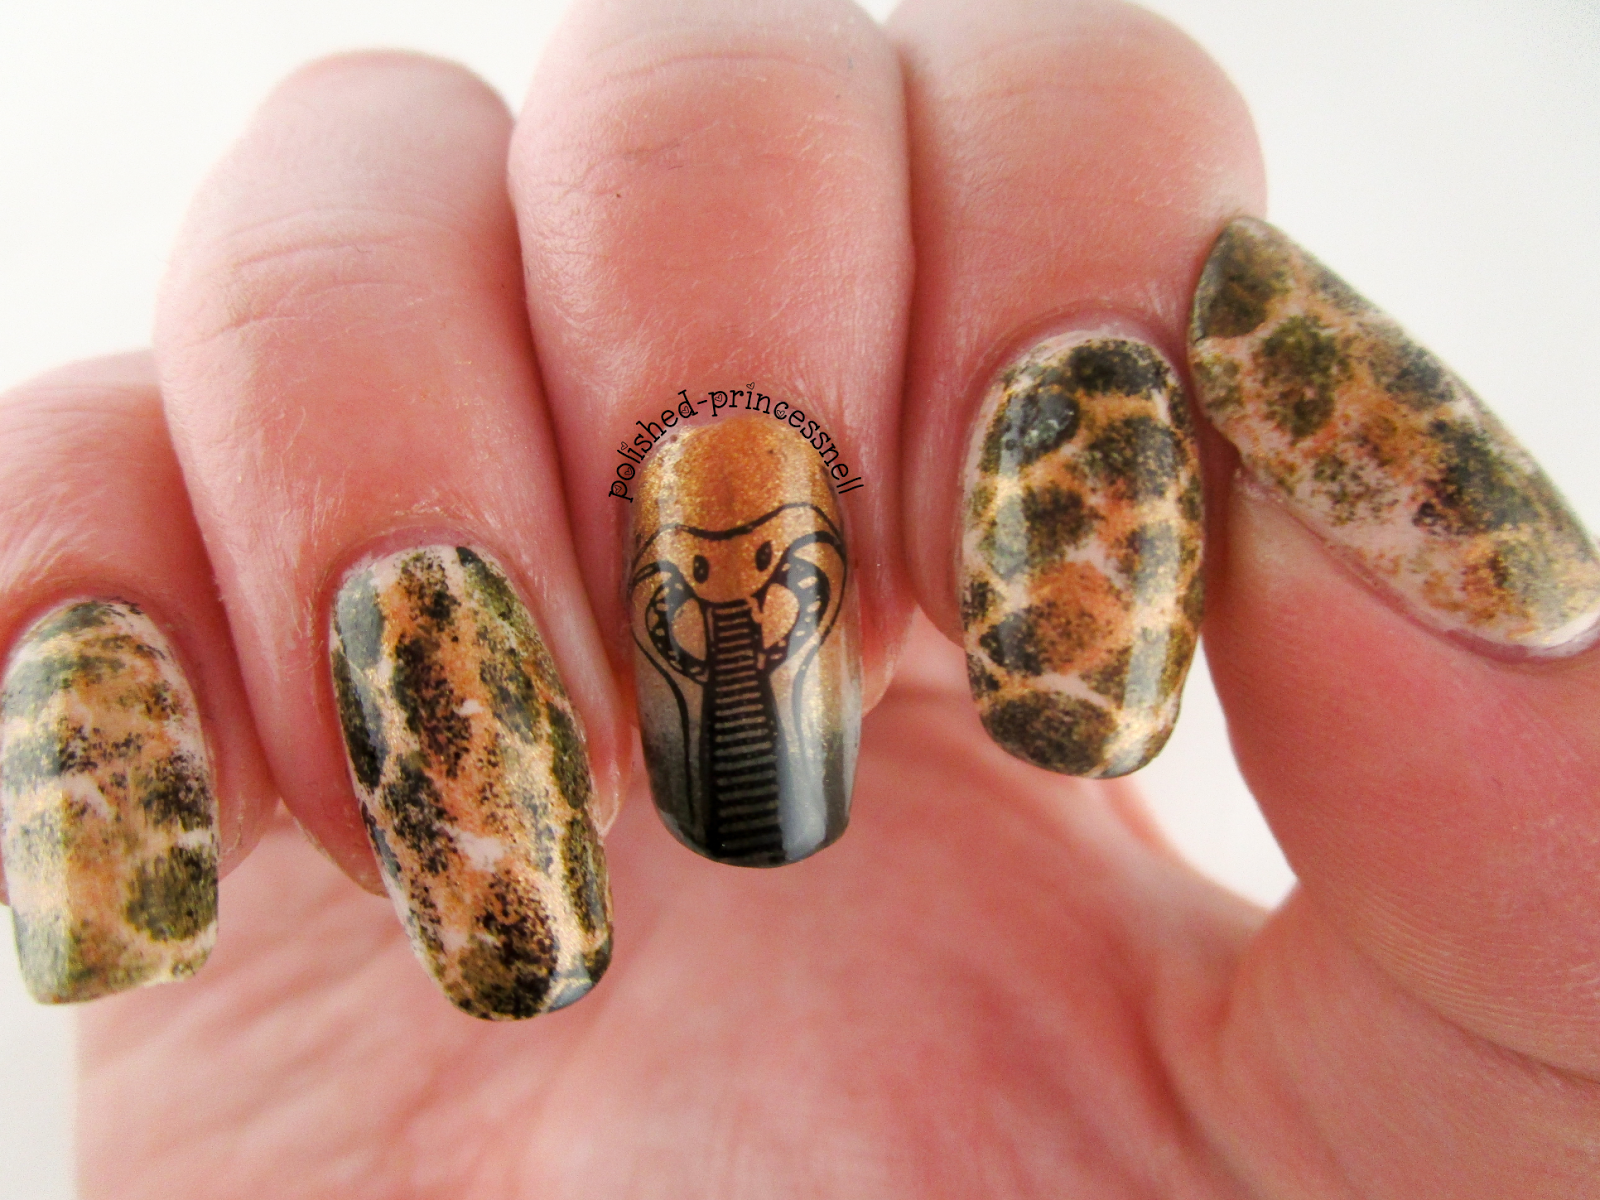
This is a super quick post featuring my second mani in the 31 Day Challenge. Prompt number two is 'orange' so I decided to stamp a tiger design onto my nails :D


#31dc2015-day-two-orange-nails

For this design I used Bundle Monster plate #613 from the CYO 2014 collection. For the base I dry brushed  NYC 'Summer In NYC', an unnamed Ted Baker peach shimmer polish, Barry M 'Cocoa' and Barry M 'Coconut' onto my nail, then stamped directly onto the nail using MoYou London 'Black Knight' stamping polish.

Sorry for the short post, I've been feeling under the weather this week and haven't been able to put as much time into nails and blogging as I usually would. Stick with me, guys!

Thanks for reading!

Helen x 

P.S. Check out all of the other submissions for the 31 Day Challenge over on Instagram - just search the hashtag #31DC2015 :)

Sunday, 23 August 2015

Sponging and Stamping!

Hi guys!

Today I have some pretty stamped nails to show you that I created after being inspired by this manicure by Sveta Sanders on Instagram. I loved the colours together and thought it seemed simple enough to recreate without too much hassle! 


sponged-nails-stamping-nail-art

I started with a base of Fuse Gelnamel 'Intens-so-fly' which is a muted turquoise gel. You can't actually see much of the base on my nails as it was mostly covered by the sponging, which I am counting as a good thing as I really don't like the colour! I then used Models Own 'Pukka Purple', Models Own 'Sun Hat' and China Glaze 'Grass Is Lime Greener' to randomly sponge the colours onto the nail, making sure to overlap them. I love how this looks! It reminds me of graffiti :)


sponged-nails-stamping-nail-art

sponged-nails-stamping-nail-art

sponged-nails-stamping-nail-art

Not content with the base as it was, I decided to add a touch of white stamping using MoYou London Pro-08 plate and one of the cute flowered designs.


sponged-nails-stamping-nail-art

sponged-nails-stamping-nail-art

sponged-nails-stamping-nail-art

To finish the look, I used neon studs as the centre of the larger flowers and topped with topcoat to seal it all in. 

Hope you like these as much as I do!  <3

Thanks for reading!

Helen x

Saturday, 11 July 2015

Snakeskin Nail Art

Hello everyone!

The prompt for this week's Weekly Nail Art Challenge on Instagram is 'aminal print + gradient'. As I've worn leopard print on a few occasions recently, I wanted to do something a bit different. So I chose snakeskin!


I followed this tutorial on YouTube as I had no idea where to begin! The basic idea is to use one light, one medium, and one dark toned polish and do the following:

  1. Paint your nails a light base colour and allow to dry
  2. Wrap a mesh material around the nail and sponge on your medium polish
  3. Carefully remove the mesh material, and repeat on all nails
  4. Use a smaller mesh material to sponge on your dark polish (again, remove carefully)
  5. Add topcoat, and you're done!

For this design I used another two of my 'untrieds' - my list is getting shorter! (I have had to purchase a whole new storage system for my untrieds as I have so many... but I'm working my way through them!)

Anyway, back to the polishes I used: OPI 'My Vampire Is Buff' (light), Ciate 'Gold Digga' (medium) and Revlon 'Jungle' (dark). I also used a tiny amount of black around the edges to add more definition to the 'scales'.


BM-612
For the little snake design I used Bundle Monster plate BM-612 and stamped with MoYou Black Special Nail Polish and my Creative Shop Stamper (bought from Rainbow Connection).


Although my index finger is by far the best, scale-wise, I'm happy with how these look! It's definitely not my favourite colour palette, it was nice to wear something different for a change.

Thanks for reading!

Helen x

As always, head over to Instagram to see all of the entries into the Weekly Nail Art Challenge - just search #wnac2015 :)

Friday, 10 July 2015

NEON WEEK: Aztec Nails

Hi everyone!

As part of my neon week, I wanted to incorporate an Aztec/tribal pattern into one of my designs. I recently picked up a Color Club Nail Striper in black, and thought this might be a good way to test it out.

neon-aztec-tribal-nail-art
Neon Tribal Nail Art

For this manicure I used a base of MoYou London 'White Knight', then divided the nails with Models Own 'Shades' from their Polish For Tans collection (I LOVE those polishes!). Finally, I added the detail using a teeny-tiny dotting tool and my Color Club striper.

neon-aztec-tribal-nail-art

neon-aztec-tribal-nail-art

neon-aztec-tribal-nail-art

Overall I'm pleased with how these turned out. I definitely need to practice my freehand linework with my striper, though!

neon-aztec-tribal-nail-art
I love the contrast between the pop of colour and the black and white design. 

Thanks for reading!

Helen x

Sunday, 14 June 2015

Pretty Purple Pattern Over Holo

Hi everyone!

I'm currently taking part in a Weekly Nail Art Challenge on Instagram and this weeks theme is holo + patterns. 

My original idea for this mani included a neon water marble, however after a devastating incident involving liquid latex and my carpet I have given up on watermarbling once again. I *will* succeed one day, but today is not that day (nor is tomorrow, probably!)

After my disaster, I decided to paint two layers of GOSH 'Holographic Hero' and stamped the tips using MoYou London Pro Plate #4 and my Hello Kitty polish 'Respect'. Respect is actually a dark blue shade, but it came out a deep purple when I stamped over the silver holo. It's a lovely and unexpected combination!

holographic-stamped-nails-wnac
Holographic Hero stamped with Respect using MoYou London Pro Plate #4

Unfortunately my camera just didn't want to demonstrate the holo-goodness of this polish no matter how hard I tried to capture it! You'll just have to believe me :)

holographic-stamped-nails-wnac
Obligatory (but blurry) macro shot

holographic-stamped-nails-wnac


Search the hashtag #wnac15 on Instagram to see all of the wonderful manicures other people have come up with as part of the challenge.

Thanks for reading!

Helen x

Monday, 1 June 2015

**Review** Nail Water Decals - BornPrettyStore

Hello!

I was recently contacted by Born Pretty Store to ask if I would like to review some of their products - of course I jumped at the chance to try out some of their stuff! Is there a better place to buy all of your nail art items? I think not! If you haven't yet stumbled across BPS, you are missing a treat!

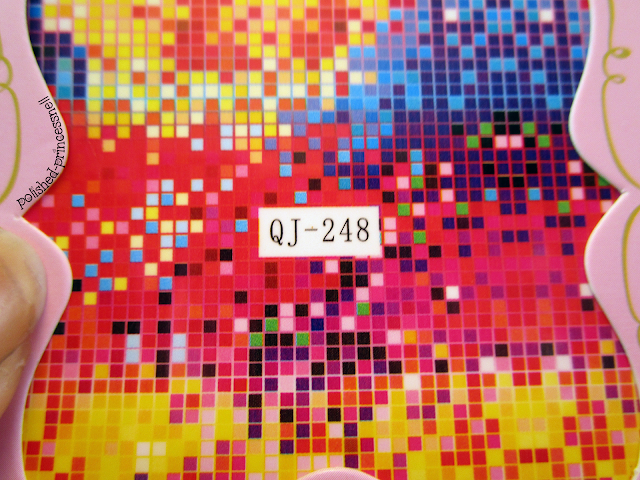
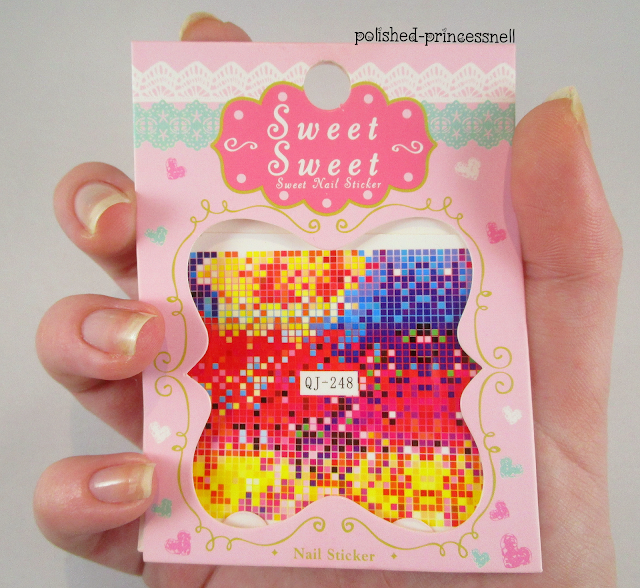
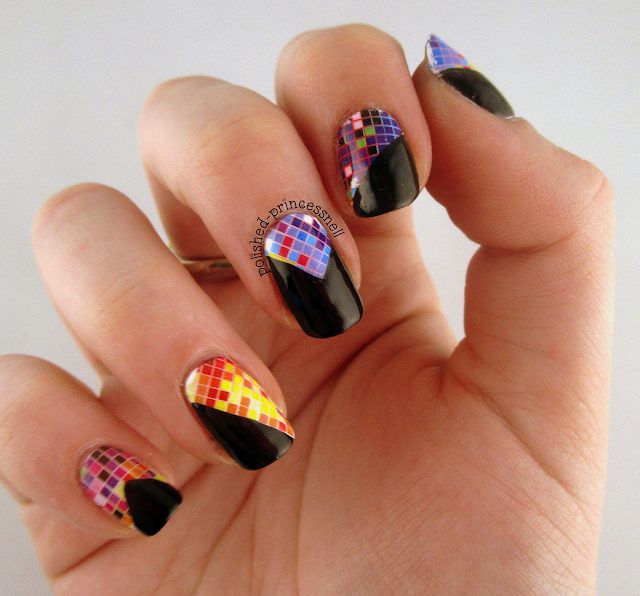
My items arrived this week and I have three review posts to feature my new stuff. The first in line are these super bright geometric water decals. I chose product QJ-248*, which reminded me of colourful pixels! I loved the fact that the colours and pattern is random and how bright it appeared on the store page. When they arrived I was pleased to see that the colours are just as vivid in real life.

review-bornprettystore-water-decals
Available to buy here

review-bornprettystore-water-decals-pixel
Pixel water decals

I was a little disappointed when I first opened the decal, as it looks like such a tiny square ("how will I fit this on ten nails?!" was my panicky cry to my boyfriend), but it goes a surprisingly long way and I even had leftovers! As these decals aren't of individual items (such as these adorable owl designs), if you have particularly long nails it may be worth purchasing two sets to fit them on all nails.

review-bornprettystore-water-decals-size
One sheet of water decals

Having never tried water decals, I was a little nervous that it would be a total failure (as we all know practice makes perfect), but I'm pleased to say that the decals were super easy to use, and that all errors appeared to be with my own technique/application rather than a fault of the actual product. 

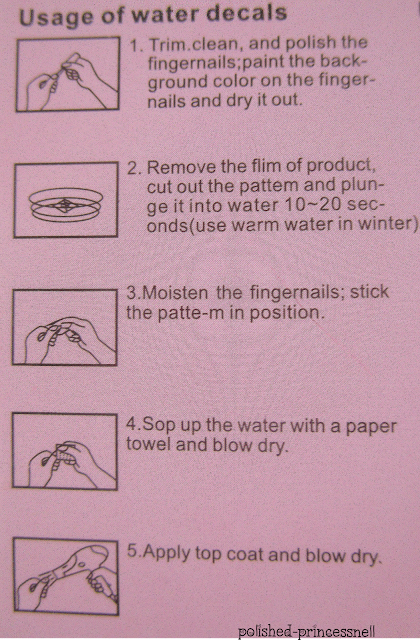
The instructions on the back of the packet are quite straightforward (see below). The basic idea is to paint your nails in a base colour of your choice, remove the plastic film from the decal, cut to size and then dunk into water for 10-20 seconds. After this time the transfer should then easily slide from the cardboard backing (think of kids temporary tattoos!) and you can place it on your nail and finish with topcoat.

I chose my new favourite white from MoYou London as a base - 'White Knight'. This polish is opaque in one generous coat, and white allowed the colours of the decal to pop!

review-bornprettystore-water-decals-moyou-london
MoYou London 'White Knight'


review-bornprettystore-water-decals-instructions
Water decal instructions
The instructions say to 'blow dry'. I must admit I did not do this step as I didn't think it was needed. Actually, on one or two nails I had the issue of the decal being too dry, so I lightly wet my fingernail to help the decal to adhere. This seemed to work perfectly and in general the decals transferred to my nails easily.

Here is the finished design:

review-bornprettystore-water-decals-nails
Water decal manicure


I used Rimmel 'Black Out' to contrast the colours in the transfers. 


review-bornprettystore-water-decals-nails
I love how vibrant the colours are over a white base
As you can see from the photos, I had a bit of trouble keeping the design intact once it was on the nail. I discovered through trial and error that this was due to adding topcoat too quickly (so the transfer 'dragged' and tore), and also from hasty clean-up. Here is a close-up of the topcoat issue:

And so, for once, wrapping my tip was not a good idea!

Overall I am very pleased to have finally tried water decals, especially as they are so quick and easy to use. These geometric style decals add a fun pattern and lots of colour to your nails in no time at all! Plus, I even have some left over to practice more, although I am definitely going to be ordering these, these and these from BornPrettyStore.com soon!

review-bornprettystore-water-decals-nails
Leftovers!


The water decals shown here can be purchased from this page for $2.18 (less than £1.50!) Use my code CESH10 to get 10% off your order. Did I also mention that BornPretty do free worldwide shipping?! No excuses not to give them a go ;)

review-bornprettystore-water-decals-nails
The finished look


Thanks for reading!

Helen x

*Items provided by BornPrettyStore for my impartial review


Friday, 3 April 2015

Stamping Over Ombré Nails - MoYou London Princess Collection

Hello lovelies!

After a busy few days of visiting family 300 miles away I am now back to the lovely city of Bristol and have been working on a pretty little ombré manicure for you all, stamped over with MoYou Princess collection plate #10. I've been wanting to do something like this for a while and my nails are now long enough for it to be worthwhile!

I wanted this to be very feminine and pretty, so I chose some cute pinks to make my ombré with - Rimmel 'Rose Libertine', Essie 'Flawless', and Rimmel 'Lose Your Lingerie'. I prepped my nails before sponging with Barry M 'Matt White' to ensure that my pinks were bright enough on the nail. 

L-R: Rose Libertine / Flawless / Lose Your Lingerie / Matt White


I think this is actually my first ombré (different tones of the same colour hue), as I usually do gradients (different colours blended together). I absolutely love how the ombré turned out, and couldn't resist snapping a few pics before I stamped all over it! 

My first attempt at ombré nails

I recently picked up my MoYou London Princess set from Boots (available to buy online here), and hadn't tried it out. I love the branding that MoYou London have - it reminds me slightly of Soap and Glory (also available from Boots)! The Princess Collection is really sweet, and includes lots of cutesy designs from hearts and flowers to raindrops and bunnies! It's adorable!

I used plate number 10 and I have circled the particular image below. I chose two designs from the plate - interlocking love hearts and butterflies, alternating on each nail. Stamping in white allowed the patterns to 'fade' into the lighter part of the ombré.

MoYou London Princess Collection

Stamped using MoYou London Princess plate #10

My cuticles are in awful shape at the moment, so I apologise for the raggedy dryness. I'm using extra amounts of my favourite cuticle rescue treatment Lemony Flutter Cuticle Butter which is available from Lush here. It smells amazing and you can feel the goodness seeping into your nails and cuticles when you apply it. If you haven't tried it I highly recommend you do!

I love this mani and hope that I continue to improve my stamping so I can really start incorporating the technique into other nail designs.

Thanks for reading!

Helen x