Showing posts with label designs. Show all posts

Thursday, 16 July 2015

Polish Me Silly - Lilac Lover Thermal **Swatch**

Hi everyone!

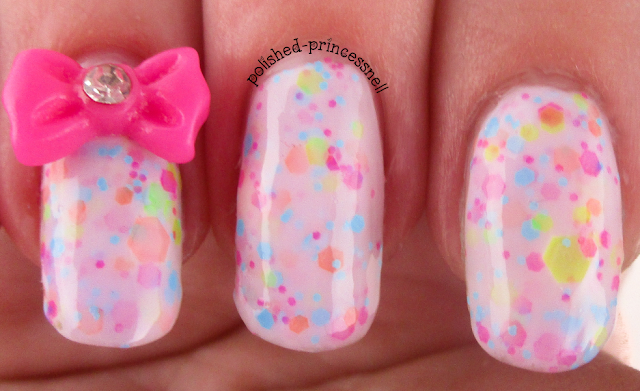
Today I am wearing one of my favourite polishes. 'Lilac Lover' is a thermal crelly polish by indie brand Polish Me Silly and it is just gorgeous. The colour shifts from a creamy white when warm to a deep lilac when cold, and on longer nails the transition is beautiful :)

lilac-lover-thermal-polish-swatch
Polish Me Silly - Lilac Lover

You can buy this polish in the UK from Rainbow Connection for £9.80, and there are other colours available too! I'm totally going to be purchasing the whole collection at some point.

As you can see, this lacquer is jam-packed full of bright matte glitter in all shapes and sizes. In these swatches I am wearing three coats on each nail as I wanted it quite opaque, but it is also gorgeous with only one or two coats too.

lilac-lover-thermal-polish-swatch
Oooooohhhhhh <3

The application is great and you don't have to 'fish around' for pieces of glitter. I also didn't have to spread the glitter at all - this is how it applied first time! Love it!

lilac-lover-thermal-polish-swatch
Lilac Lover when cold (please ignore water droplets - I had to chill my hands somehow!

lilac-lover-thermal-polish-swatch
Lilac Lover when warm

lilac-lover-thermal-polish-swatch

On my pinkie I added a coat of Kandy Colors 'Hey Girl' which is a neon pink jelly polish. The cute bow is from a set I bought on Amazon.

lilac-lover-thermal-polish-swatch

I am so in love with this polish and this brand that I just can't contain my excitement! I've promised myself that I won't buy any new nail related items in July as I have about 40 polishes that I have bought and not yet used (oops!), but as soon as August comes around I am sure to be buying more Polish Me Silly goodies :)

Thanks for reading!

Helen x

Sunday, 12 July 2015

Rainbow Tips!

Hi guys!

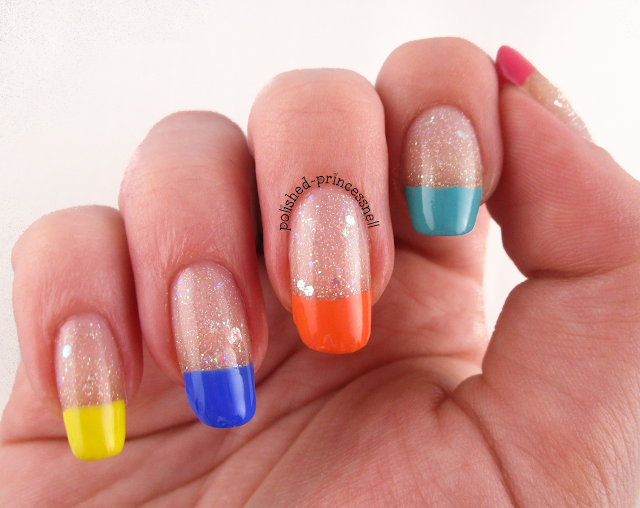
Today I have a fun French manicure with a twist to show you!


rainbow-french-tip-nails
Rainbow French Manicure

This mani is super easy to create and didn't take very long at all. I started out with a coat of China Glaze 'Fairy Dust' then added a coat of Jess 'Fresh' iridescent glitter to give the finished look some flakie goodness. I then simply painted the French tips using a range of coloured polishes (see below for details) and finished with a quick-dry topcoat. Et voila!


rainbow-french-tip-nails


Colours used are (left - right): China Glaze 'Sexy Lady'/ Nicole By OPI 'Teal Me Something New' / NYC 'Summer In NYC' / Barry M 'Damson' / NYC 'Lexington Yellow'

rainbow-french-tip-nails

rainbow-french-tip-nails

I added a 'splat' design to this manicure using MoYou London Princess plate #09 but I definitely prefer it without. What do you think?

rainbow-french-tip-nails

Thanks for reading!

Helen x

Friday, 10 July 2015

Lace Stamped Nails

Hi guys!

Wow, two blog posts in one day! I'm on a roll :)

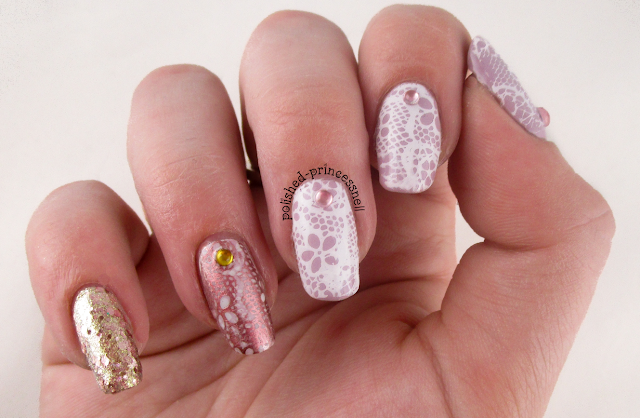
Today's manicure is one that I've been waiting to try out for a long time - lace nails! I finally ordered myself a lace design stamping plate from BornPrettyStore.com, and couldn't wait to use it in some nail art!


lace-stamped-nail-art

For this manicure I used a new Barry M Speedy Quick-Dry polish from their summer release - 'Lap Of Honour'. I painted my thumb, index and middle finger with this then stamped over it using Color Club 'French Tip' polish. On my ring finger I added a base of OPI 'My Boyfriend Scales Walls', then stamped with Claire's 'Liquid Metal Rose Gold'. Finally, I covered my pinkie with a gorgeous glitter polish from Maybelline called 'Gilded Rose'.


lace-stamped-nail-art

I couldn't resist sticking a few gems onto the nail as a finishing touch!


lace-stamped-nail-art

This manicure is way more delicate than I would normally wear, but I got a lot of compliments on it and love the detail in the stamp. I hadn't tried out any of the Born Pretty Store stamping plates before, but I must say I am impressed with the quality. The lines are well defined and create a clear image on the stamp and on the nail. For only £2.50 you really can't complain. Free shipping too! Enter my code CESH10 for 10% off your order at BornPrettyStore.com :)

Thanks for reading!

Helen x

Tuesday, 30 June 2015

NEON WEEK: Radial Gradient and Stamping

Hi!

I've been *loving* the weather here over the last few days and today we saw the temperature reach 30 degrees Celsius which is lovely! I'm so glad I have a neon theme going on at the moment because it's complimenting the sunshine wonderfully :)


neon-radial-gradient-stamping
 Stamped Neon Radial Gradient

Today's nails include a technique that I have only tried a couple of times - a radial gradient (where the gradient works outwards from the centre of the nail, rather than horizontally or vertically across the nail). I found it really difficult to get consistent gradients across all ten fingers, but I'm pretty happy with the results anyway. I added a pretty circular-style stamped image, and of course I had to stick some sparkly gems on there too!

The polishes used for this were all Models Own - 'Bikini' (yellow), 'Sun Hat' (pink) and 'Pukka Purple'. I used Pukka Purple and Bundle Monster stamping plate #BM-618 for the design. Oh, and a sprinkling of China Glaze 'Fairy Dust' was added to the gradient.

neon-radial-gradient-stamping
My left hand came out better than my right hand (even though I'm left handed...)

neon-radial-gradient-stamping
FYI my stamping is *meant* to be off-centre...

neon-radial-gradient-stamping
A bit blurry but look at the pretty Fairy Dust! <3

Hope you like them :)

Thanks for reading!

Helen x

Sunday, 28 June 2015

NEON WEEK: Leopard Print

Hi everyone!

Every now and then I am going to base my nail art on one particular theme for seven days. I'm hoping that this will allow me to practice my techniques, become more creative, and challenge my thinking. This week I have decided to start bright and choose neon!

neon-leopard-print-nail-art
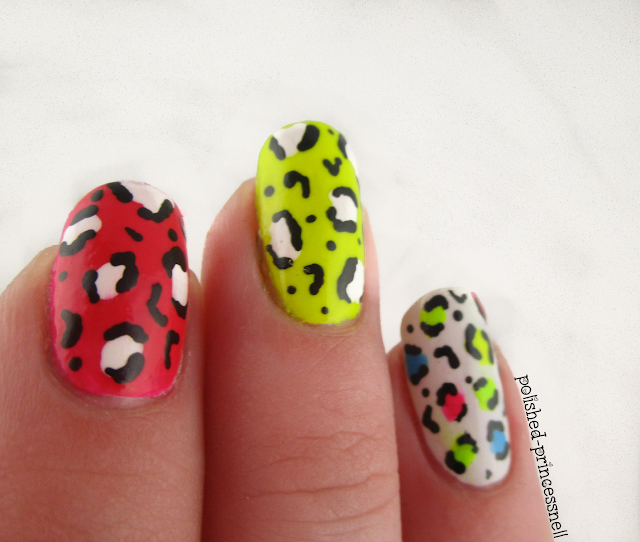
Neon leopard print
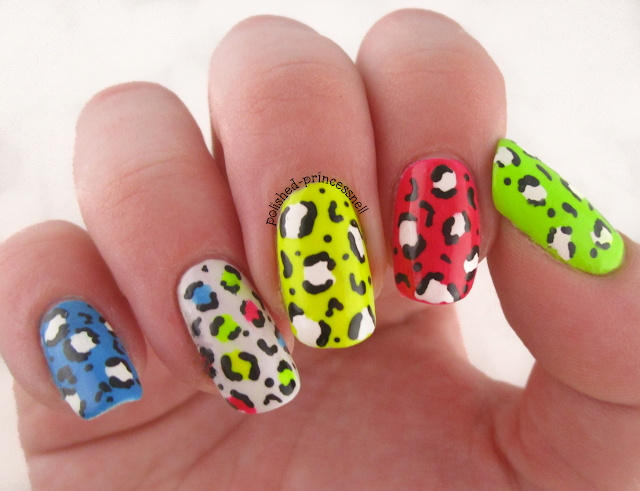
For my first mani, I went back to one of the first nail art patterns that I tried - leopard print. Leopard print is super easy to achieve and looks really cool in neon colours :)

neon-leopard-print-nail-art
L-R: Flip Flop / Bubblegum / Louis Lemon / Kensington Park Road 

For this design I used Models Own 'Louis Lemon' and 'Bubblegum' from the Iced Neon collection, 'Flip Flop' from the Polish For Tans collection, and Nails Inc. 'Kensington Park Road'. For the detail I used black and white acrylic paints and a toothpick.


neon-leopard-print-nail-art
Neon leopard print
neon-leopard-print-nail-art

neon-leopard-print-nail-art
Get your sunglasses out!
On my left hand I used the same colours but mixed them around a bit - I hate things being too uniform!

neon-leopard-print-nail-art
Say hi to Cindy :)
Thanks for reading!

Helen x

Textured Negative Space Nails

Hey guys!

Today I have a negative space manicure that I created using two polishes from the Nicole by OPI Roughles Collection. I used 'On What Grounds' (teal) and 'I'm Stucco On You' (purple). These polishes dry to a speckled, textured finish and are available in four pretty pastel shades (purple, teal, pink and yellow). I bought mine at Superdrug for £7.99 each.


negative-space-nails-roughles-textured-polish
Nicole By OPI - 'I'm Stucco On You' & 'On What Grounds?'
I actually added topcoat to this design which eliminated some of the texture. What I like about these polishes over other textured finishes are the tiny little specks of different colour - it adds a unique quality to the textured finish.


negative-space-nails-roughles-textured-polish
Negative Space

negative-space-nails-roughles-textured-polish
See the little specks of colour?
I'm still not sure if I like textured finishes or not. I have so many textured polishes in my collection, so something draws me to them, but I'm still figuring out how to use them successfully in nail art.


negative-space-nails-roughles-textured-polish
Rougles Negative Space Nails

What do you think? Yay or nay? Let me know in the comments! 

Thanks for reading!

Helen x

Sunday, 21 June 2015

**Review** Colourful Loose Glitter - BornPrettyStore

Hi guys!

Today I have a super sparkly review for you that makes me happy inside! BornPrettyStore very kindly sent me some of this mixed loose glitter* to play around with, so of course I covered my nails with it! I don't do subtle.

bornprettystore-review-loose-glitter-placement-manicure
ALL OF THIS FOR ONLY $0.99!

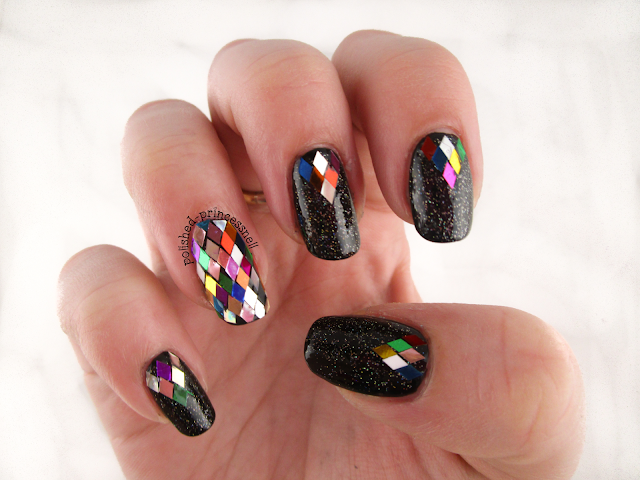
This is a rainbow filled pot of glittery goodness! The diamond shaped glitter comes in a pot full of green, blue, silver, gold, pink/purple, white, black, clear and bronze pieces. Phew!

I wanted to create a similar effect to my glitter framed nails from a little while ago, so I started with a base of Rimmel 'Black Out'. Then by applying a coat of Rimmel 'Clear' polish, I began placing the loose glitter onto my nail using a small dotting tool to position the pieces. The glitter lay flat on the nail and was easy to trim with cuticle clippers in order to get a close fit. Another thing I liked about this particular glitter is that there weren't any clumps of uncut diamonds, which is an issue I've had with other glitters. Plus, after two heavy coats of topcoat the glitter was just as shiny as when I started and almost smooth! It's a big bonus for me that the glitter pieces didn't dull after a topcoat was applied, again as this is a problem I have had in the past with other glitters.
 
bornprettystore-review-loose-glitter-placement-manicure

Because there is simply no such thing as too much glitter, I decided to add a coat of China Glaze 'Fairy Dust'.

I'll just leave a few pics here to show you the mini disco ball from a few angles :)

bornprettystore-review-loose-glitter-placement-manicure
I couldn't stop admiring my nails when I wore this

bornprettystore-review-loose-glitter-placement-manicure
I even managed to do my left (dominant) hand!

bornprettystore-review-loose-glitter-placement-manicure
A bit blurry but still pretty :)

bornprettystore-review-loose-glitter-placement-manicure
The finished look


bornprettystore-review-loose-glitter-placement-manicure
Get lost in the sparkles...


bornprettystore-review-loose-glitter-placement-manicure
Born Pretty Loose Glitter and China Glaze = ALL OF THE SPARKLE!

I hope you like this as much as I do. And *PLEASE* go to BornPrettyStore.com, pop a few (amazingly priced) items into your cart, enter my exclusive code CESH10 to receive 10% discount, enjoy the totally free international shipping, and enjoy playing with your goodies when they arrive. I promise you'll be back for more!

Thanks for reading!

Helen x

born-pretty-store-discount-code


*Items provided by BornPrettyStore for my impartial review