Showing posts with label easy nail art. Show all posts

Wednesday, 2 September 2015

Galaxy Nail Art

Hi guys!

Today I want to share a short post with you featuring some galaxy nails that created recently. This is my third attempt at this design, and so far is my favourite - they actually look like galaxies! Woohoo!

galaxy-nail-art

For this I started with a base of Barry M 'Black' and sponged/dotted a galaxy 'shape' with Color Club 'French Tip' white polish. I then used too many polishes to remember in pinks, blues, greens and purples and dabbed them around the white markings with my sponge. Finally, a few pieces of Ciate 'Celestial' glitter and a thin layer of China Glaze 'Fairy Dust' and my galaxy was complete! :D

galaxy-nail-art

galaxy-nail-art

Thanks for reading!

Helen x

Monday, 31 August 2015

Glitter Jelly Sandwich Nail Art!

Hi everyone!

Today's mani is a super bright, super squishy neon jelly glitter sandwich! Woah!


glitter-jelly-sandwich-nail-art

I created this look by layering glitter polish between thin coats of jelly polish, which does take forever as you have to wait for each layer to dry before adding the next, but LOOK AT THE PRETTY!!! For this design I used Kandy Colors 'Retro' (blue), 'Hey Girl' (pink) and 'Carnival' (green) along with Nicole by OPI 'Party Bus' glitter. I picked up 'Party Bus' at TK Maxx for £3.99 and I'm so glad I didn't pay full price for it. Even though I absolutely love the polish, I unfortunately ended up spending a lot of time fishing out the bigger pieces of glitter which is so frustrating! Less clear base and more glitter please, Nicole by OPI!


glitter-jelly-sandwich-nail-art

No glitter jelly sandwich is complete without snapping a few close-ups, so here they are!:


glitter-jelly-sandwich-nail-art

glitter-jelly-sandwich-nail-art

glitter-jelly-sandwich-nail-art

glitter-jelly-sandwich-nail-art

I love jelly polishes and these ones from Kandy Colors really do have the 'wow factor'. But I'm always looking for more to add to my collection! What's your favourite jelly polish?

Thanks for reading!

Helen x
Sunday, 23 August 2015

Splash Floral Nail Art

Hi everyone!

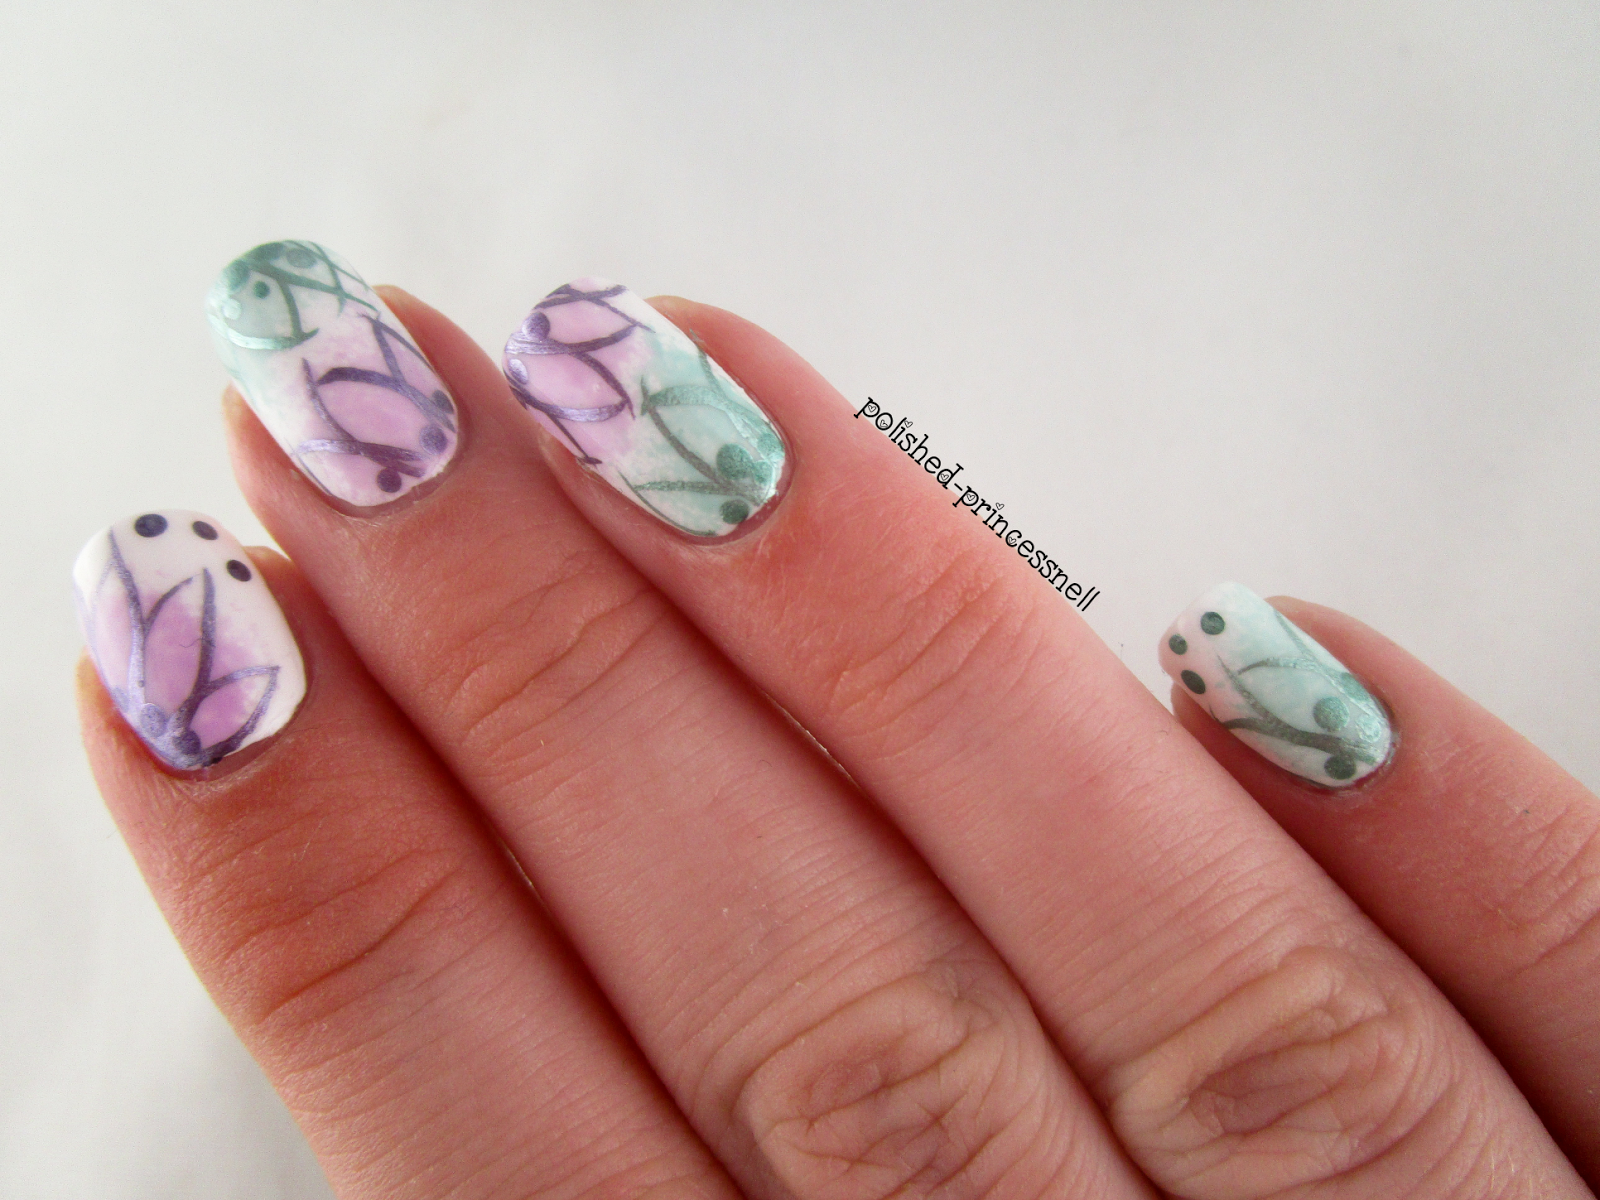
This week's prompt for the Weekly Nail Art Challenge over on Instagram is 'mint and lilac' with a summer theme. I decided to create an abstract flower design for this one :)


I started off with a base of Essence 'Wild White Ways', then using a torn sponge, I dabbed on Ciate 'Sugar Plum' and Essie 'Mint Candy Apple'. Finally, I added the flower outlines using a striping brush and two polishes from Claire's Liquid Metal collection - 'Teal' and 'Purple' (very imaginatively named, Essence!) 


I kind of wish I hadn't put two flowers on my middle and ring fingers, as it makes the mani seem a bit cluttered, but overall I'm really pleased with this one. It's a refreshing change as it's much more delicate than the neon designs I've been wearing recently! 


As always, head over to Instagram to see all of the entries into the Weekly Nail Art Challenge - just search #wnac2015 :)

Thanks for reading!

Helen x

Sponging and Stamping!

Hi guys!

Today I have some pretty stamped nails to show you that I created after being inspired by this manicure by Sveta Sanders on Instagram. I loved the colours together and thought it seemed simple enough to recreate without too much hassle! 


sponged-nails-stamping-nail-art

I started with a base of Fuse Gelnamel 'Intens-so-fly' which is a muted turquoise gel. You can't actually see much of the base on my nails as it was mostly covered by the sponging, which I am counting as a good thing as I really don't like the colour! I then used Models Own 'Pukka Purple', Models Own 'Sun Hat' and China Glaze 'Grass Is Lime Greener' to randomly sponge the colours onto the nail, making sure to overlap them. I love how this looks! It reminds me of graffiti :)


sponged-nails-stamping-nail-art

sponged-nails-stamping-nail-art

sponged-nails-stamping-nail-art

Not content with the base as it was, I decided to add a touch of white stamping using MoYou London Pro-08 plate and one of the cute flowered designs.


sponged-nails-stamping-nail-art

sponged-nails-stamping-nail-art

sponged-nails-stamping-nail-art

To finish the look, I used neon studs as the centre of the larger flowers and topped with topcoat to seal it all in. 

Hope you like these as much as I do!  <3

Thanks for reading!

Helen x

Tuesday, 18 August 2015

Pretty In Pink Nails

Hi guys,

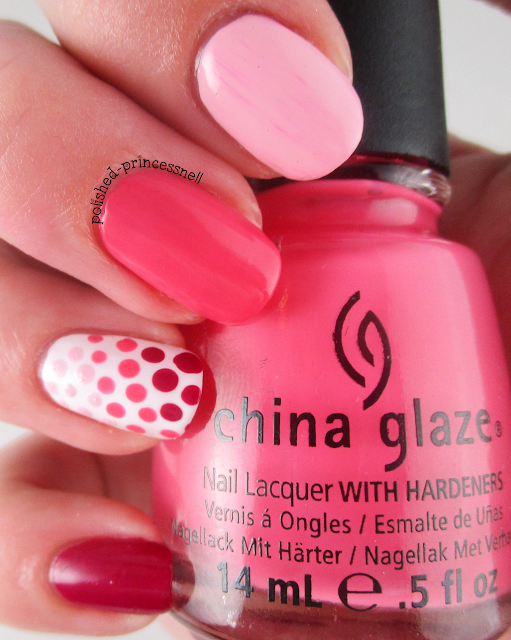
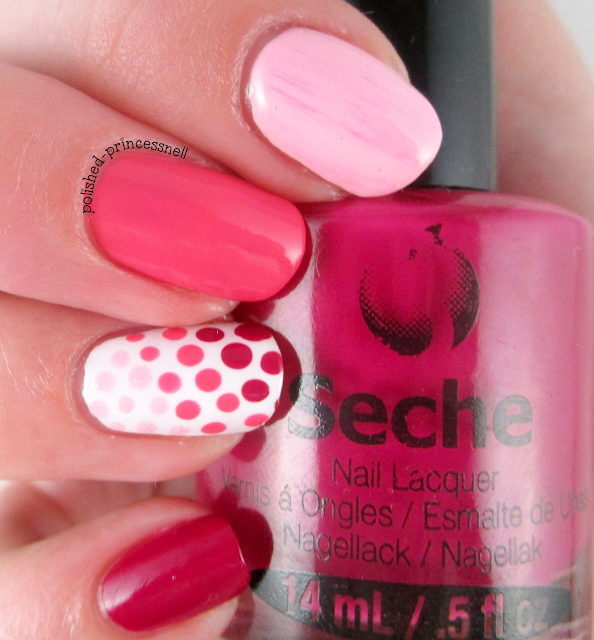
Today I have some super simple and girly nails to show you. This was inspired by UK indie maker PolishedbyLeanne who is giving away her sparkly 'gemstone' polish collection to one lucky winner over on Instagram. And all you have to do is paint your nails pink! Pink is my favourite colour, and I definitely don't use it enough in my nail art, so I really enjoyed this manicure :)

pink-white-ombre-polka-dot-nails

The polishes I used here are Barry M 'Kiss Me Quick', China Glaze 'Sexy Lady', and Seche 'Opulant'. I also used my new fave one-coat white - Essence 'Wild White Ways'. As soon as I placed brush to nail I knew that this was a winner, and such a bargain purchase at only £1.60! I think I need to stock up on this polish as I'll be using it a lot! Unfortunately, my topcoat picked up some of the darker polish and spread it onto the pastel shade, leaving me with a dry-brush effect streak. Lesson learned: don't be so hasty!

pink-white-ombre-polka-dot-nails
Barry M - Kiss Me Quick
pink-white-ombre-polka-dot-nails
China Glaze - Sexy Lady
pink-white-ombre-polka-dot-nails
Seche - Opulant
For those who are interested in the progress of my stubby little thumb nail after it snapped halfway down about two weeks ago, take a peek at the pic below. Ugh, it still looks so silly! I think I'm going to be leaving her out of photos for a little while yet :(

pink-white-ombre-polka-dot-nails

pink-white-ombre-polka-dot-nails

pink-white-ombre-polka-dot-nails


Thanks for reading!

Helen x

Friday, 7 August 2015

Cute Checkered Floral Mani

Hi everyone!

Today I have a checkered design with floral accents to show you. I have been wanting to do something like this for a while, and the finished look reminds me of curtains or towels that you might have in your kitchen! Very summery and cute!

checkered-floral-nail-art

For this manicure I started with a base of Barry M 'Coconut' which is the most perfect milky off-white colour <3. Once dry, I placed striping tape in a checkered pattern on my nails and topped with Barry M 'Sky Blue' on my thumb, index and pinkie fingers, then Collection 'Peach Blossom' on my middle and ring fingers. For the floral design, I blended 'Sky Blue' and 'Damson' (by Barry M) on the nail, and finished with Ciate 'Mojito' for the leaves.

checkered-floral-nail-art

I'm pretty pleased with how these came out and want to try a similar design with more of a yellow theme as I have a very particular set of kitchen curtains in mind which this doesn't quite capture!

checkered-floral-nail-art

checkered-floral-nail-art

checkered-floral-nail-art

Hope you like them :)

Thanks for reading!

Helen

Saturday, 1 August 2015

Travel In Colour Gradient Nails

Hi everyone!

This post was meant to have some nail art in it, but I liked the base to the art so much that I have dedicated a whole post to it! Let's take a look:

gradient-nail-art-travel-in-color-china-glaze

I used three colours to create a mix of gradients: OPI 'Ski Teal We Drop', Barry M 'Sugarplum' and Maybelline 'Grey Beats'. I added one coat of China Glaze 'Travel In Color' to each nail and topped with Ciate Speed Pro Topcoat.

gradient-nail-art-travel-in-color-china-glaze

gradient-nail-art-travel-in-color-china-glaze

gradient-nail-art-travel-in-color-china-glaze

'Ski Teal We Drop' by OPI is, as the name suggest, a dark teal colour, however this was hidden by the glitter topper goodness of China Glaze. The topper made the colours below it shift to beautiful purples, pinks, golds, blues and greens - so pretty! The photo below kind of demonstrates this over the teal and grey polish gradient.

gradient-nail-art-travel-in-color-china-glaze

I actually added some nail art to this after taking these pics, but I'm unsure as to whether I will post them as they were a bit rubbish. This is definitely a set of nails that look best left simple!

gradient-nail-art-travel-in-color-china-glaze

Thanks for reading!

Helen x

Monday, 20 July 2015

Pink and Grey Saran Wrap Nails

Hi!

I have been playing around with one of my favourite nail art techniques today - dry marbling/saran wrap nails. The smoky marbled effect is so beautiful and is incredibly easy to do. The basic idea is to blob a few colours on your nails and then press a plastic food bag or cling film into the colours to blend them together. Magic!

dry-marble-saran-wrap-nails

For this manicure I used Rimmel 'Punk Rock' (grey) from their Salon Pro collection. I love the polishes in the Salon Pro range and they apply like a dream. I don't own enough of them in my opinion, although my boyfriend will most likely disagree! The pink is Maybelline 'Pink Punk', and the glitter is Maybelline 'Silver Touch'. I am also really impressed with these two polishes, especially Silver Touch. Finally, I used Sinful Colors 'Mauve' as a base for, and within, the saran wrap nails to lighten the manicure up a bit.


dry-marble-saran-wrap-nails
Maybelline 'Silver Touch' - I love the larger silver hexes in this polish!

I like that the glitter is slightly purple/lavender leaning as I think it brings the whole design together nicely :)


dry-marble-saran-wrap-nails

dry-marble-saran-wrap-nails

dry-marble-saran-wrap-nails

Thanks for reading!

Helen x

Rimmel - Midnight Kiss **Swatch**

Hey guys!

Today I have a swatch of Rimmel 'Midnight Kiss' to show you. Midnight Kiss is a matte polish in a rich navy shade that is part of their 'Velvet Matte' collection.

rimmel-midnight-kiss-velvet-matte-swatch

I found the application quite difficult to work with in terms of the consistency of the polish - it went on thick and I was doubtful that it would level out. However, to my surprise it started spreading across the nail and the results weren't half bad! You can see in the photo below how smooth the finish is.

rimmel-midnight-kiss-velvet-matte-swatch

The polish appears much lighter in the bottle than it does on the nail. I found one coat to be too streaky so I applied two, but it definitely darkened the overall look quite a bit,

rimmel-midnight-kiss-velvet-matte-swatch

To add a little French twist to this manicure, I coated my tips in Rimmel 'Clear' polish to add a glossy finish. I love this look - simple and sophisticated (not my usual style!), plus it protects your manicure from chipping and tip wear. Win-win!

rimmel-midnight-kiss-velvet-matte-swatch

Thanks for reading!

Helen x