Showing posts with label rimmel. Show all posts

Tuesday, 21 July 2015

Classic Monochrome Nails

Hi!

Every now and then I get a hankering for a classic monochrome mani, so that is what I'm wearing on my nails today!


For this design I used Rimmel 'White Hot Love', Rimmel 'Black Out' and Binky London 'Gold Rush'. I stamped my design using my brand new super duper Fab UR Nails Fun17 plate, which I am in LOVE with! This design is so pretty and I just love that plate in general! <3


Hope you like it :)

Thanks for reading!

Helen x

Monday, 20 July 2015

Rimmel - Midnight Kiss **Swatch**

Hey guys!

Today I have a swatch of Rimmel 'Midnight Kiss' to show you. Midnight Kiss is a matte polish in a rich navy shade that is part of their 'Velvet Matte' collection.

rimmel-midnight-kiss-velvet-matte-swatch

I found the application quite difficult to work with in terms of the consistency of the polish - it went on thick and I was doubtful that it would level out. However, to my surprise it started spreading across the nail and the results weren't half bad! You can see in the photo below how smooth the finish is.

rimmel-midnight-kiss-velvet-matte-swatch

The polish appears much lighter in the bottle than it does on the nail. I found one coat to be too streaky so I applied two, but it definitely darkened the overall look quite a bit,

rimmel-midnight-kiss-velvet-matte-swatch

To add a little French twist to this manicure, I coated my tips in Rimmel 'Clear' polish to add a glossy finish. I love this look - simple and sophisticated (not my usual style!), plus it protects your manicure from chipping and tip wear. Win-win!

rimmel-midnight-kiss-velvet-matte-swatch

Thanks for reading!

Helen x

Monday, 1 June 2015

**Review** Nail Water Decals - BornPrettyStore

Hello!

I was recently contacted by Born Pretty Store to ask if I would like to review some of their products - of course I jumped at the chance to try out some of their stuff! Is there a better place to buy all of your nail art items? I think not! If you haven't yet stumbled across BPS, you are missing a treat!

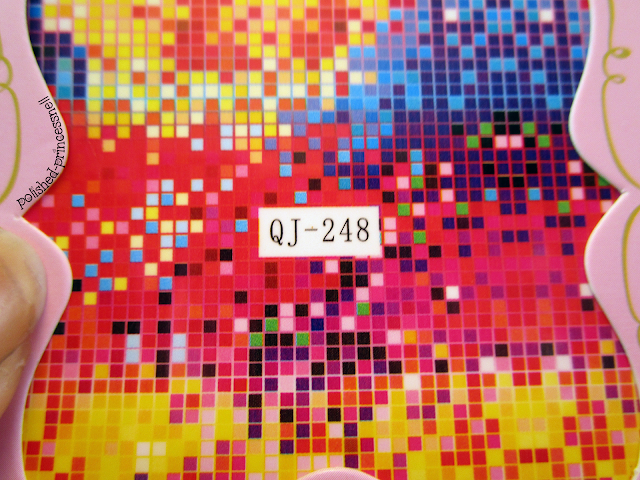
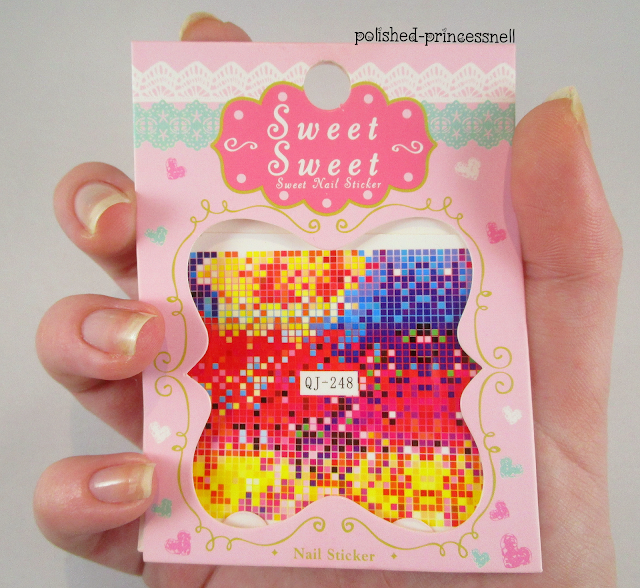
My items arrived this week and I have three review posts to feature my new stuff. The first in line are these super bright geometric water decals. I chose product QJ-248*, which reminded me of colourful pixels! I loved the fact that the colours and pattern is random and how bright it appeared on the store page. When they arrived I was pleased to see that the colours are just as vivid in real life.

review-bornprettystore-water-decals
Available to buy here

review-bornprettystore-water-decals-pixel
Pixel water decals

I was a little disappointed when I first opened the decal, as it looks like such a tiny square ("how will I fit this on ten nails?!" was my panicky cry to my boyfriend), but it goes a surprisingly long way and I even had leftovers! As these decals aren't of individual items (such as these adorable owl designs), if you have particularly long nails it may be worth purchasing two sets to fit them on all nails.

review-bornprettystore-water-decals-size
One sheet of water decals

Having never tried water decals, I was a little nervous that it would be a total failure (as we all know practice makes perfect), but I'm pleased to say that the decals were super easy to use, and that all errors appeared to be with my own technique/application rather than a fault of the actual product. 

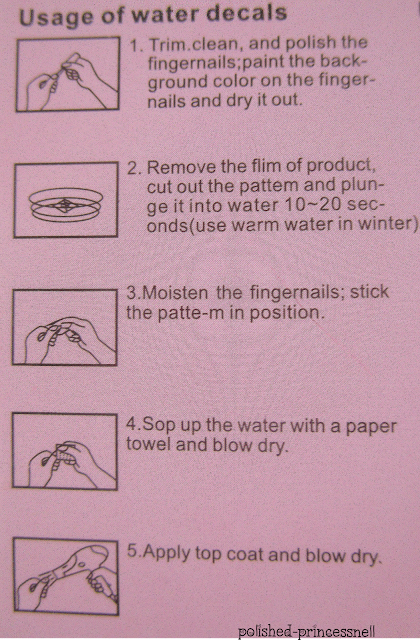
The instructions on the back of the packet are quite straightforward (see below). The basic idea is to paint your nails in a base colour of your choice, remove the plastic film from the decal, cut to size and then dunk into water for 10-20 seconds. After this time the transfer should then easily slide from the cardboard backing (think of kids temporary tattoos!) and you can place it on your nail and finish with topcoat.

I chose my new favourite white from MoYou London as a base - 'White Knight'. This polish is opaque in one generous coat, and white allowed the colours of the decal to pop!

review-bornprettystore-water-decals-moyou-london
MoYou London 'White Knight'


review-bornprettystore-water-decals-instructions
Water decal instructions
The instructions say to 'blow dry'. I must admit I did not do this step as I didn't think it was needed. Actually, on one or two nails I had the issue of the decal being too dry, so I lightly wet my fingernail to help the decal to adhere. This seemed to work perfectly and in general the decals transferred to my nails easily.

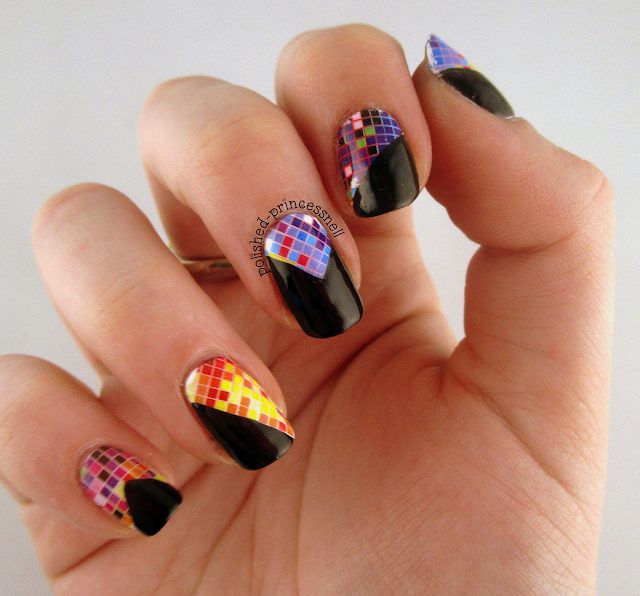
Here is the finished design:

review-bornprettystore-water-decals-nails
Water decal manicure


I used Rimmel 'Black Out' to contrast the colours in the transfers. 


review-bornprettystore-water-decals-nails
I love how vibrant the colours are over a white base
As you can see from the photos, I had a bit of trouble keeping the design intact once it was on the nail. I discovered through trial and error that this was due to adding topcoat too quickly (so the transfer 'dragged' and tore), and also from hasty clean-up. Here is a close-up of the topcoat issue:

And so, for once, wrapping my tip was not a good idea!

Overall I am very pleased to have finally tried water decals, especially as they are so quick and easy to use. These geometric style decals add a fun pattern and lots of colour to your nails in no time at all! Plus, I even have some left over to practice more, although I am definitely going to be ordering these, these and these from BornPrettyStore.com soon!

review-bornprettystore-water-decals-nails
Leftovers!


The water decals shown here can be purchased from this page for $2.18 (less than £1.50!) Use my code CESH10 to get 10% off your order. Did I also mention that BornPretty do free worldwide shipping?! No excuses not to give them a go ;)

review-bornprettystore-water-decals-nails
The finished look


Thanks for reading!

Helen x

*Items provided by BornPrettyStore for my impartial review


Saturday, 25 April 2015

Mani Swap - Stripey Nails with Pink Rose Accents

Hi everyone!

It's been such a busy couple of weeks as I've started a new job and I'm finally getting my life on track again, I've not had a chance to sit down and write a proper post. But now it's the weekend I get to catch up on the fun stuff, like painting nails and writing about it! :)

Today I have a manicure that I created in a recent mani swap with Alyssa (The Girly Engineer on Instagram). It's a beautiful and delicate design, integrating chic pastel stripes with vintage style roses. Very cute! Alyssa decided to try out my sugar skull mani that I created a little while ago (blog post here), and she did an awesome job!

Mani Swap with Alyssa AKA @thegirlyengineer
My nails are on the left, Alyssa's nails are on the right

For this design I decided to use quite muted colours, as I wanted this to be as delicate as possible, I chose the gorgeous Rimmel 'Rose Libertine', (a lovely dusty pink) and Barry M 'Kiss Me Quick' for the roses, with Essie 'Mint Candy Apple' leaves. My base was Barry M 'Coconut' and Rimmel 'Breakfast In Bed'.

L-R: Rose Libertine / Kiss Me Quick / Coconut / Mint Candy Apple / Breakfast In Bed

I just want to take a moment to talk about my base colour - Barry M's amazing Coconut. This is a shade I've been wanting to get my hands on for a while. It is the perfect base for nail art as it is creamy off-white (almost nude), so it doesn't have the harsh starkness that some white polishes have. It is up there with OPI 'My Vampire Is Buff' as my favourite nude-ish base, but at only £3.99 a bottle it's an absolute steal compared to brands such as OPI! Here is a photo of Coconut on it's own:

Barry M Coconut, available in Boots and Superdrug for £3.99

The final product!

This was my first attempt at roses, so they are a bit 'blobby' and don't have the detail that I would have wanted, but I'll definitely try the technique again. Overall I'm happy with the outcome, and it was so much fun finally being able to do a mani swap, I'm hoping there'll be many more in the future!

Thanks for reading!

Helen x

Saturday, 11 April 2015

Rockstud Nails! Inspired by Valentino

Hello lovely people!

When I was 14 I received a Valentino perfume for Christmas. I remember being totally won over by the packaging, lots of bright colours and a crisp-looking cubed bottle. I cannot for the life of me find an image of the particular perfume online, which is a total disappointment, but I can assure you it was gorgeous! Recently I stumbled upon Valentino's new Rockstud Collection on Instagram, and again I'm totally won over - I love the contrast of bright colours with hints of gold accent coming from the studs which adorn each item. At approximately £1500, I'm not going to be able to afford/justify buying a Valentino bag, but the design is perfect to translate onto nails!

Valentino - Rockstud Collection

As always, I flicked through my swatch book to find the most suitable colours, and ended up using: Ciate 'Mojito', Rimmel 'Raw As Night', Rimmel 'Black Cherries', Sally Hansen 'Butter-fly Stroke', Seche 'Snapdragon',  and Nails Inc. 'Kensington Park Road'.


L-R: Mojito / Raw As Night / Black Cherries / Butter-fly Stroke / Snapdragon / Kensington Park Road

I completed the whole design freehand - no striping tape, no vinyls, no template at all - which I am very proud of, particularly my index and pinkie fingers! I added studs to every nail to keep in theme (any excuse to stick things to my nails!) 

Valentino Inspired Nails
I absolutely love wearing these, they are so bright and cheerful and totally me. I want to replicate this again in a few months to see if I can improve on my 'V' shapes, but I am absolutely happy with this as a first attempt.

Here are a few more photos:


And here is a final shot of both hands. I definitely think that I am getting better using my non-dominant hand for freehand designs, and I sometimes find that my left hand is actually better than my right. Maybe it's because I'm concentrating more? 


I hope you like these as much as I do. As always I'd LOVE to hear what you think, so please feel free to comment below or leave a message on my Facebook page!

Thanks for reading!

Helen x

PS If anyone would like to buy me a Valentino bag, I will wholeheartedly accept! :)

Saturday, 4 April 2015

Freehand Sugar Skull

Hello my lovelies!

I'm currently taking part in a nail art challenge which is being held on Instagram by @nailzz_designzz_, and day 3 is 'freehand'. I thought that this would be a good time to whip out my trusty Idiot's Guides Nail Art book written by The Lacquerologist (which I talk about here). I LOVE the sugar skull design, and decided to recreate it for this mani. Emily has a great tutorial very similar to the one in her book on her blog, so take a look!

For this mani I used the following polishes: Nails Inc. 'Notting Hill Gate', OPI 'My Boyfriend Scales Walls', Rimmel 'Black Out', Ciate 'Big Yellow Taxi', Seventeen 'Orange Soda', and Nails Inc. 'Kensington Park Road'.


L-R: Big Yellow Taxi / Black Out / My Boyfriend Scales Walls / Kensington Park Road / Orange Soda
Front: Notting Hill Gate (pink)

And here it is:


Sugar skull accent


I'm currently still using some brushes that I bought from Amazon and Poundland for my designs, but they aren't the best quality unfortunately. I have just ordered these (recommended on various blogs) so hopefully my detail can be a bit better once they arrive!


I absolutely love how this turned out - it's not perfect by any stretch of the imagination but my freehand skills are getting better all the time and I think sugar skulls are the perfect practising focus as they look even better when they aren't quite perfect! 

I'd love to hear your thoughts so please feel free to leave a comment :)

Thanks for reading!

Helen x