Hi guys,
I had an unfortunate incident involving my nails and a car door the other day which has resulted in having to file them to a super short length. This makes me sad, but I'm determined to make the most of them being short! Being part of the nub club isn't that bad, is it?
Anyway, on to the design for today. The prompt for day 15 of the 31 Day Challenge is delicate print, and here is what I came up with:
I decided to stick to a very sheer polish as my base for this: Essie 'Sugar Daddy', which is barely noticable on the nail, even though I applied three coats here! I stamped the lace pattern (this plate from Born Pretty Store) onto my bare nail before adding Sugar Daddy. I then added a thin French tip with Claire's 'Rose Gold Liquid Metal'. On my ring finger I used two layers of Maybelline 'Gilded Rose', which is a gorgeous gold and pink glitter polish.
Finally I placed a small pearl at the base of my middle finger using Gilded Rose to hold it in place, and topped with WAH London 'Classy Glassy Glossy Topcoat'.
Thanks for reading!
Helen x
Showing posts with label essie. Show all posts
Wednesday, 16 September 2015
Sunday, 23 August 2015
Splash Floral Nail Art
Hi everyone!
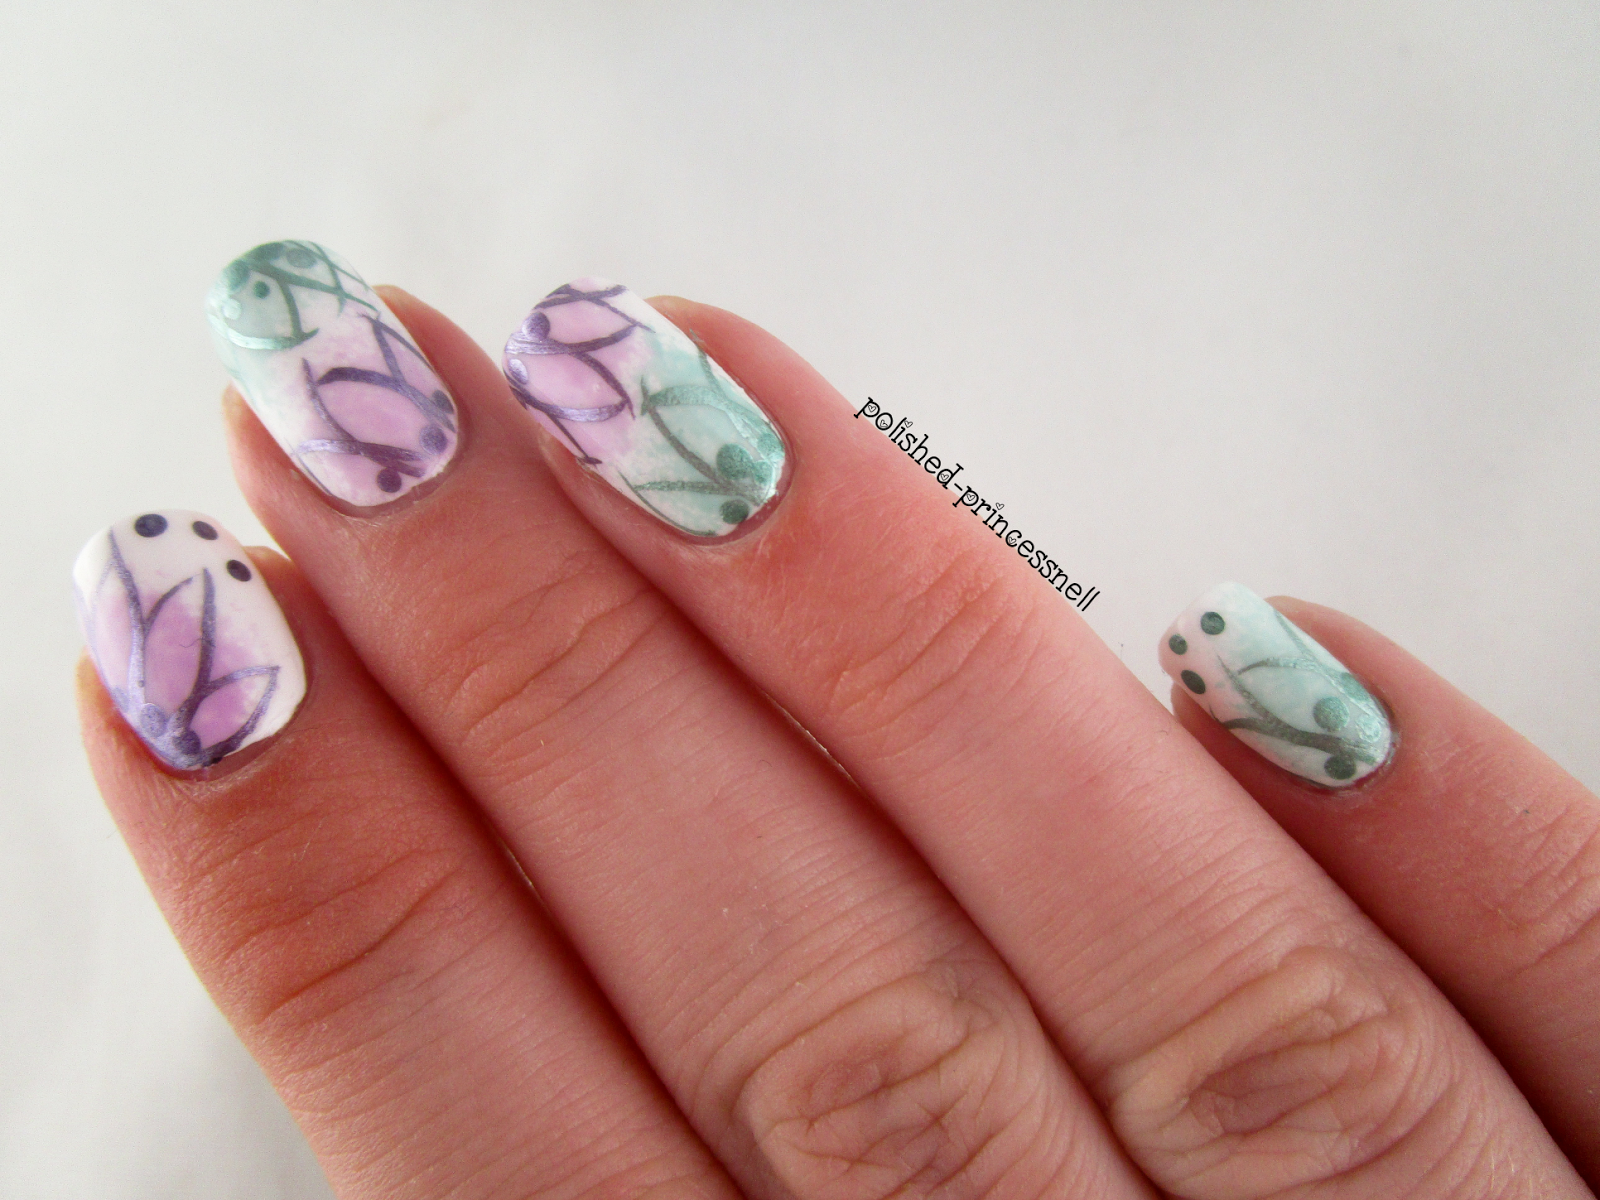
This week's prompt for the Weekly Nail Art Challenge over on Instagram is 'mint and lilac' with a summer theme. I decided to create an abstract flower design for this one :)
I started off with a base of Essence 'Wild White Ways', then using a torn sponge, I dabbed on Ciate 'Sugar Plum' and Essie 'Mint Candy Apple'. Finally, I added the flower outlines using a striping brush and two polishes from Claire's Liquid Metal collection - 'Teal' and 'Purple' (very imaginatively named, Essence!)
I kind of wish I hadn't put two flowers on my middle and ring fingers, as it makes the mani seem a bit cluttered, but overall I'm really pleased with this one. It's a refreshing change as it's much more delicate than the neon designs I've been wearing recently!
As always, head over to Instagram to see all of the entries into the Weekly Nail Art Challenge - just search #wnac2015 :)
Thanks for reading!
Helen x
This week's prompt for the Weekly Nail Art Challenge over on Instagram is 'mint and lilac' with a summer theme. I decided to create an abstract flower design for this one :)
I started off with a base of Essence 'Wild White Ways', then using a torn sponge, I dabbed on Ciate 'Sugar Plum' and Essie 'Mint Candy Apple'. Finally, I added the flower outlines using a striping brush and two polishes from Claire's Liquid Metal collection - 'Teal' and 'Purple' (very imaginatively named, Essence!)
I kind of wish I hadn't put two flowers on my middle and ring fingers, as it makes the mani seem a bit cluttered, but overall I'm really pleased with this one. It's a refreshing change as it's much more delicate than the neon designs I've been wearing recently!
As always, head over to Instagram to see all of the entries into the Weekly Nail Art Challenge - just search #wnac2015 :)
Thanks for reading!
Helen x
Saturday, 25 April 2015
Mani Swap - Stripey Nails with Pink Rose Accents
Hi everyone!
It's been such a busy couple of weeks as I've started a new job and I'm finally getting my life on track again, I've not had a chance to sit down and write a proper post. But now it's the weekend I get to catch up on the fun stuff, like painting nails and writing about it! :)
Today I have a manicure that I created in a recent mani swap with Alyssa (The Girly Engineer on Instagram). It's a beautiful and delicate design, integrating chic pastel stripes with vintage style roses. Very cute! Alyssa decided to try out my sugar skull mani that I created a little while ago (blog post here), and she did an awesome job!
For this design I decided to use quite muted colours, as I wanted this to be as delicate as possible, I chose the gorgeous Rimmel 'Rose Libertine', (a lovely dusty pink) and Barry M 'Kiss Me Quick' for the roses, with Essie 'Mint Candy Apple' leaves. My base was Barry M 'Coconut' and Rimmel 'Breakfast In Bed'.
This was my first attempt at roses, so they are a bit 'blobby' and don't have the detail that I would have wanted, but I'll definitely try the technique again. Overall I'm happy with the outcome, and it was so much fun finally being able to do a mani swap, I'm hoping there'll be many more in the future!
It's been such a busy couple of weeks as I've started a new job and I'm finally getting my life on track again, I've not had a chance to sit down and write a proper post. But now it's the weekend I get to catch up on the fun stuff, like painting nails and writing about it! :)
Today I have a manicure that I created in a recent mani swap with Alyssa (The Girly Engineer on Instagram). It's a beautiful and delicate design, integrating chic pastel stripes with vintage style roses. Very cute! Alyssa decided to try out my sugar skull mani that I created a little while ago (blog post here), and she did an awesome job!
![]() |
| Mani Swap with Alyssa AKA @thegirlyengineer My nails are on the left, Alyssa's nails are on the right |
For this design I decided to use quite muted colours, as I wanted this to be as delicate as possible, I chose the gorgeous Rimmel 'Rose Libertine', (a lovely dusty pink) and Barry M 'Kiss Me Quick' for the roses, with Essie 'Mint Candy Apple' leaves. My base was Barry M 'Coconut' and Rimmel 'Breakfast In Bed'.
![]() |
| L-R: Rose Libertine / Kiss Me Quick / Coconut / Mint Candy Apple / Breakfast In Bed |
I just want to take a moment to talk about my base colour - Barry M's amazing Coconut. This is a shade I've been wanting to get my hands on for a while. It is the perfect base for nail art as it is creamy off-white (almost nude), so it doesn't have the harsh starkness that some white polishes have. It is up there with OPI 'My Vampire Is Buff' as my favourite nude-ish base, but at only £3.99 a bottle it's an absolute steal compared to brands such as OPI! Here is a photo of Coconut on it's own:
![]() |
| Barry M Coconut, available in Boots and Superdrug for £3.99 |
![]() |
| The final product! |
This was my first attempt at roses, so they are a bit 'blobby' and don't have the detail that I would have wanted, but I'll definitely try the technique again. Overall I'm happy with the outcome, and it was so much fun finally being able to do a mani swap, I'm hoping there'll be many more in the future!
Thanks for reading!
Helen x
Labels:
barry m,
crafty fingers,
essie,
freehand,
Instagram,
manicure,
nail,
nail art,
nail designs,
nail polish,
nails,
pastel,
pink,
polish,
pretty,
rimmel,
roses,
vintage
Location:
Bristol, City of Bristol, UK
Wednesday, 8 April 2015
Scaled Gradient - First Attempt
Hello my lovelies!
It's been a manic few days lately as I've been participating in a nail art challenge held on Instagram (you can check out my entries on Instagram by clicking the link at the side of this page -->)
The prompt for 7th April is 'ombre/gradient', so I decided to try out a scaled gradient; something I've never attempted before. A scaled gradient is basically two gradients on the nail, one at the bottom and one further up the nail towards the tip. I used chevron nail vinyls from sparkly-nails.co.uk to create the barrier between the two gradients. Simply
Nailogical has an amazing post here which explains everything you could possibly need to know about gradients. I cannot recommend this article enough, as a matter of fact, it was Cristine from Simply Nailogical who first came up with the scaled gradient idea (and many others!) Definitely check out her blog if you are in need of any gradient-related nail porn!
I ensured that I picked polishes that would have enough opacity to cover the other polishes. For example, my light blue needed to be pigmented enough to cover the darker blue at the scaled part of the gradient. I went through my stash and chose Barry M 'Blue Grape', Seche 'Casually Cool', Seche 'Snapdragon' and Essie 'Flawless'.
Anyway, here are the nails:
Unfortunately my pinkie finger is too small and so I struggled to fit two gradients on the tiny canvas, so I decided to cover it all with glitter! My fave glitter collection is Barry M's 'Glitterati' which is an outstanding set of six polishes (go and buy them NOW!). For this I used 'VIP' to cover up my mess.
Let me know what you think!
Thanks for reading,
Helen x
It's been a manic few days lately as I've been participating in a nail art challenge held on Instagram (you can check out my entries on Instagram by clicking the link at the side of this page -->)
![]() |
| Blurry picture! Scaled gradient using chevron nail vinyls. |
Nailogical has an amazing post here which explains everything you could possibly need to know about gradients. I cannot recommend this article enough, as a matter of fact, it was Cristine from Simply Nailogical who first came up with the scaled gradient idea (and many others!) Definitely check out her blog if you are in need of any gradient-related nail porn!
![]() |
| L-R: Blue Grape / Casually Cool / Snapdragon / Flawless |
Unfortunately my pinkie finger is too small and so I struggled to fit two gradients on the tiny canvas, so I decided to cover it all with glitter! My fave glitter collection is Barry M's 'Glitterati' which is an outstanding set of six polishes (go and buy them NOW!). For this I used 'VIP' to cover up my mess.
![]() |
| VIP from the Glitterati Collection |
![]() |
| The final product! (Please ignore hair dangling from middle finger...) |
Thanks for reading,
Helen x
Labels:
barry m,
blue,
chevron,
essie,
glitter,
gradient,
Instagram,
manicure,
nail,
nail art,
nail designs,
nail polish,
nails,
pink,
polish,
scaled gradient,
seche
Location:
Bristol, City of Bristol, UK
Subscribe to:
Posts (Atom)