Hey!
Today's nails are inspired by nature. And sparkly charms!
I've been dying to use this adorable leaf charm for a while, so when I saw a manicure by @charsnails on Instagram using it, I just had to paint my nails!
I started with a base of Nails Inc. 'Marylebone Road' on all fingers except my ring finger, which I painted using Barry M 'Cardamom' (as a background for my charm). I then used the saran-wrap technique to blend 'Cardamom', 'Marylebone Road', and Make Up Gallery 'Spearmint' on the nail. The final step was to create a leaf pattern using acrylic paint, stick on my charm and top with Poshe Topcoat. Et voila!
These turned out much better than I imagined they would, and I really love the effect of the leaves. As a result of this mani, I now have loads of ideas for nature-themed nails that I can't wait to try out!
Thanks for reading!
Helen x
Showing posts with label nails inc.. Show all posts
Monday, 24 August 2015
Sunday, 28 June 2015
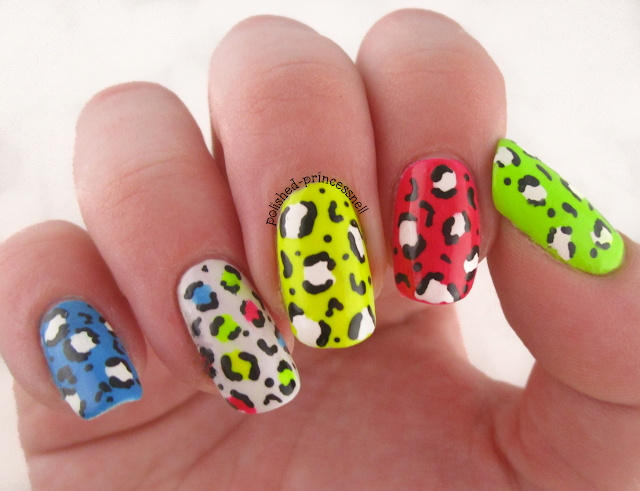
NEON WEEK: Leopard Print
Hi everyone!
Every now and then I am going to base my nail art on one particular theme for seven days. I'm hoping that this will allow me to practice my techniques, become more creative, and challenge my thinking. This week I have decided to start bright and choose neon!
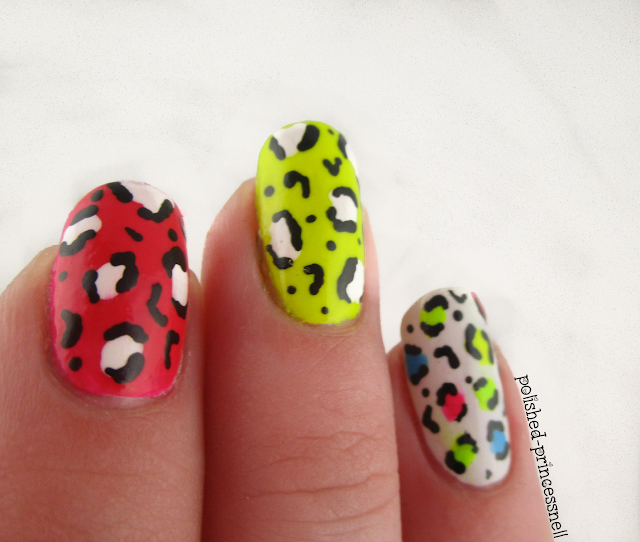
For my first mani, I went back to one of the first nail art patterns that I tried - leopard print. Leopard print is super easy to achieve and looks really cool in neon colours :)
For this design I used Models Own 'Louis Lemon' and 'Bubblegum' from the Iced Neon collection, 'Flip Flop' from the Polish For Tans collection, and Nails Inc. 'Kensington Park Road'. For the detail I used black and white acrylic paints and a toothpick.
On my left hand I used the same colours but mixed them around a bit - I hate things being too uniform!
Thanks for reading!
Helen x
Every now and then I am going to base my nail art on one particular theme for seven days. I'm hoping that this will allow me to practice my techniques, become more creative, and challenge my thinking. This week I have decided to start bright and choose neon!
![]() |
| Neon leopard print |
![]() |
| L-R: Flip Flop / Bubblegum / Louis Lemon / Kensington Park Road |
For this design I used Models Own 'Louis Lemon' and 'Bubblegum' from the Iced Neon collection, 'Flip Flop' from the Polish For Tans collection, and Nails Inc. 'Kensington Park Road'. For the detail I used black and white acrylic paints and a toothpick.
![]() |
| Neon leopard print |
![]() |
![]() |
| Get your sunglasses out! |
![]() |
| Say hi to Cindy :) |
Helen x
Labels:
designs,
easy nail art,
freehand,
Instagram,
lacquer,
leopard print,
leopard print nails,
mani,
manicure,
models own,
nail,
nail art,
nail designs,
nail polish,
nails,
nails inc.,
neon,
polish,
simple nail art,
summer
Location:
Bristol, City of Bristol, UK
Wednesday, 10 June 2015
Monarch Butterfly Manicure
Hi everyone!
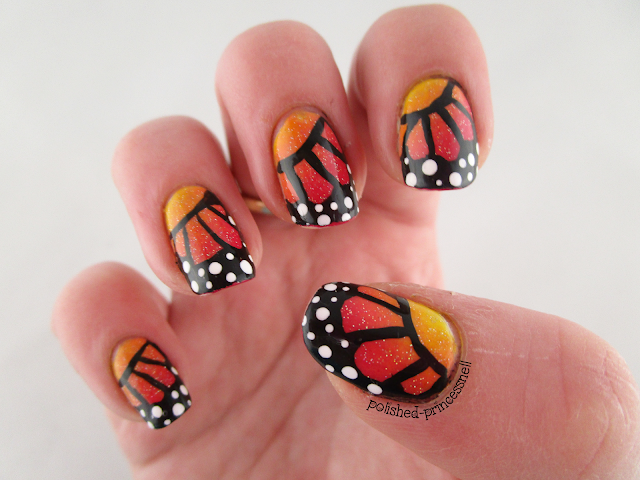
Today's manicure is inspired by the beauty of butterfly wings! Monarch (butterfly) nails are super popular in the nail world at the moment. I've never tried it before but it was surprisingly simple and the effect is stunning.
Here is the finished look:
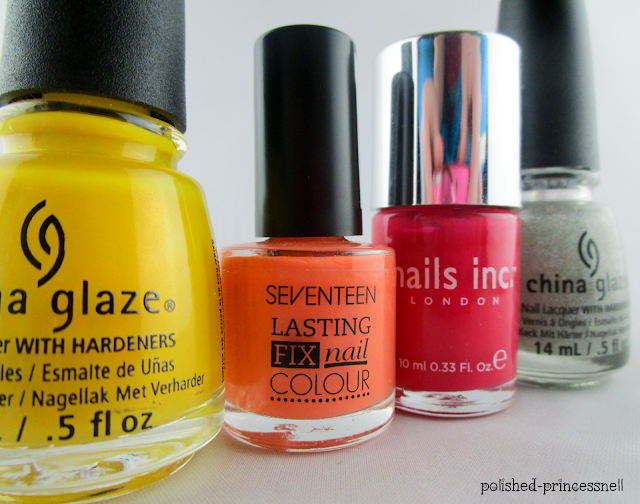
I wanted to keep with the colours of a typical monarch butterfly using a gradient of yellow through to deep pink (which is meant to be red, but I just can't resist pink!). I decided to use my new favourite yellow polish - China Glaze 'Sun's Up Top Down', along with Seventeen 'Orange Soda' and Nails Inc. 'Notting Hill Carnival'. Of course nothing is quite complete without a sprinkling of China Glaze 'Fairy Dust'!
I began by creating a gradient from the corner of my nail, then added the detail using a small brush and black and white acrylic paint. Finally, I gave it a good coat of Glisten & Glow 'HK Girl', which is still in first place as my favourite quick-dry topcoat.
One day soon I *will* have the skills to make my striping neater and more consistent, but until them I'm still very happy with how these turned out :)
Thanks for reading!
Helen x
Today's manicure is inspired by the beauty of butterfly wings! Monarch (butterfly) nails are super popular in the nail world at the moment. I've never tried it before but it was surprisingly simple and the effect is stunning.
Here is the finished look:
![]() |
| Monarch Butterfly Nails |
![]() |
| L-R: Sun's Up Top Down / Orange Soda / Notting Hill Carnival / Fairy Dust |
![]() |
| How cool would it be if butterflies were sparkly in real life?! |
![]() |
| Monarch Butterfly Manicure |
![]() |
| Sparkly Gradient Monarch Butterfly Nails |
Thanks for reading!
Helen x
Labels:
butterfly,
butterfly nails,
china glaze,
fairy dust,
glitter,
gradient,
Instagram,
mani,
manicure,
monarch nails,
nail,
nail art,
nail designs,
nail polish,
nails,
nails inc.,
ombré,
polish,
pretty,
sparkle
Saturday, 11 April 2015
Rockstud Nails! Inspired by Valentino
Hello lovely people!
When I was 14 I received a Valentino perfume for Christmas. I remember being totally won over by the packaging, lots of bright colours and a crisp-looking cubed bottle. I cannot for the life of me find an image of the particular perfume online, which is a total disappointment, but I can assure you it was gorgeous! Recently I stumbled upon Valentino's new Rockstud Collection on Instagram, and again I'm totally won over - I love the contrast of bright colours with hints of gold accent coming from the studs which adorn each item. At approximately £1500, I'm not going to be able to afford/justify buying a Valentino bag, but the design is perfect to translate onto nails!
As always, I flicked through my swatch book to find the most suitable colours, and ended up using: Ciate 'Mojito', Rimmel 'Raw As Night', Rimmel 'Black Cherries', Sally Hansen 'Butter-fly Stroke', Seche 'Snapdragon', and Nails Inc. 'Kensington Park Road'.
I completed the whole design freehand - no striping tape, no vinyls, no template at all - which I am very proud of, particularly my index and pinkie fingers! I added studs to every nail to keep in theme (any excuse to stick things to my nails!)
I absolutely love wearing these, they are so bright and cheerful and totally me. I want to replicate this again in a few months to see if I can improve on my 'V' shapes, but I am absolutely happy with this as a first attempt.
Here are a few more photos:
And here is a final shot of both hands. I definitely think that I am getting better using my non-dominant hand for freehand designs, and I sometimes find that my left hand is actually better than my right. Maybe it's because I'm concentrating more?
I hope you like these as much as I do. As always I'd LOVE to hear what you think, so please feel free to comment below or leave a message on my Facebook page!
Thanks for reading!
Helen x
PS If anyone would like to buy me a Valentino bag, I will wholeheartedly accept! :)
When I was 14 I received a Valentino perfume for Christmas. I remember being totally won over by the packaging, lots of bright colours and a crisp-looking cubed bottle. I cannot for the life of me find an image of the particular perfume online, which is a total disappointment, but I can assure you it was gorgeous! Recently I stumbled upon Valentino's new Rockstud Collection on Instagram, and again I'm totally won over - I love the contrast of bright colours with hints of gold accent coming from the studs which adorn each item. At approximately £1500, I'm not going to be able to afford/justify buying a Valentino bag, but the design is perfect to translate onto nails!
![]() |
| Valentino - Rockstud Collection |
As always, I flicked through my swatch book to find the most suitable colours, and ended up using: Ciate 'Mojito', Rimmel 'Raw As Night', Rimmel 'Black Cherries', Sally Hansen 'Butter-fly Stroke', Seche 'Snapdragon', and Nails Inc. 'Kensington Park Road'.
![]() |
| L-R: Mojito / Raw As Night / Black Cherries / Butter-fly Stroke / Snapdragon / Kensington Park Road |
![]() |
| Valentino Inspired Nails |
Here are a few more photos:
And here is a final shot of both hands. I definitely think that I am getting better using my non-dominant hand for freehand designs, and I sometimes find that my left hand is actually better than my right. Maybe it's because I'm concentrating more?
I hope you like these as much as I do. As always I'd LOVE to hear what you think, so please feel free to comment below or leave a message on my Facebook page!
Thanks for reading!
Helen x
PS If anyone would like to buy me a Valentino bag, I will wholeheartedly accept! :)
Labels:
chevron,
ciate,
freehand,
gold,
Instagram,
manicure,
nail,
nail art,
nail designs,
nail polish,
nails,
nails inc.,
negative space,
polish,
rimmel,
rockstud,
Sally Hansen,
seche,
studs,
valentino
Location:
Bristol, City of Bristol, UK
Saturday, 4 April 2015
Freehand Sugar Skull
Hello my lovelies!
I'm currently taking part in a nail art challenge which is being held on Instagram by @nailzz_designzz_, and day 3 is 'freehand'. I thought that this would be a good time to whip out my trusty Idiot's Guides Nail Art book written by The Lacquerologist (which I talk about here). I LOVE the sugar skull design, and decided to recreate it for this mani. Emily has a great tutorial very similar to the one in her book on her blog, so take a look!
For this mani I used the following polishes: Nails Inc. 'Notting Hill Gate', OPI 'My Boyfriend Scales Walls', Rimmel 'Black Out', Ciate 'Big Yellow Taxi', Seventeen 'Orange Soda', and Nails Inc. 'Kensington Park Road'.
And here it is:
I'm currently still using some brushes that I bought from Amazon and Poundland for my designs, but they aren't the best quality unfortunately. I have just ordered these (recommended on various blogs) so hopefully my detail can be a bit better once they arrive!
I absolutely love how this turned out - it's not perfect by any stretch of the imagination but my freehand skills are getting better all the time and I think sugar skulls are the perfect practising focus as they look even better when they aren't quite perfect!
I'd love to hear your thoughts so please feel free to leave a comment :)
Thanks for reading!
Helen x
I'm currently taking part in a nail art challenge which is being held on Instagram by @nailzz_designzz_, and day 3 is 'freehand'. I thought that this would be a good time to whip out my trusty Idiot's Guides Nail Art book written by The Lacquerologist (which I talk about here). I LOVE the sugar skull design, and decided to recreate it for this mani. Emily has a great tutorial very similar to the one in her book on her blog, so take a look!
For this mani I used the following polishes: Nails Inc. 'Notting Hill Gate', OPI 'My Boyfriend Scales Walls', Rimmel 'Black Out', Ciate 'Big Yellow Taxi', Seventeen 'Orange Soda', and Nails Inc. 'Kensington Park Road'.
![]() |
| L-R: Big Yellow Taxi / Black Out / My Boyfriend Scales Walls / Kensington Park Road / Orange Soda Front: Notting Hill Gate (pink) |
And here it is:
![]() |
| Sugar skull accent |
I'm currently still using some brushes that I bought from Amazon and Poundland for my designs, but they aren't the best quality unfortunately. I have just ordered these (recommended on various blogs) so hopefully my detail can be a bit better once they arrive!
I absolutely love how this turned out - it's not perfect by any stretch of the imagination but my freehand skills are getting better all the time and I think sugar skulls are the perfect practising focus as they look even better when they aren't quite perfect!
I'd love to hear your thoughts so please feel free to leave a comment :)
Thanks for reading!
Helen x
Labels:
ciate,
freehand,
Instagram,
manicure,
nail,
nail art,
nail designs,
nail polish,
nails,
nails inc.,
opi,
pink,
polish,
rimmel,
sugar skull
Location:
Bristol, City of Bristol, UK
Subscribe to:
Posts (Atom)