Tuesday, 30 June 2015

NEON WEEK: Radial Gradient and Stamping

Hi!

I've been *loving* the weather here over the last few days and today we saw the temperature reach 30 degrees Celsius which is lovely! I'm so glad I have a neon theme going on at the moment because it's complimenting the sunshine wonderfully :)


neon-radial-gradient-stamping
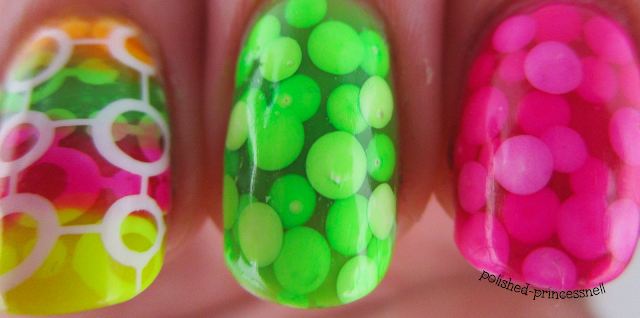
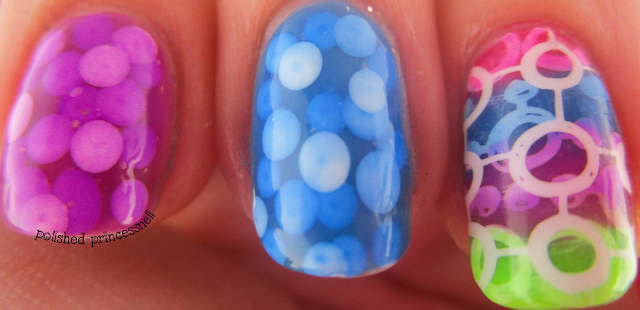
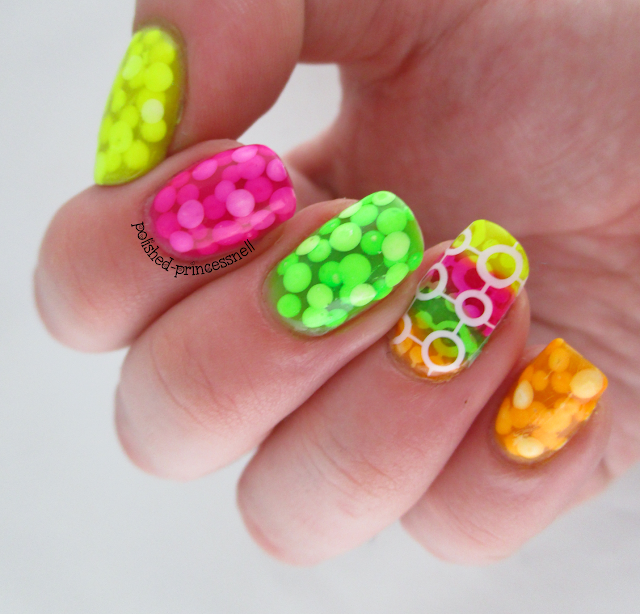
 Stamped Neon Radial Gradient

Today's nails include a technique that I have only tried a couple of times - a radial gradient (where the gradient works outwards from the centre of the nail, rather than horizontally or vertically across the nail). I found it really difficult to get consistent gradients across all ten fingers, but I'm pretty happy with the results anyway. I added a pretty circular-style stamped image, and of course I had to stick some sparkly gems on there too!

The polishes used for this were all Models Own - 'Bikini' (yellow), 'Sun Hat' (pink) and 'Pukka Purple'. I used Pukka Purple and Bundle Monster stamping plate #BM-618 for the design. Oh, and a sprinkling of China Glaze 'Fairy Dust' was added to the gradient.

neon-radial-gradient-stamping
My left hand came out better than my right hand (even though I'm left handed...)

neon-radial-gradient-stamping
FYI my stamping is *meant* to be off-centre...

neon-radial-gradient-stamping
A bit blurry but look at the pretty Fairy Dust! <3

Hope you like them :)

Thanks for reading!

Helen x

Sunday, 28 June 2015

NEON WEEK: Leopard Print

Hi everyone!

Every now and then I am going to base my nail art on one particular theme for seven days. I'm hoping that this will allow me to practice my techniques, become more creative, and challenge my thinking. This week I have decided to start bright and choose neon!

neon-leopard-print-nail-art
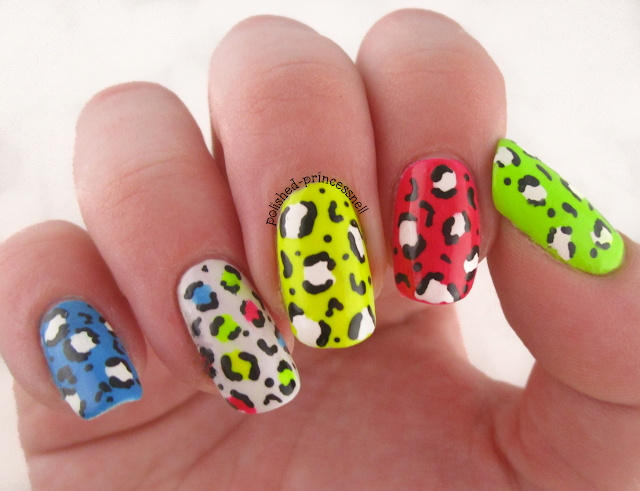
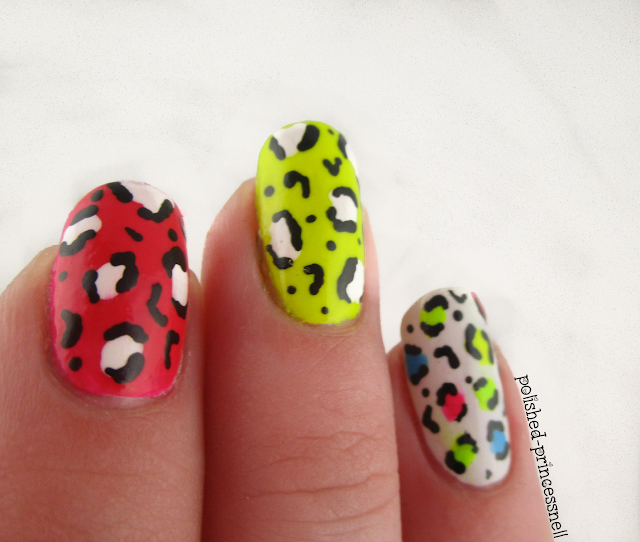
Neon leopard print
For my first mani, I went back to one of the first nail art patterns that I tried - leopard print. Leopard print is super easy to achieve and looks really cool in neon colours :)

neon-leopard-print-nail-art
L-R: Flip Flop / Bubblegum / Louis Lemon / Kensington Park Road 

For this design I used Models Own 'Louis Lemon' and 'Bubblegum' from the Iced Neon collection, 'Flip Flop' from the Polish For Tans collection, and Nails Inc. 'Kensington Park Road'. For the detail I used black and white acrylic paints and a toothpick.


neon-leopard-print-nail-art
Neon leopard print
neon-leopard-print-nail-art

neon-leopard-print-nail-art
Get your sunglasses out!
On my left hand I used the same colours but mixed them around a bit - I hate things being too uniform!

neon-leopard-print-nail-art
Say hi to Cindy :)
Thanks for reading!

Helen x

Textured Negative Space Nails

Hey guys!

Today I have a negative space manicure that I created using two polishes from the Nicole by OPI Roughles Collection. I used 'On What Grounds' (teal) and 'I'm Stucco On You' (purple). These polishes dry to a speckled, textured finish and are available in four pretty pastel shades (purple, teal, pink and yellow). I bought mine at Superdrug for £7.99 each.


negative-space-nails-roughles-textured-polish
Nicole By OPI - 'I'm Stucco On You' & 'On What Grounds?'
I actually added topcoat to this design which eliminated some of the texture. What I like about these polishes over other textured finishes are the tiny little specks of different colour - it adds a unique quality to the textured finish.


negative-space-nails-roughles-textured-polish
Negative Space

negative-space-nails-roughles-textured-polish
See the little specks of colour?
I'm still not sure if I like textured finishes or not. I have so many textured polishes in my collection, so something draws me to them, but I'm still figuring out how to use them successfully in nail art.


negative-space-nails-roughles-textured-polish
Rougles Negative Space Nails

What do you think? Yay or nay? Let me know in the comments! 

Thanks for reading!

Helen x

Tuesday, 23 June 2015

Rockstar Gel Nails!

Hey everyone!

Today I want to share with you the sparkliest nails that my hands have ever adorned! 


gel-nails-rockstar-glitter-gradient
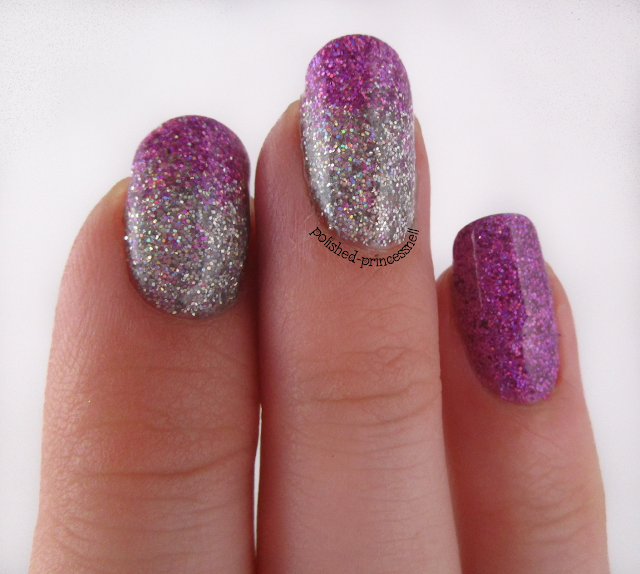
Rockstar Nails

This is a style nicknamed 'rockstar nails' and it is applied to a gel manicure.

The basic idea is:

  1. Clean and prep your nails for a gel manicure
  2. Apply a base coat and cure in an LED/UV lamp
  3. Apply a thin coat of gel polish and before curing sprinkle fine glitter onto the nail.
  4. Press lightly onto the nail to ensure the glitter adheres, then cure in your lamp.
  5. Apply topcoat and cure.

If you want to recreate this look, I recommend heading over to Chalkboard Nails for a great tutorial (the one that I followed), which has each step explained in much more detail than I gave above!


gel-nails-rockstar-glitter-gradient
Super glittery! 

gel-nails-rockstar-glitter-gradient
LOOK AT THE PRETTY!

This is so easy to create and the effect is absolutely stunning. As this is a gel manicure my nails are super glossy and the glitter really shines through, almost magnified by the topcoat.


gel-nails-rockstar-glitter-gradient
Obligatory macro shot :)

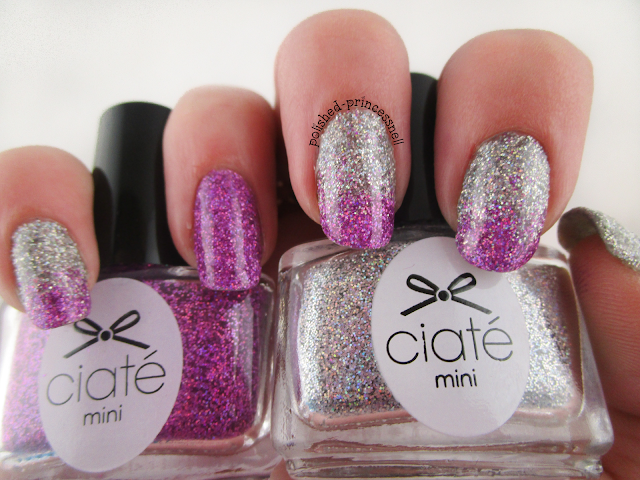
I used two Ciate glitters that I got in my Ciate Mini Manor Advent Calendar last year - a fantastic holographic silver ('Let It Snow') and holographic pink ('Prima Ballerina'). I have been waiting for the perfect opportunity to use these and I think I found it!


gel-nails-rockstar-glitter-gradient
My camera could only just pick up the holo goodness in these bottles


gel-nails-rockstar-glitter-gradient
Ciate Fine Holographic Glitter - Prima Ballerina and Let It Snow

gel-nails-rockstar-glitter-gradient
Can you see the holo shift?! 

I am starting to fall in love with gel manicures - there are so many possibilities using cured polish, and the prettiness lasts for ages too!

Thanks for reading!

Helen x

Monday, 22 June 2015

Gold and Turquoise Nails

Hi guys!

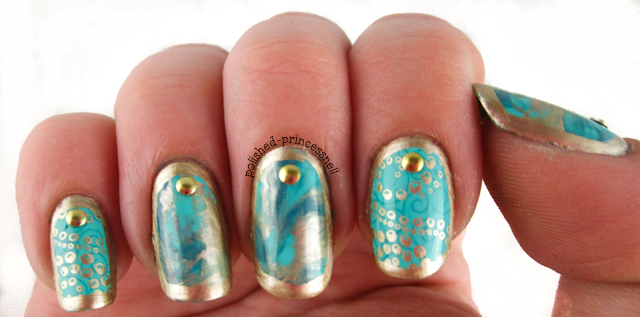
Today I have a pretty gold and turquoise manicure to show you. I created these as June week 3 prompt for the Weekly Nail Art Challenge I'm taking part in over on Instagram.

weekly-nail-art-challenge-wnac-turqoise-gold-stamped-nails
Weekly Nail Art Challenge - Turquoise and Gold

To achieve this look, I first painted my nails in a base colour of Barry M 'Green Berry', which is a vibrant turquoise polish from their Gelly Hi-Shine collection. It's probably my favourite green and is perfect for summer.

After my base colour had dried, I blobbed random dots of Barry M 'Green Berry', Collection 'After Dinner Mint' and Models Own 'Gold Chrome' onto my nails, then pressed down on them with a piece of plastic (I just used a plastic food bag for this). I love the 'saran wrap' technique as it creates such a gorgeous smoky/marbled effect on the nail. Finally, on my index and pinkie, I used my Bundle Monster stamping plate #607 to stamp two patterns using 'After Dinner Mint' and then 'Gold Chrome'. Finally, I outlined my nails using a thin striping brush and voila!


weekly-nail-art-challenge-wnac-turqoise-gold-stamped-nails
Saran wrap technique and stamping


weekly-nail-art-challenge-wnac-turqoise-gold-stamped-nails
Oooooohhhhh macro!
I also decided to try this manicure with one of my new matte topcoats - 'Satin Matt' from Essence. I picked this up from Wilko for £2 and I'm actually quite impressed with it. I'm not sure that it is that different to a regular matte topcoat, but at £2 I'm not complaining!

weekly-nail-art-challenge-wnac-turqoise-gold-stamped-nails
Essence Satin Matt 

weekly-nail-art-challenge-wnac-turqoise-gold-stamped-nails
Matte gold and turquoise nails
I definitely prefer these nails glossy as I think the marbled effect has more depth than when they are mattified. What is your preference? Glossy or matte?

Thanks for reading!

Helen

Sunday, 21 June 2015

**Review** Colourful Loose Glitter - BornPrettyStore

Hi guys!

Today I have a super sparkly review for you that makes me happy inside! BornPrettyStore very kindly sent me some of this mixed loose glitter* to play around with, so of course I covered my nails with it! I don't do subtle.

bornprettystore-review-loose-glitter-placement-manicure
ALL OF THIS FOR ONLY $0.99!

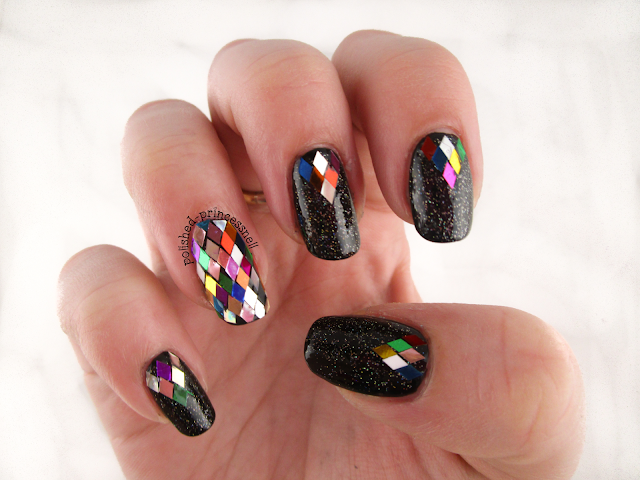
This is a rainbow filled pot of glittery goodness! The diamond shaped glitter comes in a pot full of green, blue, silver, gold, pink/purple, white, black, clear and bronze pieces. Phew!

I wanted to create a similar effect to my glitter framed nails from a little while ago, so I started with a base of Rimmel 'Black Out'. Then by applying a coat of Rimmel 'Clear' polish, I began placing the loose glitter onto my nail using a small dotting tool to position the pieces. The glitter lay flat on the nail and was easy to trim with cuticle clippers in order to get a close fit. Another thing I liked about this particular glitter is that there weren't any clumps of uncut diamonds, which is an issue I've had with other glitters. Plus, after two heavy coats of topcoat the glitter was just as shiny as when I started and almost smooth! It's a big bonus for me that the glitter pieces didn't dull after a topcoat was applied, again as this is a problem I have had in the past with other glitters.
 
bornprettystore-review-loose-glitter-placement-manicure

Because there is simply no such thing as too much glitter, I decided to add a coat of China Glaze 'Fairy Dust'.

I'll just leave a few pics here to show you the mini disco ball from a few angles :)

bornprettystore-review-loose-glitter-placement-manicure
I couldn't stop admiring my nails when I wore this

bornprettystore-review-loose-glitter-placement-manicure
I even managed to do my left (dominant) hand!

bornprettystore-review-loose-glitter-placement-manicure
A bit blurry but still pretty :)

bornprettystore-review-loose-glitter-placement-manicure
The finished look


bornprettystore-review-loose-glitter-placement-manicure
Get lost in the sparkles...


bornprettystore-review-loose-glitter-placement-manicure
Born Pretty Loose Glitter and China Glaze = ALL OF THE SPARKLE!

I hope you like this as much as I do. And *PLEASE* go to BornPrettyStore.com, pop a few (amazingly priced) items into your cart, enter my exclusive code CESH10 to receive 10% discount, enjoy the totally free international shipping, and enjoy playing with your goodies when they arrive. I promise you'll be back for more!

Thanks for reading!

Helen x

born-pretty-store-discount-code


*Items provided by BornPrettyStore for my impartial review

Friday, 19 June 2015

New Stamping Goodies!

Hi folks!

Recently I got my hands on some Bundle Monster stamping plates and a Creative Stamper (also known as a match made in heaven). And so of course I tried them out straight away.


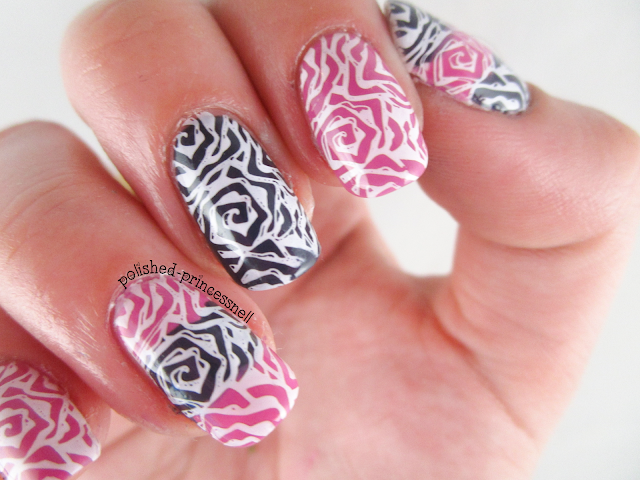
This mani uses BM plate #618, which is a funky abstract rose kind of pattern. The plate is from the 2014 CYO (Create Your Own) collection, consisting of 20 plates packed full of fab designs (including a dinosaur plate, an animal plate, and a comic book plate!). You can buy it from Bundle Monster on Amazon for around £12.

I used NYC 'Lincoln Square Lavender' and Rimmel 'Punk Rock' as a base, then stamped using MoYou London 'White Knight'.


Here is a picture of my Creative Shop stamper - look at how big it is! And squishy too! <3


I've said it before and I'll say it again, grey and pink together are beautiful :)


Thanks for reading!

Helen x

Sunday, 14 June 2015

Pink and Blue Half Moon Mani

Hi guys!

I am seriously loving blogging at the moment, so I thought I'd share with you a quick and simple manicure that I did recently.

blue-and-pink-half-moon-manicure
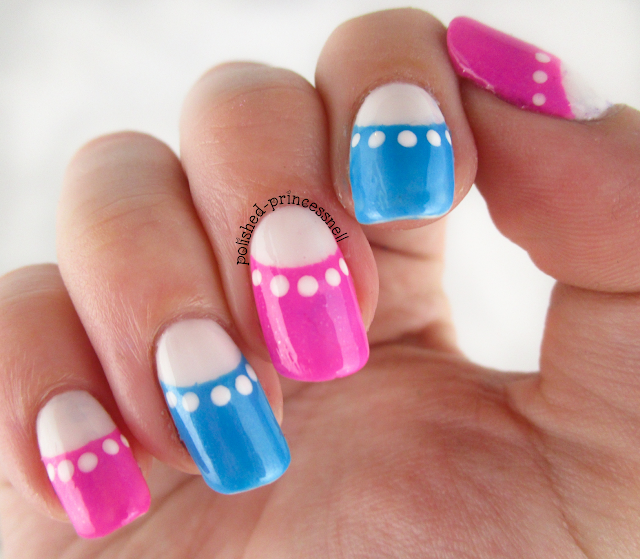
Half Moon Manicure
This is my second attempt at a half moon design (my first one you can see here, although be warned: this is in the early days of my nail art journey and it is absolutely pants!) 

For this one I used some nifty half moon nail vinyls from Sparkly Nails to create a clean shape. I highly recommend using stencils/vinyls for things like this as it keeps the manicure uniform across the nails, however I found that these particular vinyls left a sticky residue on my nails once I had peeled them off :( Luckily, my base coat is a white gel polish so I could easily remove the stickiness with acetone-free polish remover, although I think I would have had a problem if I had a regular polish as a base.


Half Moon Nail Vinyls -  from SparklyNails.co,uk

The colours used in this mani are from the Models Own Diamond Luxe collection; 'Asscher Blue' and 'Radiant Pink'. Models Own claim that these polishes 'contain real Diamond Dust to deliver a completely unique, multi-dimensional super-sparkly finish and some serious bling appeal'. There is a unique subtle shimmer to these shades (which you can see on the picture below), but I wouldn't say they are 'blingy'!


blue-and-pink-half-moon-manicure
Asscher Blue / Radiant Pink
Blue and pink nail art always makes me smile - it's so fun, pretty and girly. For a long time my only nail art consisted of Barry M blue and pink crackle polish - ah memories!


blue-and-pink-half-moon-manicure
I added the dots using Rimmel 'White Hot Love' and a dotting tool

blue-and-pink-half-moon-manicure

Hope you like it, thanks for reading!


Helen x

Pretty Purple Pattern Over Holo

Hi everyone!

I'm currently taking part in a Weekly Nail Art Challenge on Instagram and this weeks theme is holo + patterns

My original idea for this mani included a neon water marble, however after a devastating incident involving liquid latex and my carpet I have given up on watermarbling once again. I *will* succeed one day, but today is not that day (nor is tomorrow, probably!)

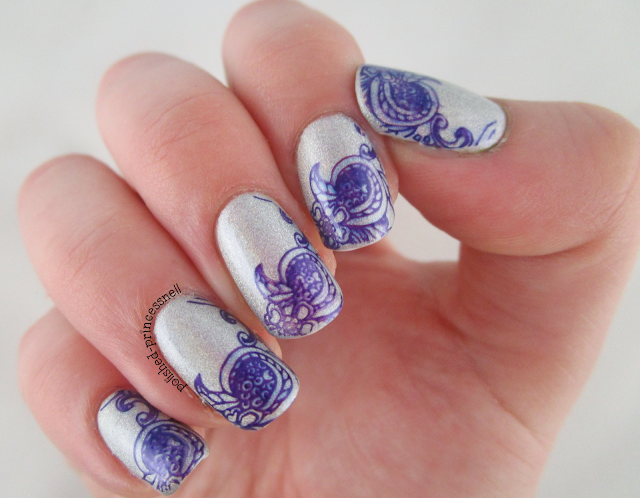
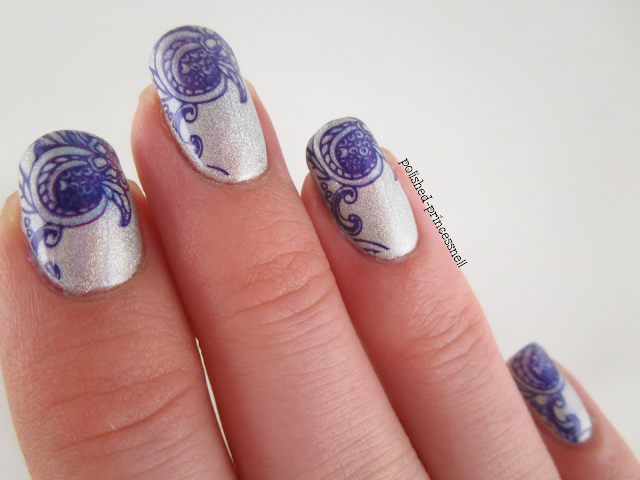
After my disaster, I decided to paint two layers of GOSH 'Holographic Hero' and stamped the tips using MoYou London Pro Plate #4 and my Hello Kitty polish 'Respect'. Respect is actually a dark blue shade, but it came out a deep purple when I stamped over the silver holo. It's a lovely and unexpected combination!

holographic-stamped-nails-wnac
Holographic Hero stamped with Respect using MoYou London Pro Plate #4

Unfortunately my camera just didn't want to demonstrate the holo-goodness of this polish no matter how hard I tried to capture it! You'll just have to believe me :)

holographic-stamped-nails-wnac
Obligatory (but blurry) macro shot

holographic-stamped-nails-wnac


Search the hashtag #wnac15 on Instagram to see all of the wonderful manicures other people have come up with as part of the challenge.

Thanks for reading!

Helen x
Friday, 12 June 2015

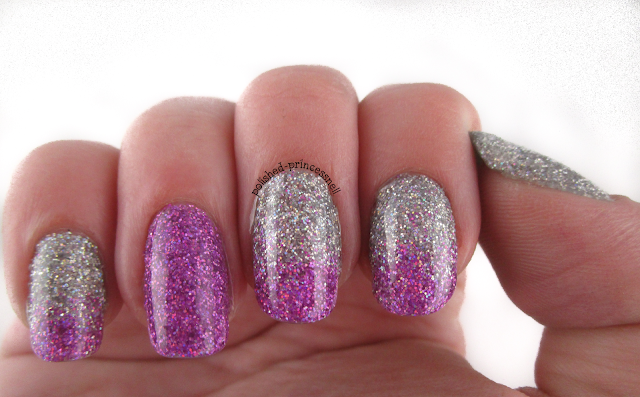
Neon Jelly Pond Mani


Hi everyone!

I've got a picture-heavy post for you all today!

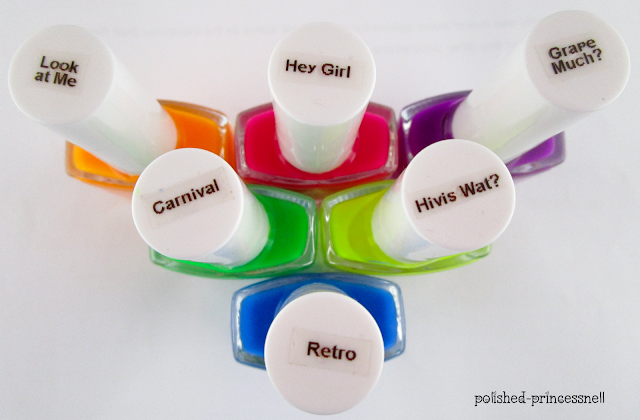
Whilst browsing Instagram (my favourite pastime), I stumbled upon an indie brand called Kandy Colors, and was instantly drawn in by their neon jelly collection. I love jelly polishes/tints but unfortunately found that my OPI Sheer Tints are really difficult to use due to their formula, so I've been on the lookout for an upgrade. I headed over to the Kandy Colors site and was super pleased to find that you can buy the whole collection for under £20! You get six amazingly bright neon shades which are available in both jelly and creme formulas (choices, choices!)

Let's take a look at the polishes:

kandycolors-neon-jelly-pond-manicure-nails


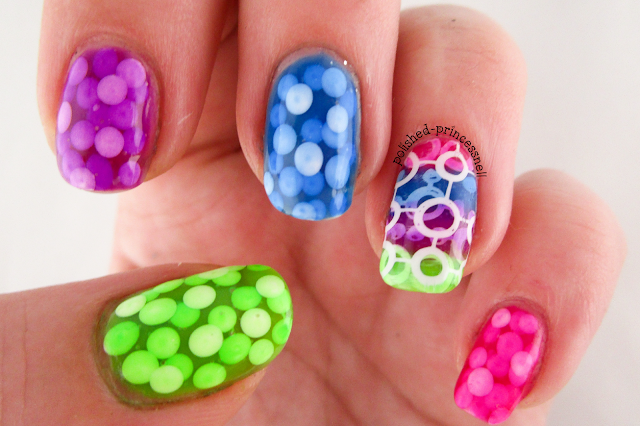
 Obviously, I couldn't wait to try these beauties out, and instead of having to choose which colours to use I decided to use them all!

Here is my finished manicure (apologies in advance for the atrocity that is my Cinderella hand!):

kandycolors-neon-jelly-pond-manicure-nails

kandycolors-neon-jelly-pond-manicure-nails


kandycolors-neon-jelly-pond-manicure-nails

kandycolors-neon-jelly-pond-manicure-nails

kandycolors-neon-jelly-pond-manicure-nails

I went for a picnic with my boyfriend last night and my nails were GLOWING in the sunlight, it is truly magical! My favourites from this collection are Carnival (green) and Hey Girl (pink). They are definitely some of the brightest neon shades I have seen around.

kandycolors-neon-jelly-pond-manicure-nails

Hope you like it :) thanks for reading!

Helen x